
Who doesn't enjoy opening Christmas crackers during the holidays, at a party or just for fun? It's even better to make your own to go along with your holiday theme! Follow this easy step-by-step guide for how to make Christmas crackers 2 ways that will complement your holiday decorations.
Making your own DIY Christmas crackers is a fun holiday craft project for family and friends to join in! This project requires only a few supplies, many of which you may already have on-hand, and one that you have to order ahead of time.
Get creative with cracker fillings to surprise your guests this holiday season! With many methods to create your own, read on for two ways on how to make your own Christmas crackers.
This post may contain affiliate links which we may receive a small commission when some items are purchased at no additional cost to you. Read the full disclosure.
Last Christmas, I bought two luxurious looking sets of Morris & Co Christmas crackers at HomeGoods. Styled to the nines in a quintessential Morris & Co paper complete with satin bows, it was the first time I had ever bought Christmas crackers.
On Christmas Day, we opened each cracker one by one, laughing the whole time as they "popped" open with their namesake cracker sound.
Cracker fillings sprung like confetti onto the floor, finally revealing the secret goodies inside! While mostly tiny, inexpensive trinkets, it was the experience that we enjoyed.
Why Make Your Own Christmas Crackers at Home
Given how much fun we had last year, I decided to incorporate Christmas crackers into our holiday traditions. When I decorate for the holidays, I typically stay within the color palette that flows all throughout our Christmas decorations, gift wrapping paper and any theme I come up with.
While the Morris & Co crackers were beautiful, I knew I would have to make my own to complement whatever decorations we had going on. This may be the case for you as well. To be honest, I could not wait to make my own!

Our dreamy pastel Christmas decorations, combined with charming gift wrapped presents from last year is my favorite so far! For a previous Christmas, we had a more organic holiday decoration style. You can see how the colors and decorations all work together.
Most people think you can only have crackers at Christmas, but that's simply not true. Making your own crackers means you aren't limited to just Christmas time.
You can make your own crackers for any occasion, including
- Birthdays
- Valentines Day
- Anniversaries
- Fourth of July
- Other holidays
Think how fun it would be to give guests a party favor inside a cracker at a birthday celebration! Or, celebrate an anniversary with a piece of jewelry tucked secretly inside a cracker. How memorable would that be?
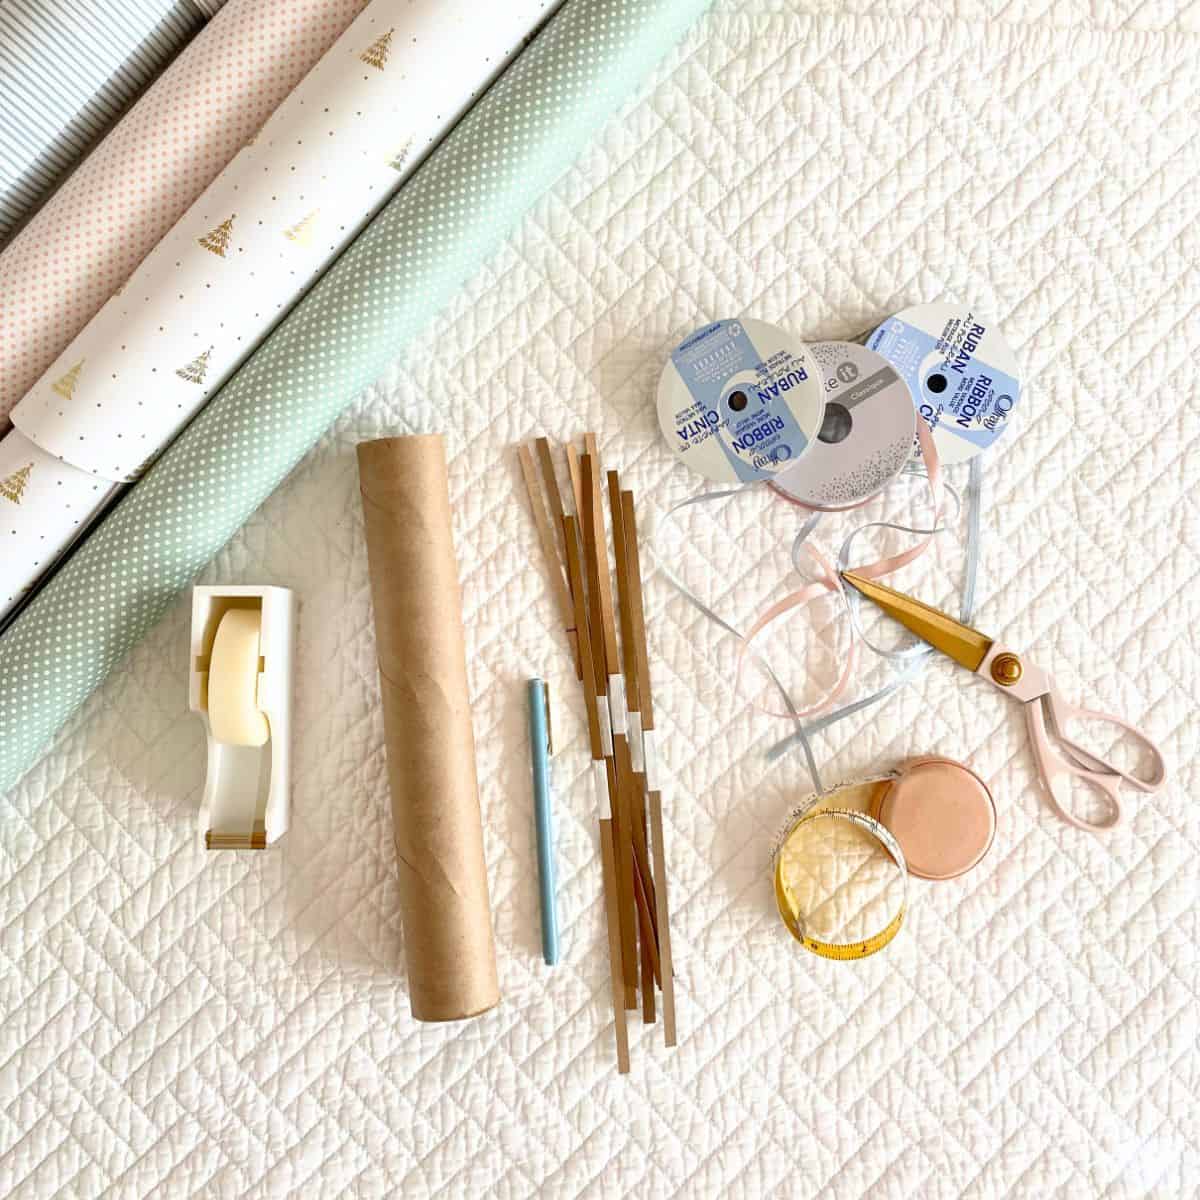
Supplies You Will Need
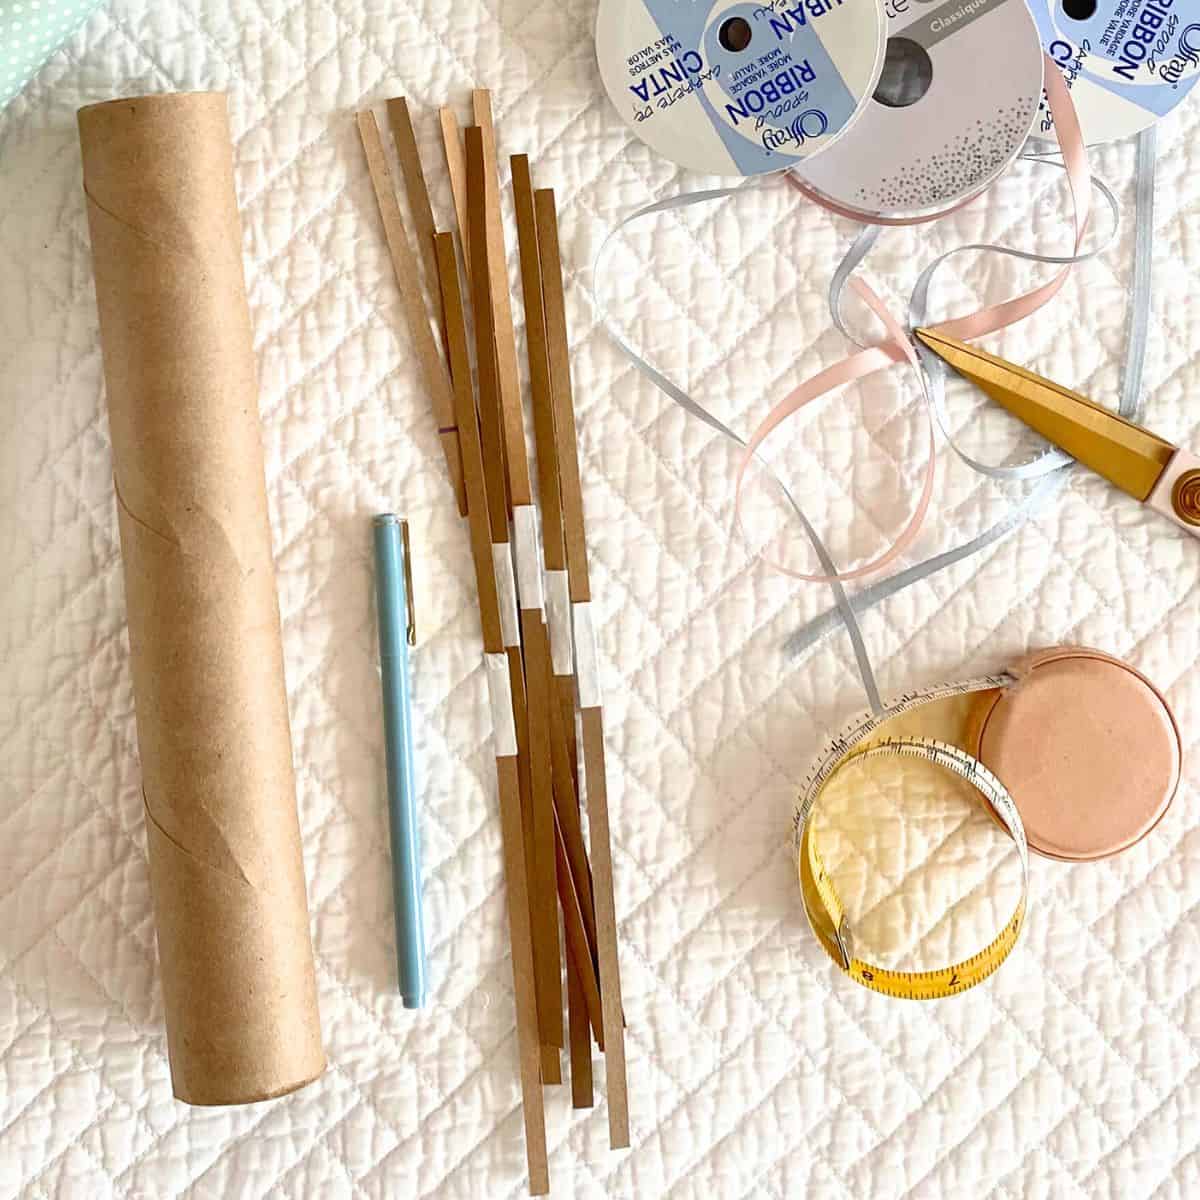
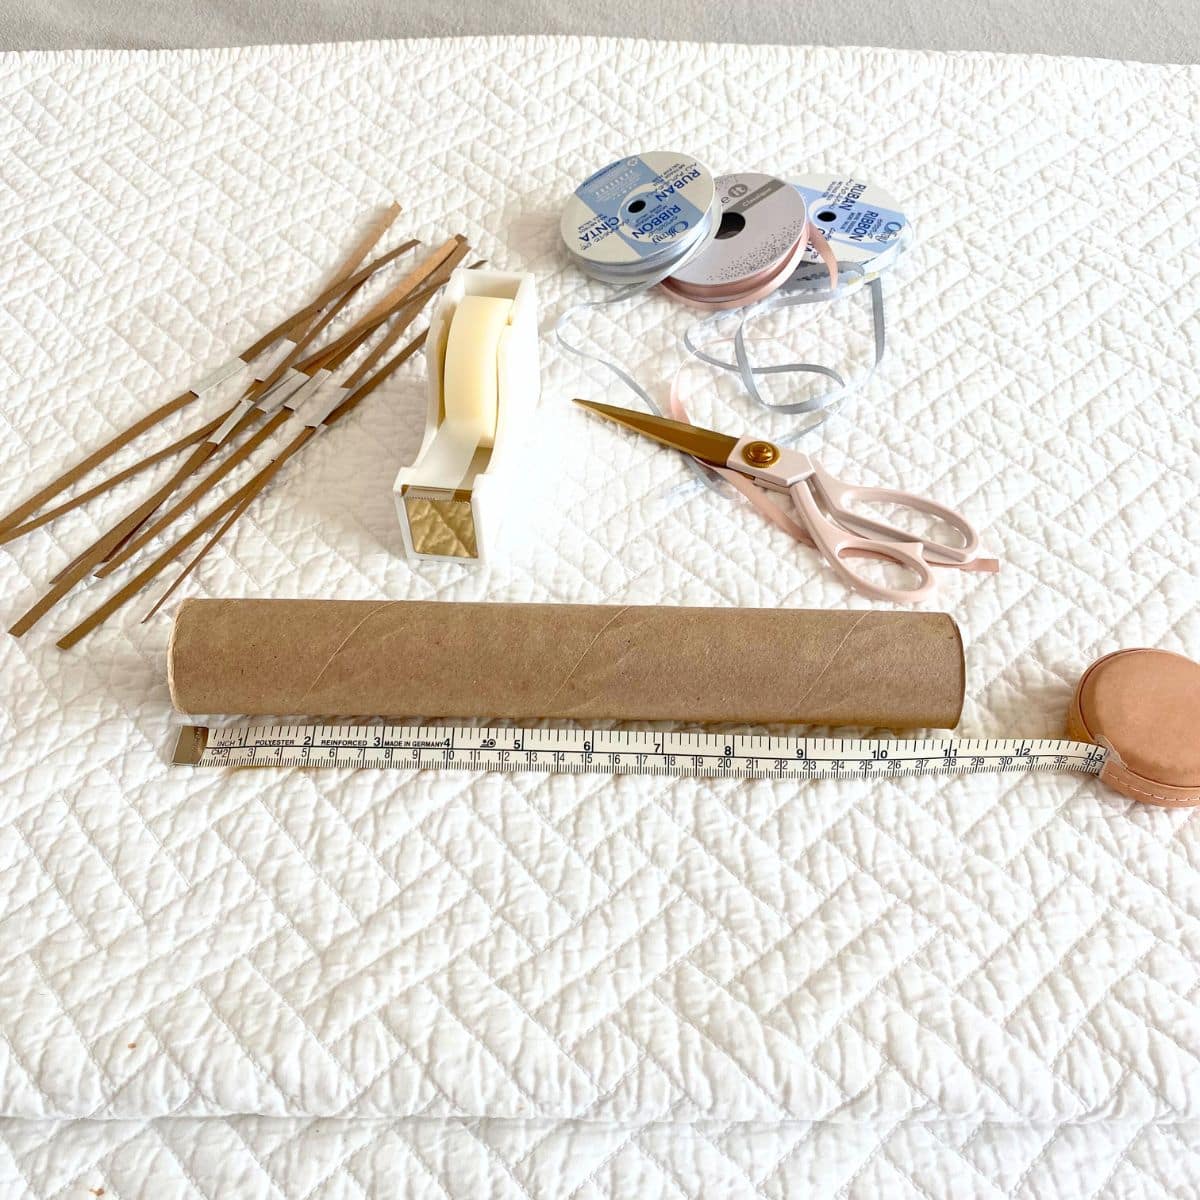
You may already have most of the supplies on-hand to make DIY Christmas crackers. That said, you will have to plan ahead to ensure enough cardboard craft tubes as well snaps/poppers. You'll find more details on those things below.
Tip:
Plan ahead! For both the cardboard craft tubes as well as the snaps/poppers, plan about 3 months in advance. It may take you a while to gather enough tubes to make 6-12 crackers. Furthermore, if you live in the U.S., the snaps/poppers may take a few weeks to get to you, since they usually come from overseas.
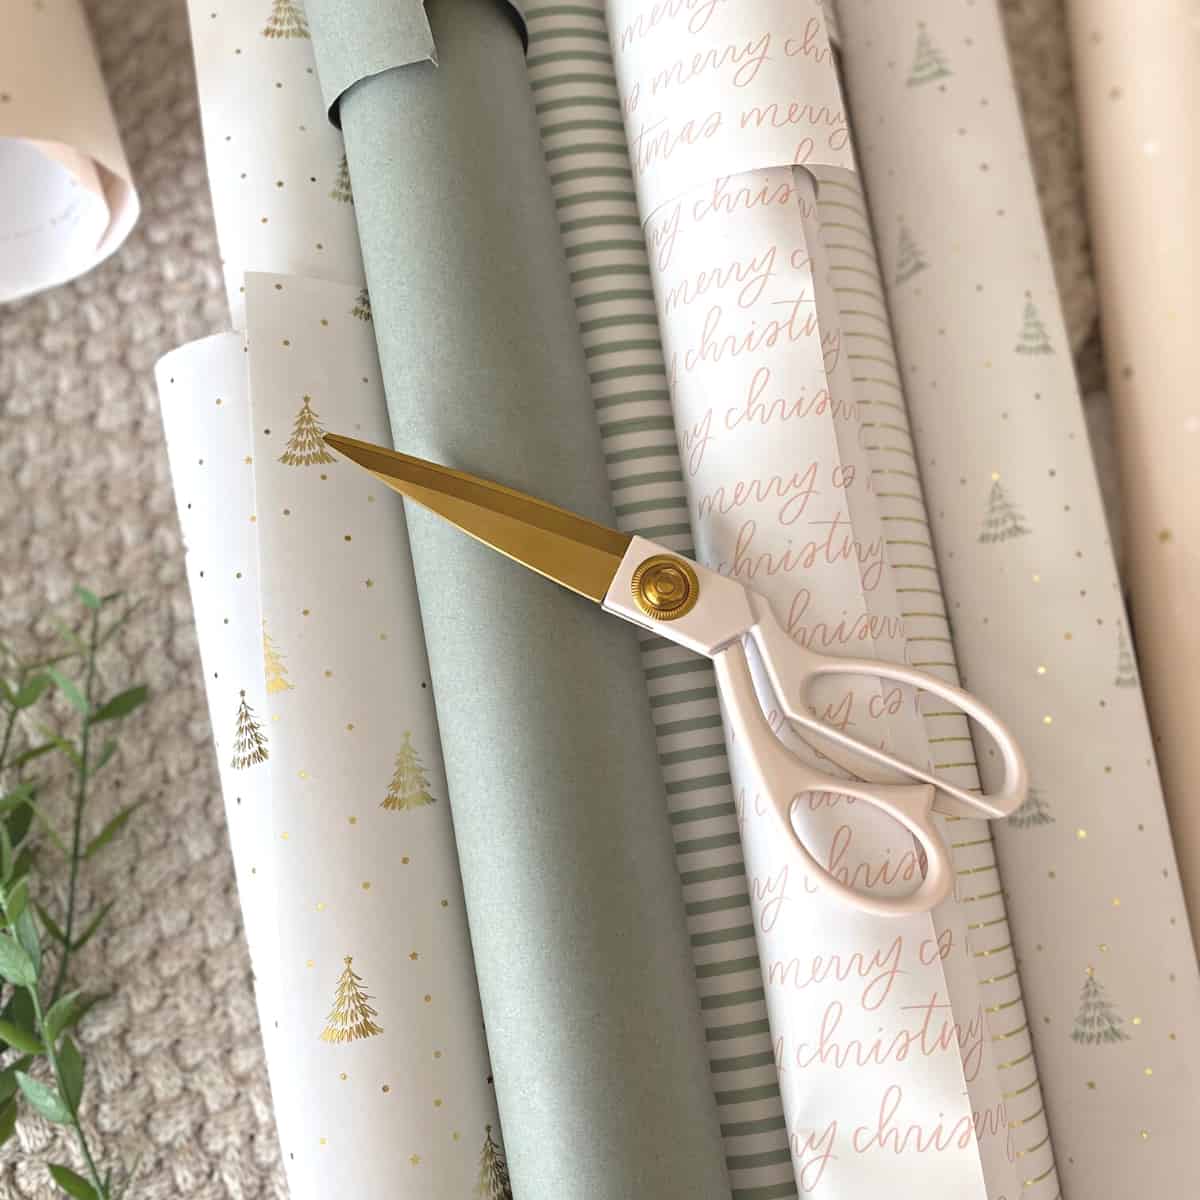
- Pretty wrapping paper - You can use whatever wrapping paper you choose. This is a great project to use up scraps. I recommend matching the cracker paper to the same wrapping papers you use for presents for a more cohesive look. Whatever paper you choose, select a paper that is easy to work with that is also on the thinner side, like gift wrapping paper.
In other Christmas posts, I have talked about my love of Sugar Paper gift wrapping paper. The MANY pictures I've taken reinforce how much I love their beautiful papers. You can also shop Sugar Paper x Target for a slightly different but equally pretty gift wrapping paper line.
I also found this very pretty somewhat similar pretty wrapping paper that would look lovely as Christmas crackers. They also have darling Christmas cards to complement the paper.
- Paper towel rolls or cardboard craft tubes - You will need empty cardboard paper towel rolls or craft tubes for this project. Emptying paper towel rolls (some people use toilet paper rolls) can take a little while to gather enough to make 6-12 crackers. Plan ahead by collecting rolls throughout the year. Here, I used paper towel rolls.
- Cracker snaps/poppers - If you want your crackers to actually make the signature "cracker" or "popper" sound, you will need to buy Christmas cracker snaps/poppers. If you follow the link, it takes you to the Etsy shop I bought mine from. They were very helpful in communicating when the shipment was delayed which is fairly common with this particular item.
You will need 1 snap/popper per Christmas cracker. They should be very inexpensive to the point where shipping may cost more than the snaps themselves. I gladly paid for shipping in order to get the traditional cracker sound.
I also highly recommend ordering snaps/poppers at least 3 months in advance. Given snaps usually come from overseas if you order from the U.S, they can take a few weeks to arrive or may be delayed due to unforeseen circumstances like mine were. Also, the closer to the holidays you get, the higher the likelihood you will not be able to get them in time or at all.
- Scissors, X-Acto/exacto knife or specialty paper cutter - To cut the wrapping paper, a sharp pair of scissors work best. The blush pink scissors I have are gorgeous and not available anymore, but I love these taupe brass scissors by the same brand that are pretty while also being functional. Any sharp scissors will work for this project. If you prefer, you can also use a specialty paper cutting tool, including the WrapMaster paper cutter or gift wrap cutter.
- Tape or glue - Adhering the snaps/poppers to the cardboard craft tubes requires either tape or glue. I used tape because I find it much easier to work with for this project.
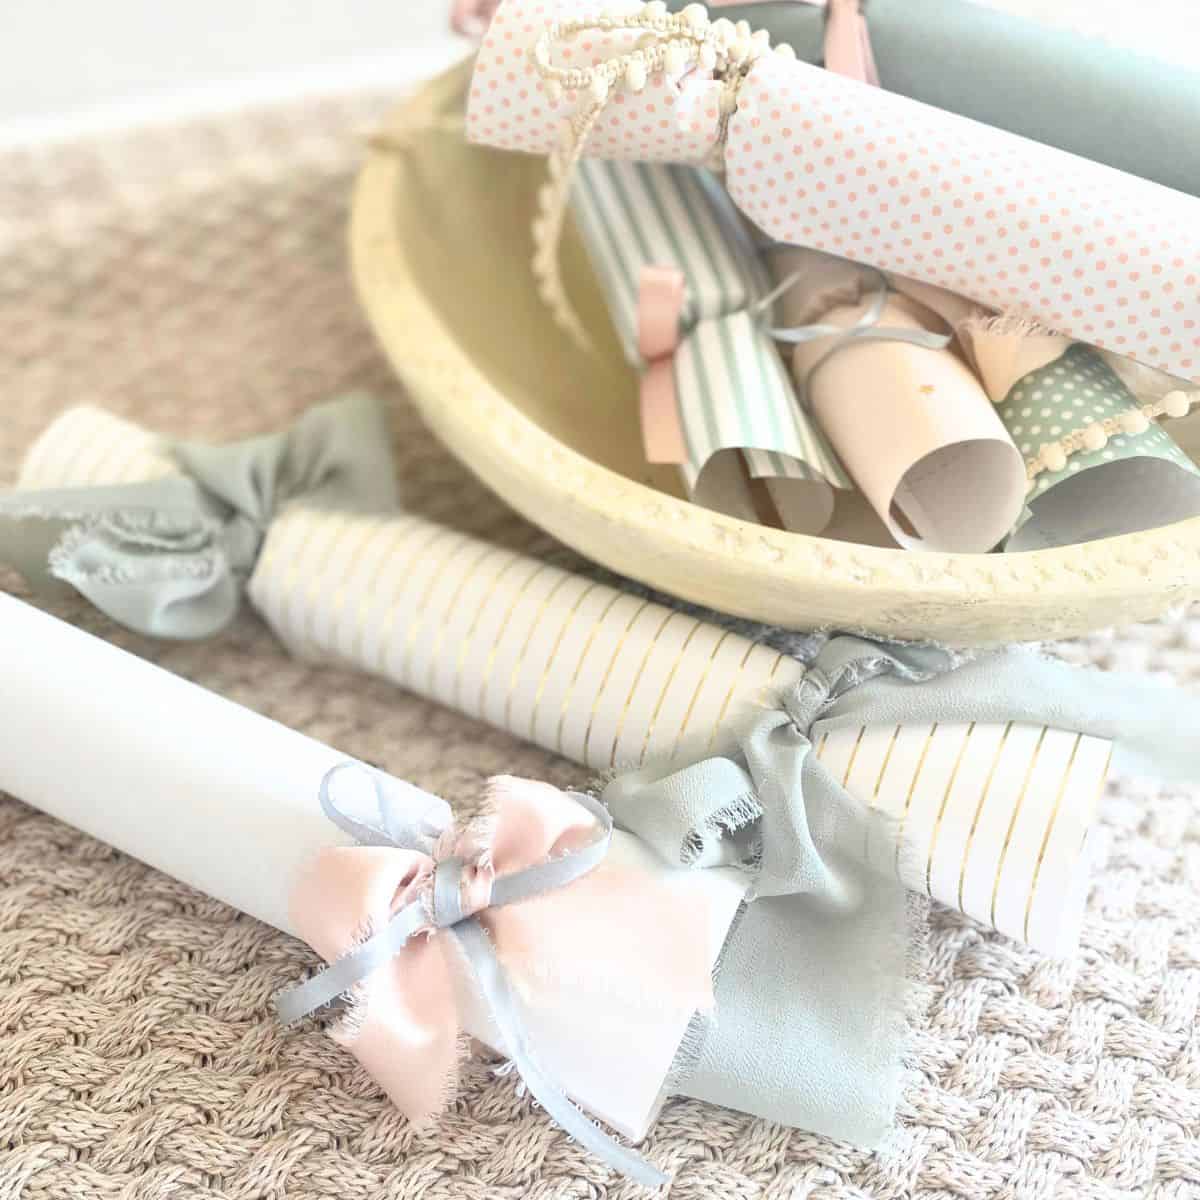
- Ribbon or string - Quintessential Christmas crackers are tied at each end with a pretty ribbon, bow or string. Since I have an ever-growing collection of ribbons, it is my preference. In fact, I love layering different types of ribbon for an even more elevated effect. You can get ideas for layered ribbons in both my Gift Wrap Ideas and Christmas Present Wrapping Ideas posts.
- Decorations - If you want to embellish your Christmas crackers even more, you can add decorative elements, such as stickers, stamps, paint, or tie charms with ribbon at each end.
- Small treats or gifts - Tucked secretly inside each cracker is a special surprise. From candy to jewelry, be as creative as you want! Think outside the-dare I say-box as well as your audience. For instance, kids love candy or other small treats, whereas grandparents might like a single serving bag of their favorite tea, lovely ballpoint pen or gift certificate to a shop they frequent.
Also, many parties have a theme, so keep that in mind as you shop for goodies to fill each cracker. Make sure you're not just buying junk that will end up in the trash. Moreover, there are no rules that say the treat has to be cheap or small as long as it fits inside. World Market is a wonderful place to find a variety of treats, such as interesting travel size bath products, tiny condiments and jams, and a wide assortment of tea.
Tip:
Larger and heavier items may not "pop" out of the cracker. If you're okay with that, fill the crackers with things you want. Otherwise, choose small, very lightweight items.
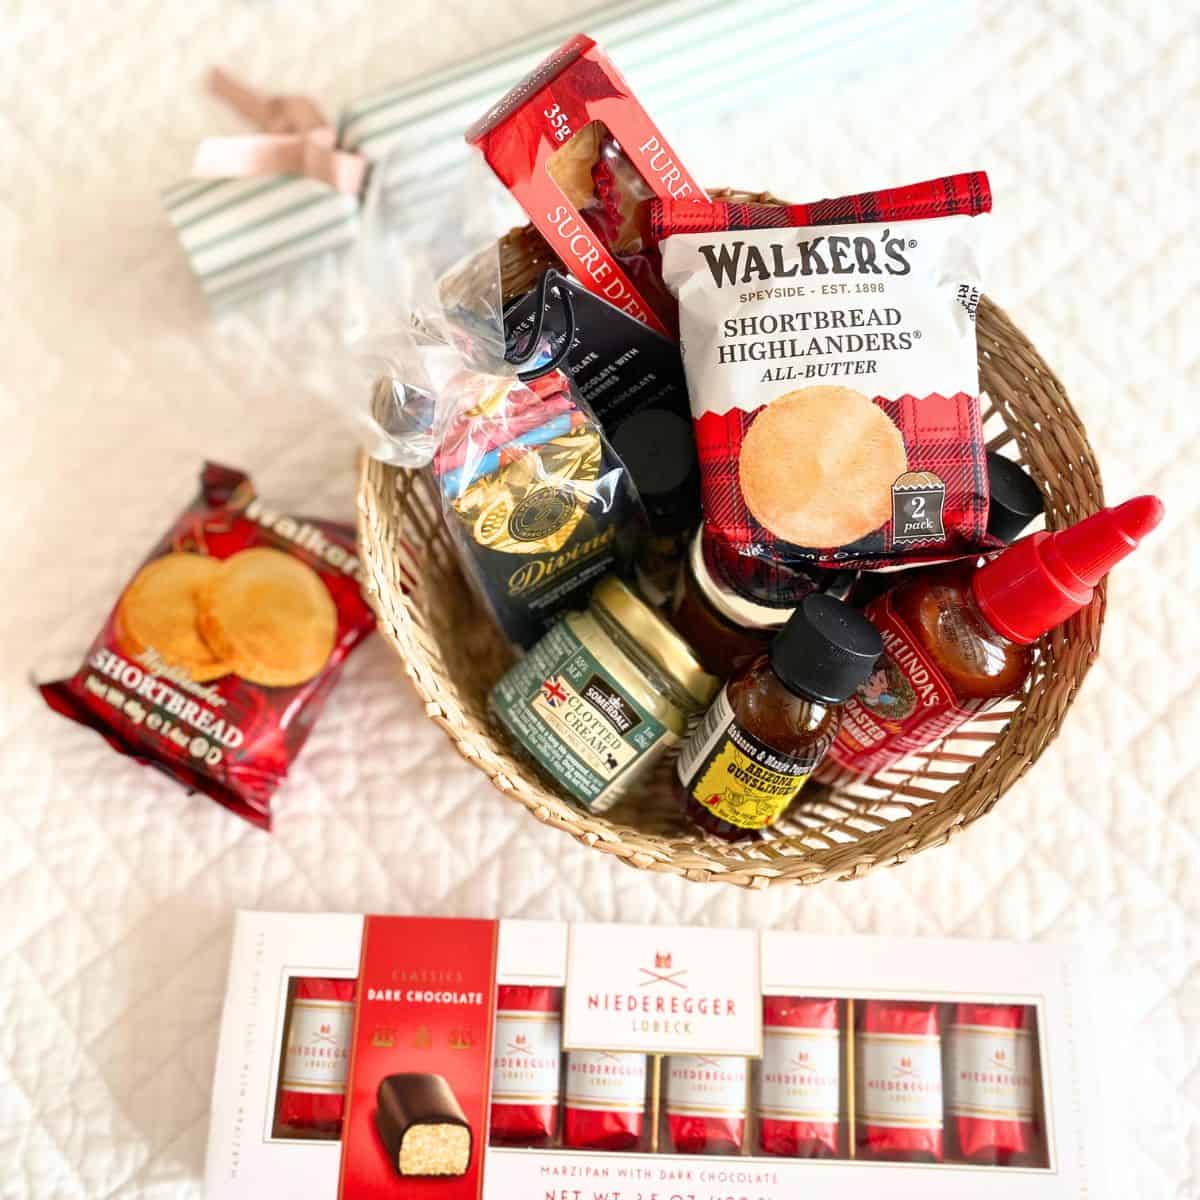
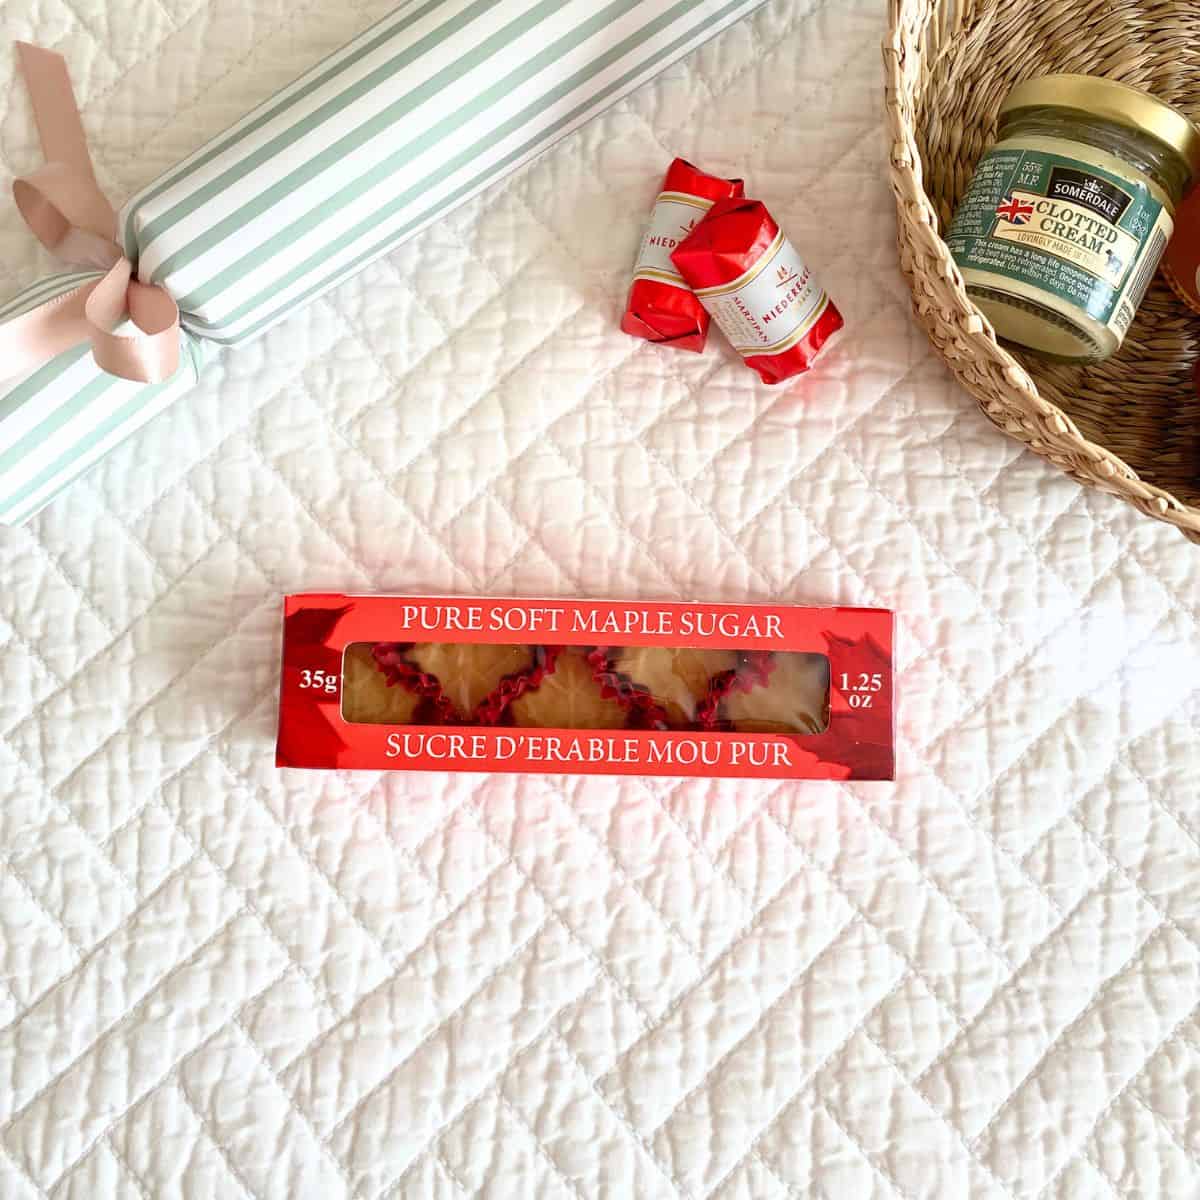
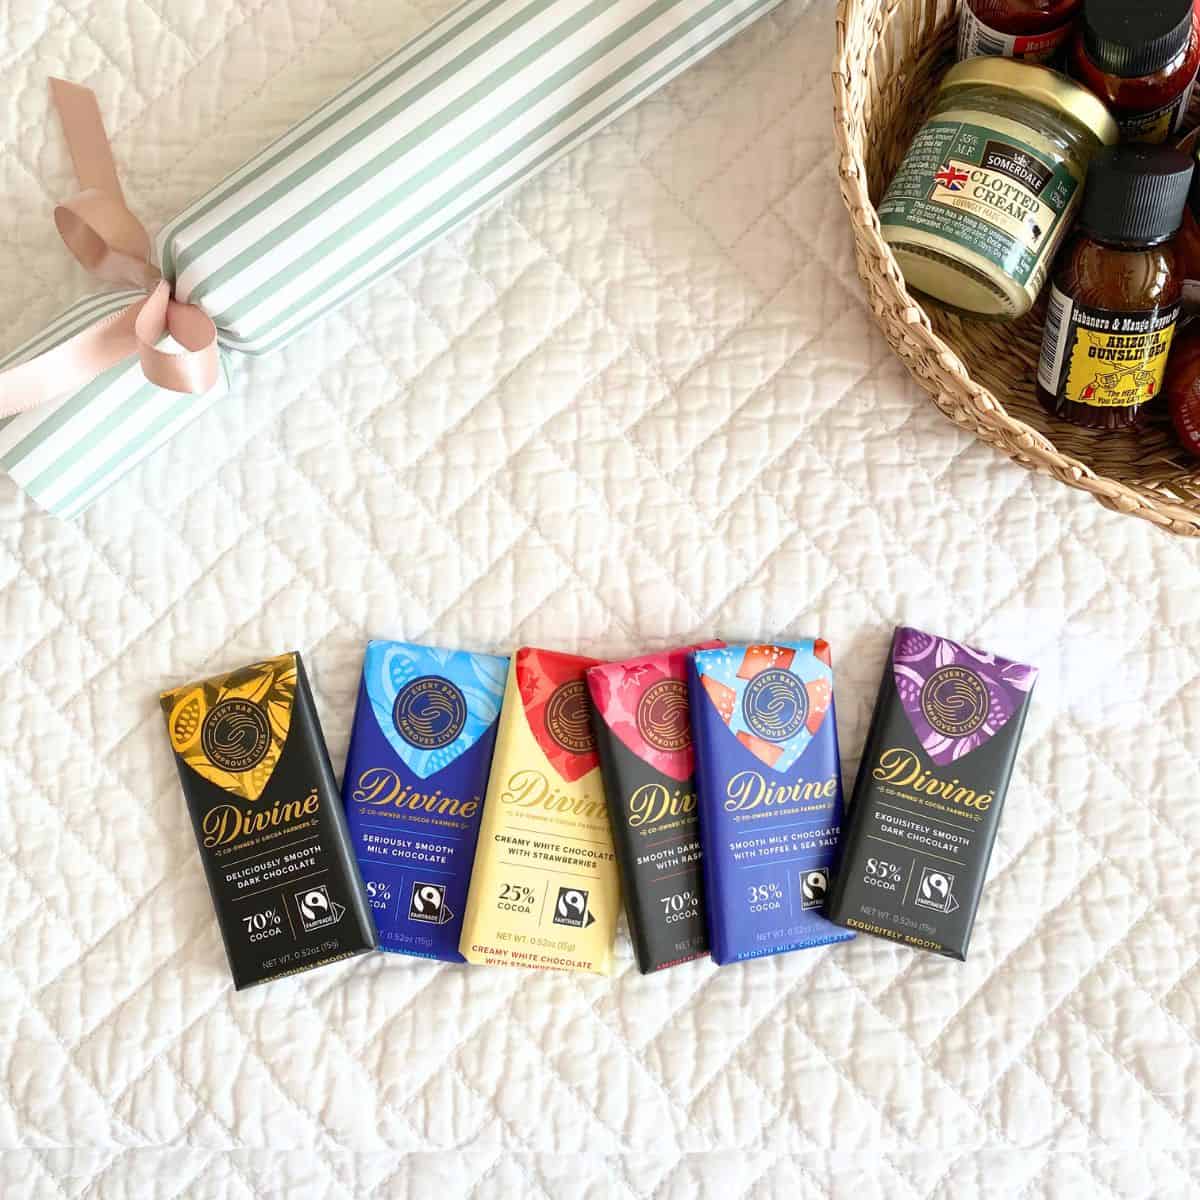
I used a variety of tiny European candies and other delicious treats!
How to Make DIY Christmas Crackers Step-by-Step - 2 Ways
As far as DIY holiday projects go, making your own Christmas crackers is fairly easy. You do have to plan a little in advance, as mentioned in the supplies section above. Crafting the crackers takes little effort and is a fun activity for the whole family on Christmas Eve.
Tip:
If you can make a sacrificial cracker for testing purposes, I highly recommend doing so. You want to make sure that the treats you fill the cracker with are not too heavy and that the snap/popper actually works the way it's intended.
I probably read at least five different articles and watched two or three videos to see how others succeeded with this project before I decided on which method to use to DIY crackers. However, my crackers are more decoration than functional, since the paper I use is heavier. To actually pop our crackers was a challenge to fight against the thick paper.
There are two ways I found worked best to craft homemade Christmas crackers:
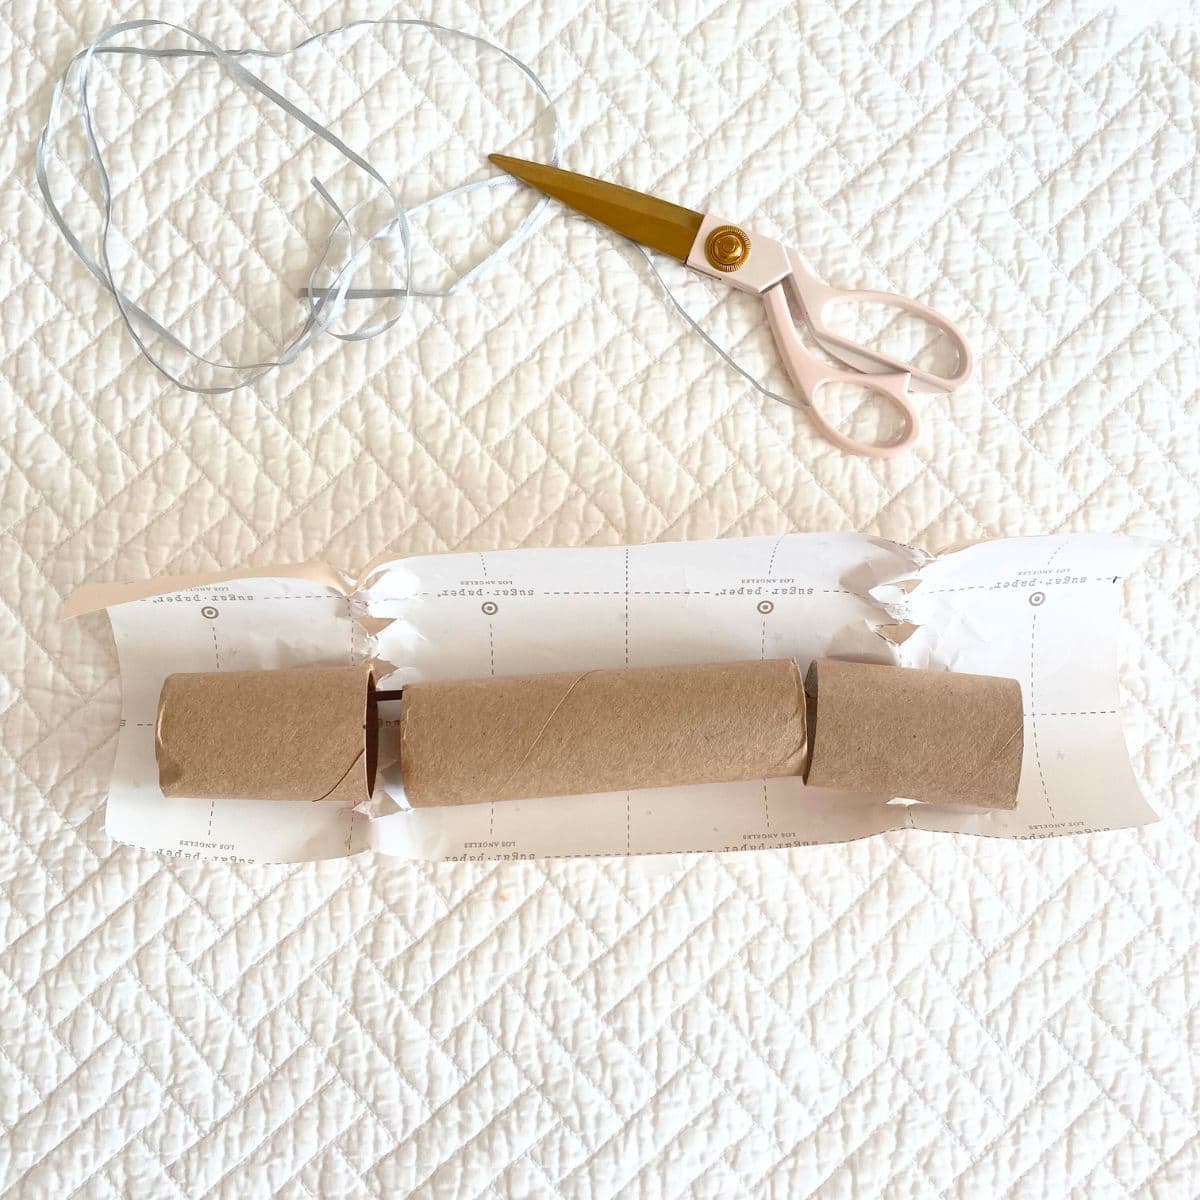
- The first way/method uses three craft tubes as the structure to ensure the cracker shape is maintained throughout the assembly process.
- The second way/method is to cut a diamond pattern into the wrapping paper to aid in making the snap/popper work without having to overcome the force of the paper when you open them. I find this method is easier and does not require the use of three craft tubes to complete.
Below, I walk through the steps for each way/method, so you can decide which version will work best for you.
The First Way to Make DIY Crackers
Step 1: Prepare the Cracker Tubes
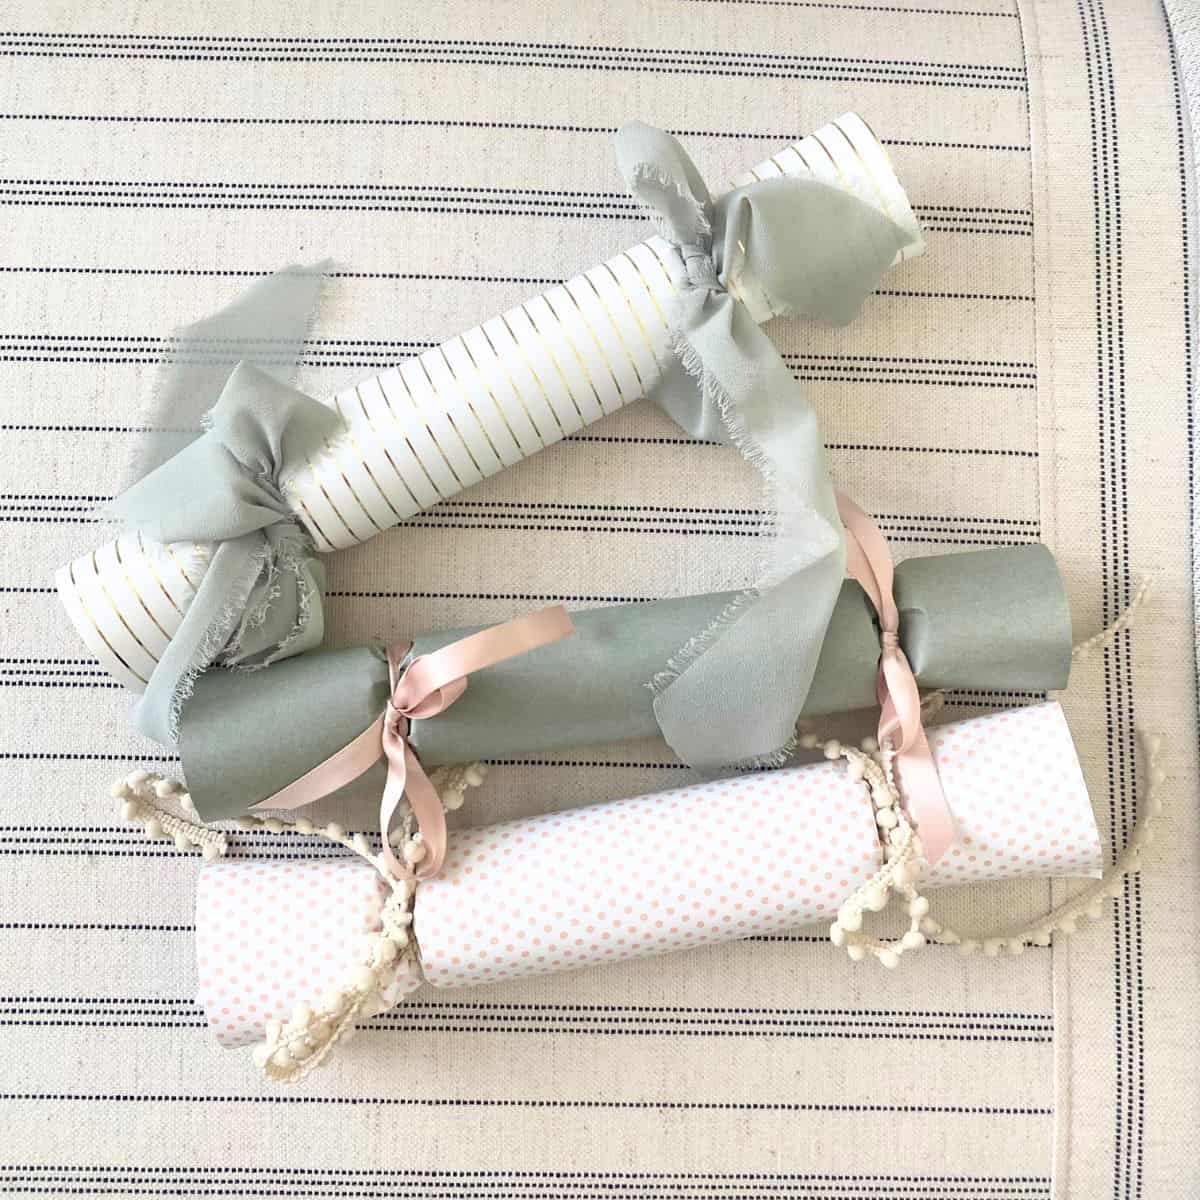
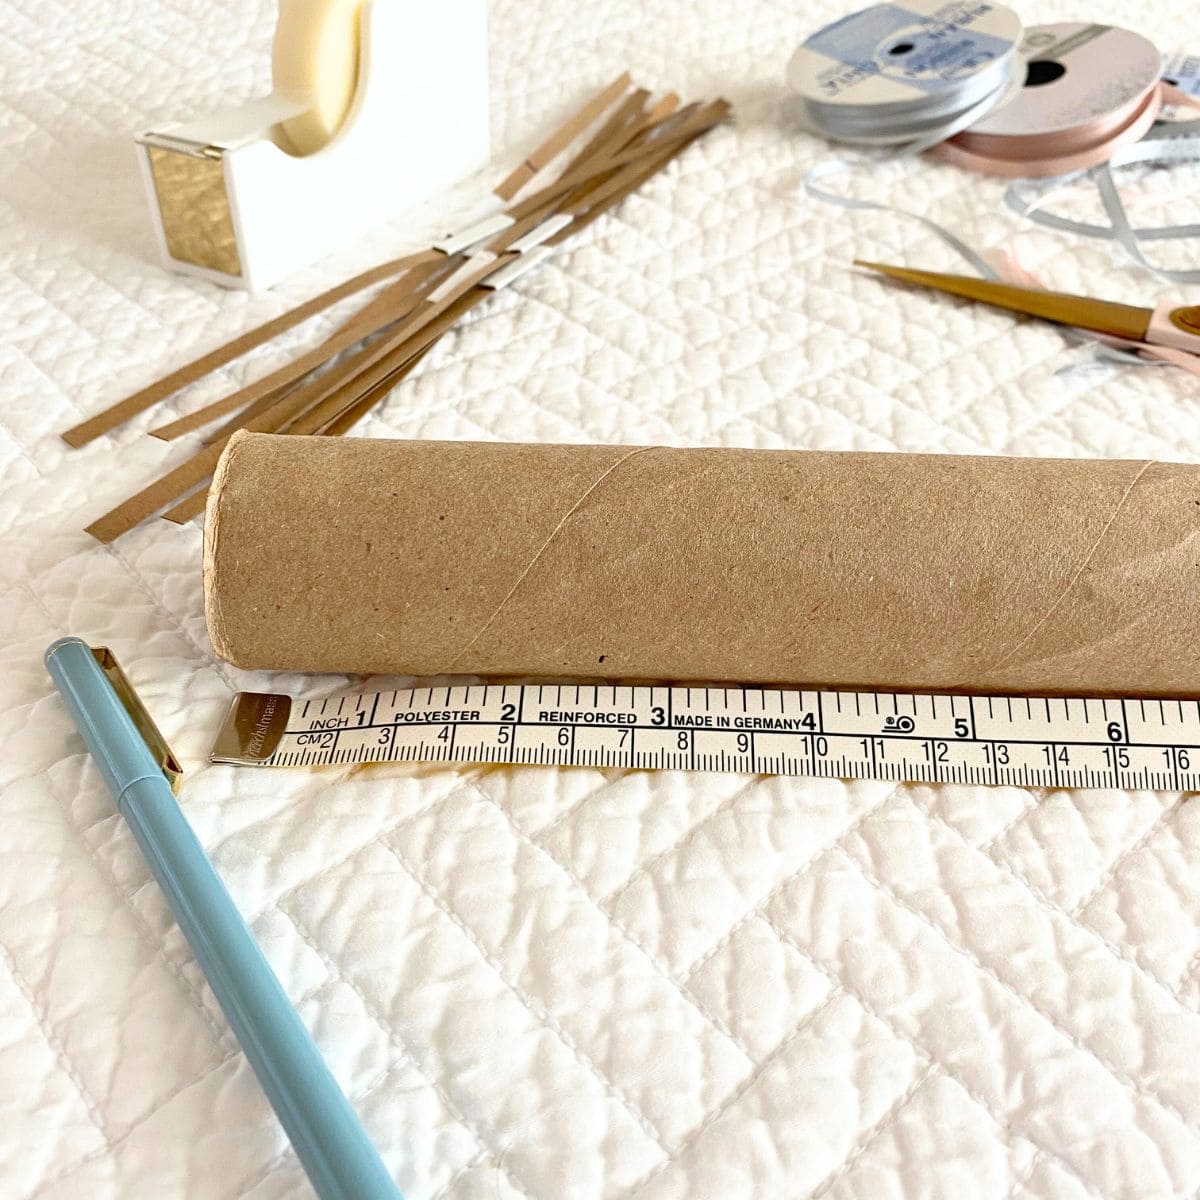
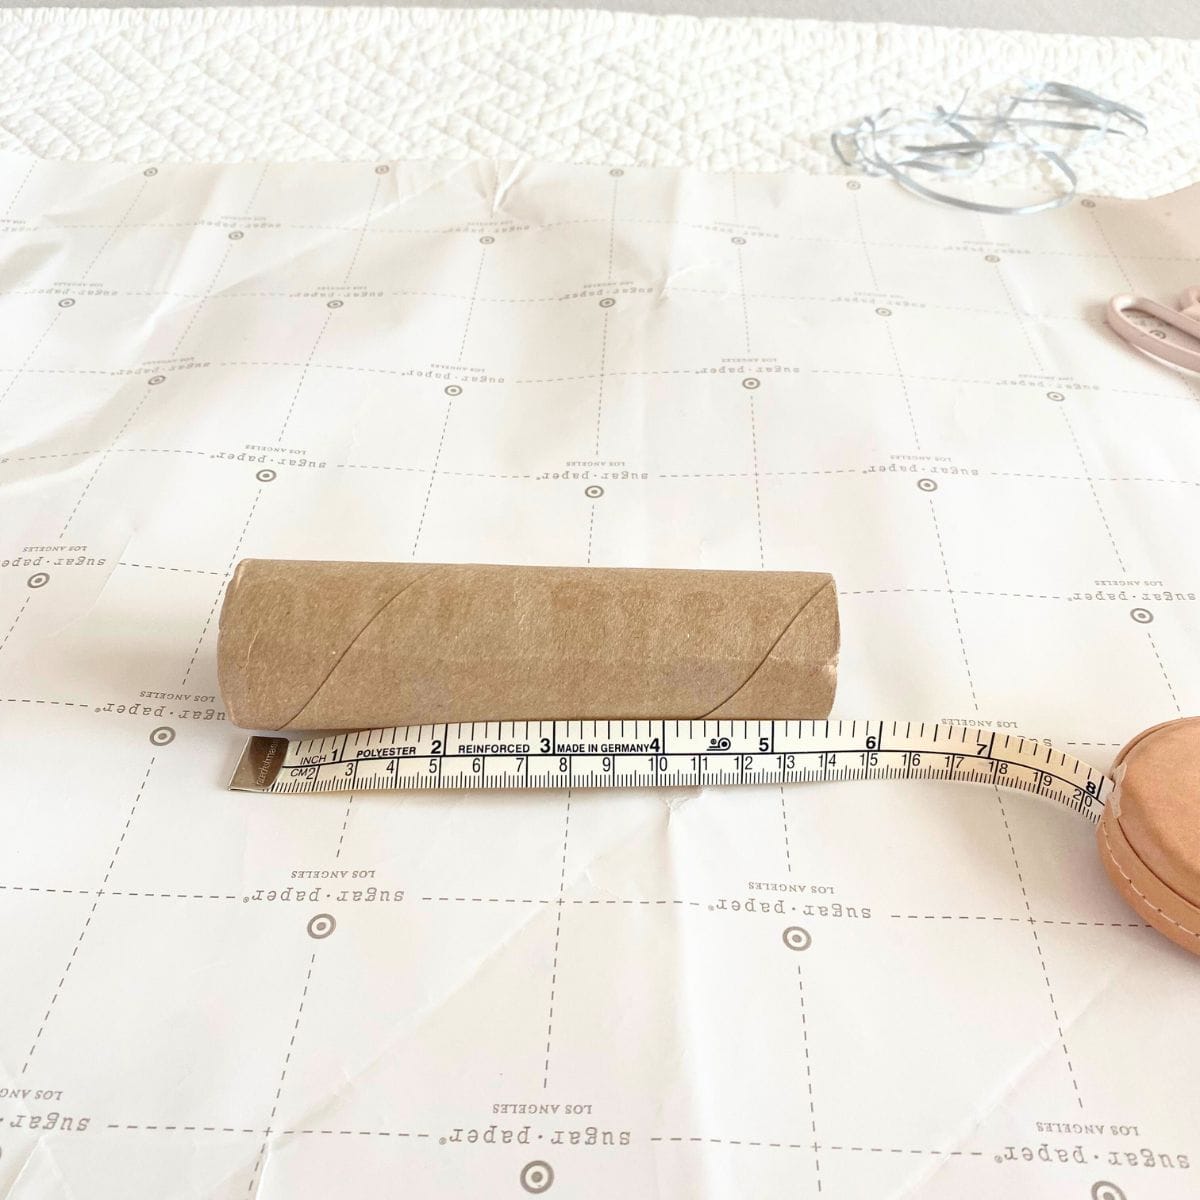
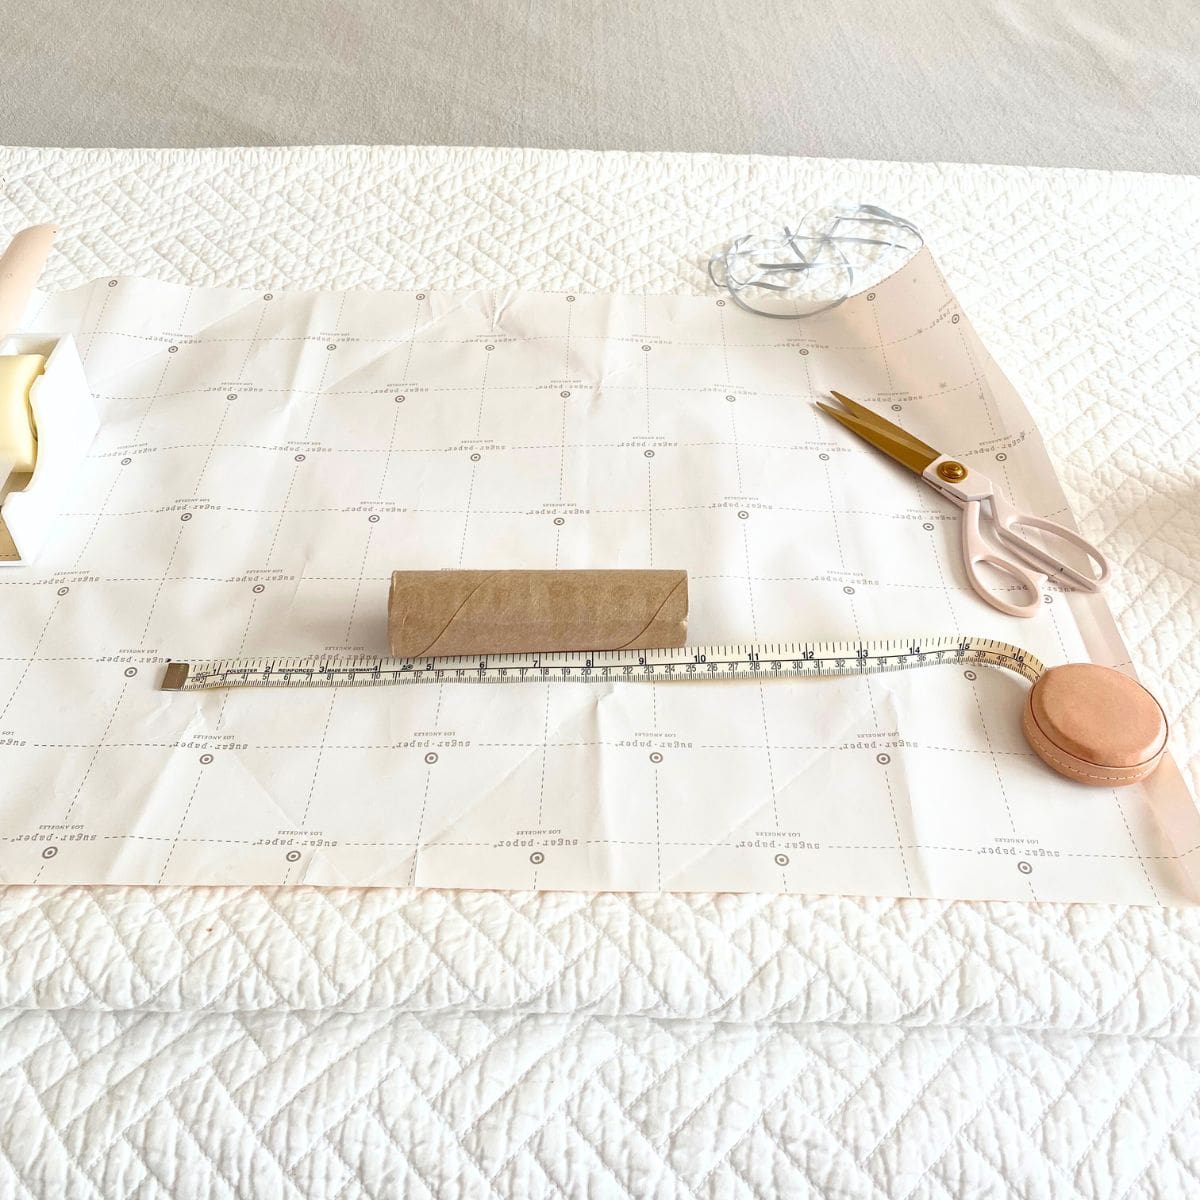
If you are using paper towel rolls like I did, you need to cut each roll. Instead of thirds, I cut mine with the middle section slightly larger to make it look more like a bon-bon. At 11" in total length, I measured the craft tube about 2 ½ to inches from each end, leaving the middle section with the remainder.
If you prefer, you can cut each roll in thirds. Doing so makes crackers that are about the same size as a toilet paper roll, which you can also use.
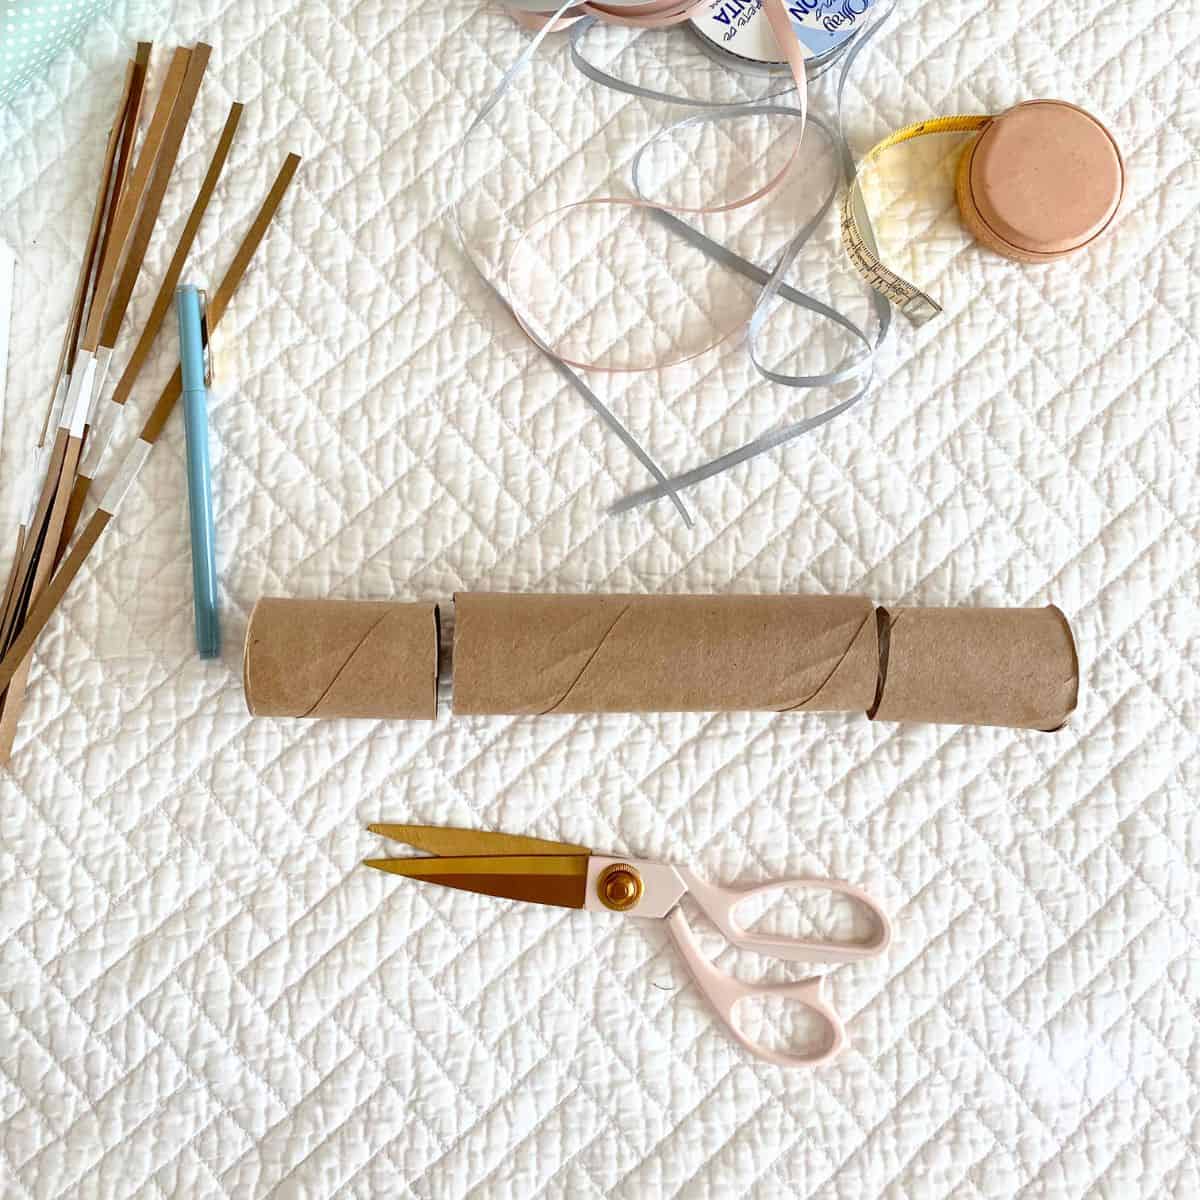
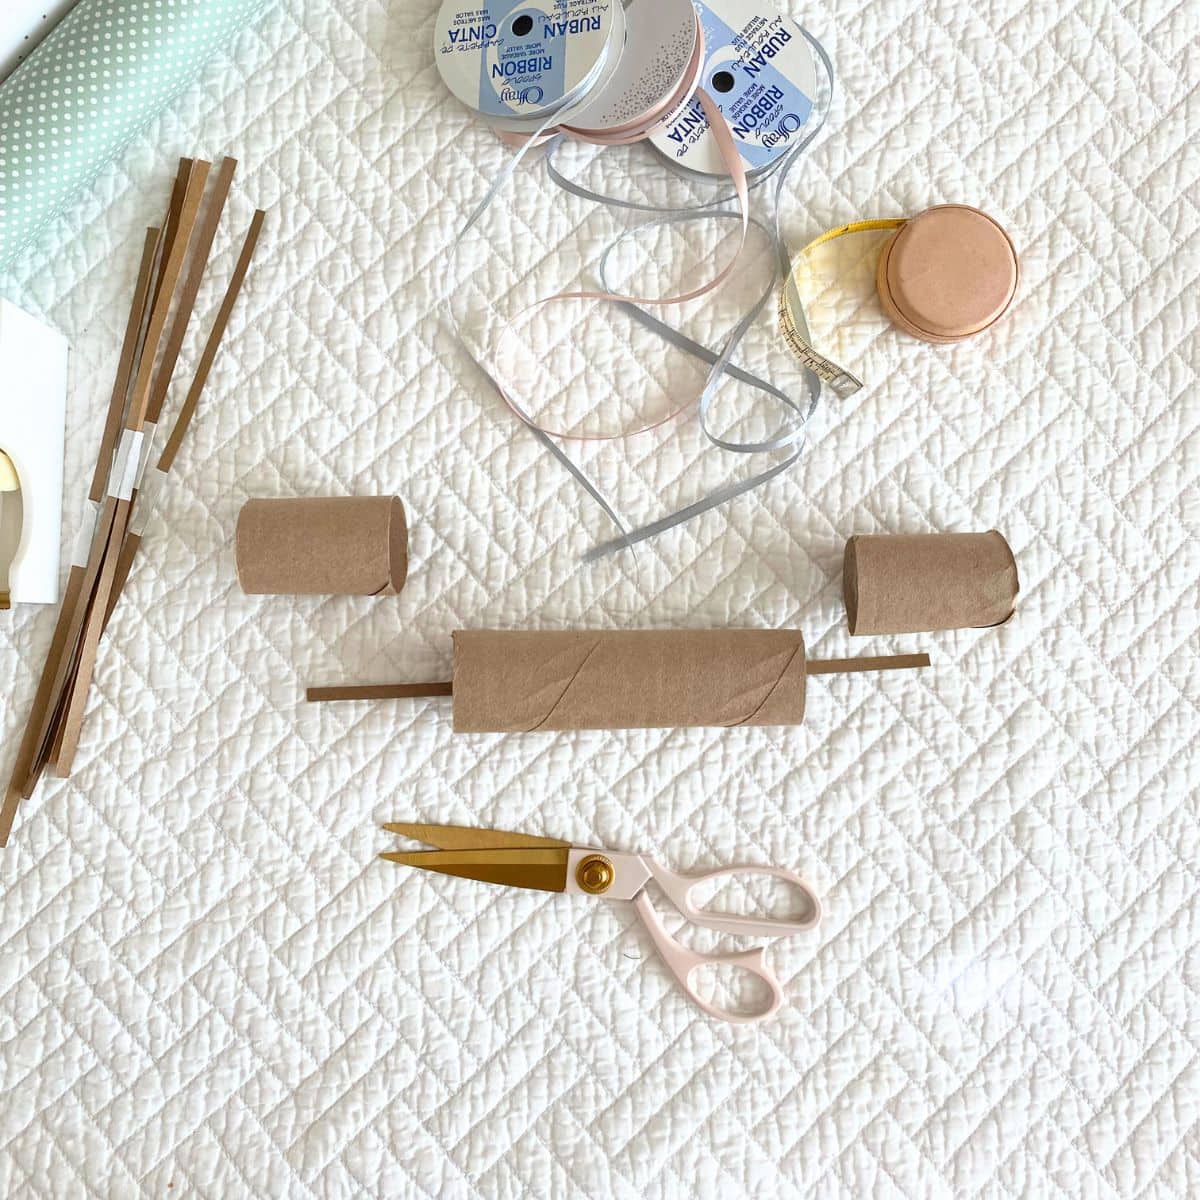
Step 2: Add the Snap/Popper
Skip to step 3 if you are not using snaps/poppers in your crackers. Remove the two tube ends and place one of the snaps/poppers inside at the center of the middle tube. Tape/glue it to the inside of the tube at each end to secure it. Do NOT tape or glue the middle of the snap since that is where the snap/pop comes from and you don't want to interfere with it. Place the ends back on the tube with the snap inside.

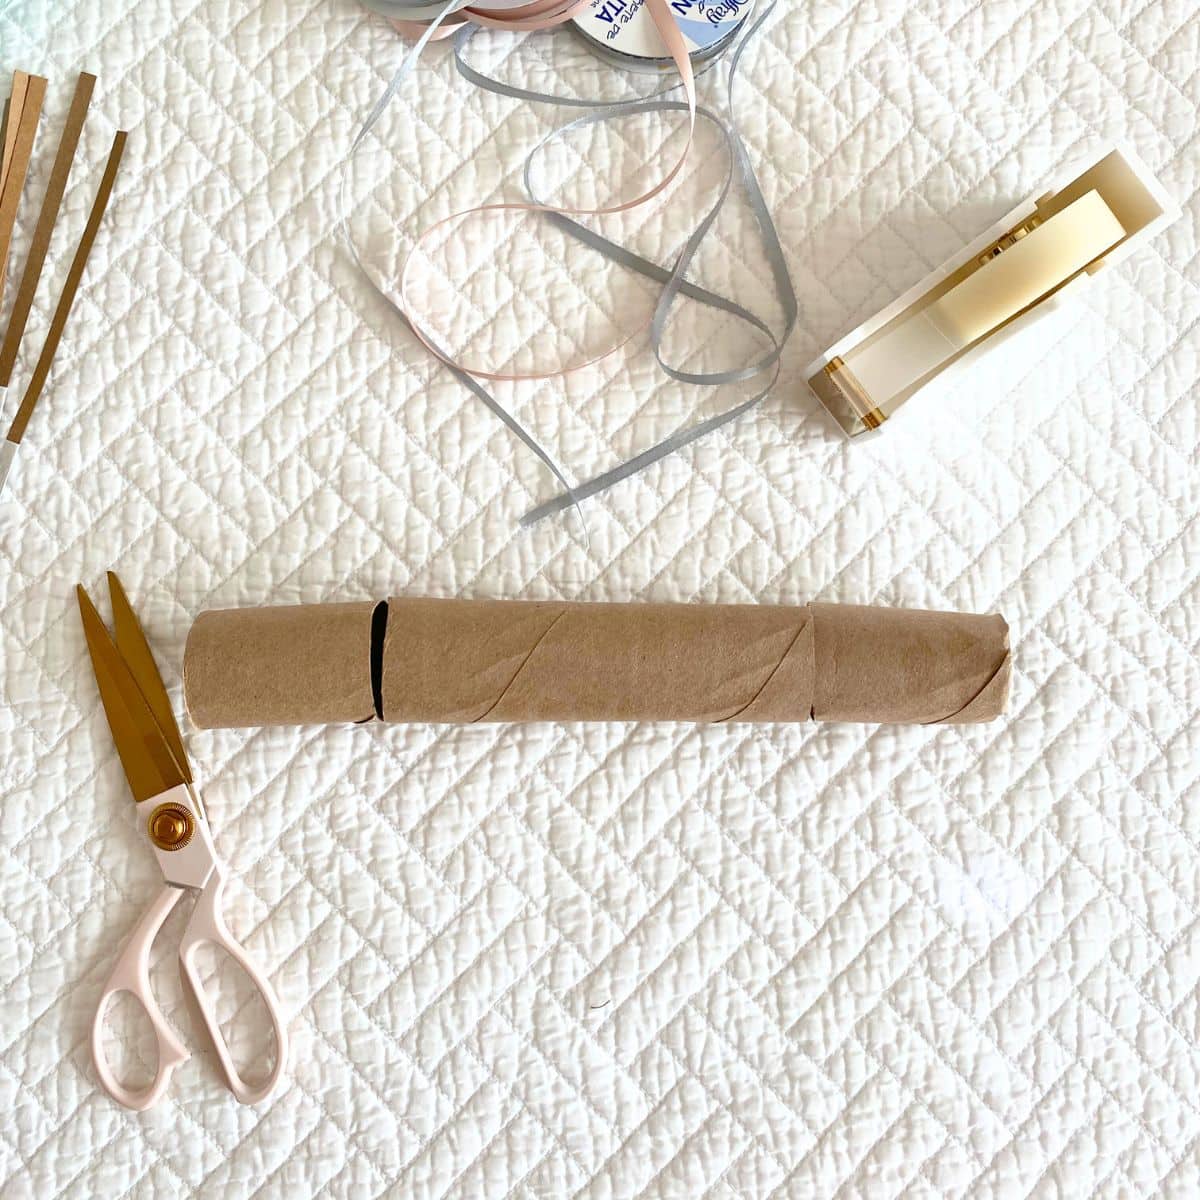
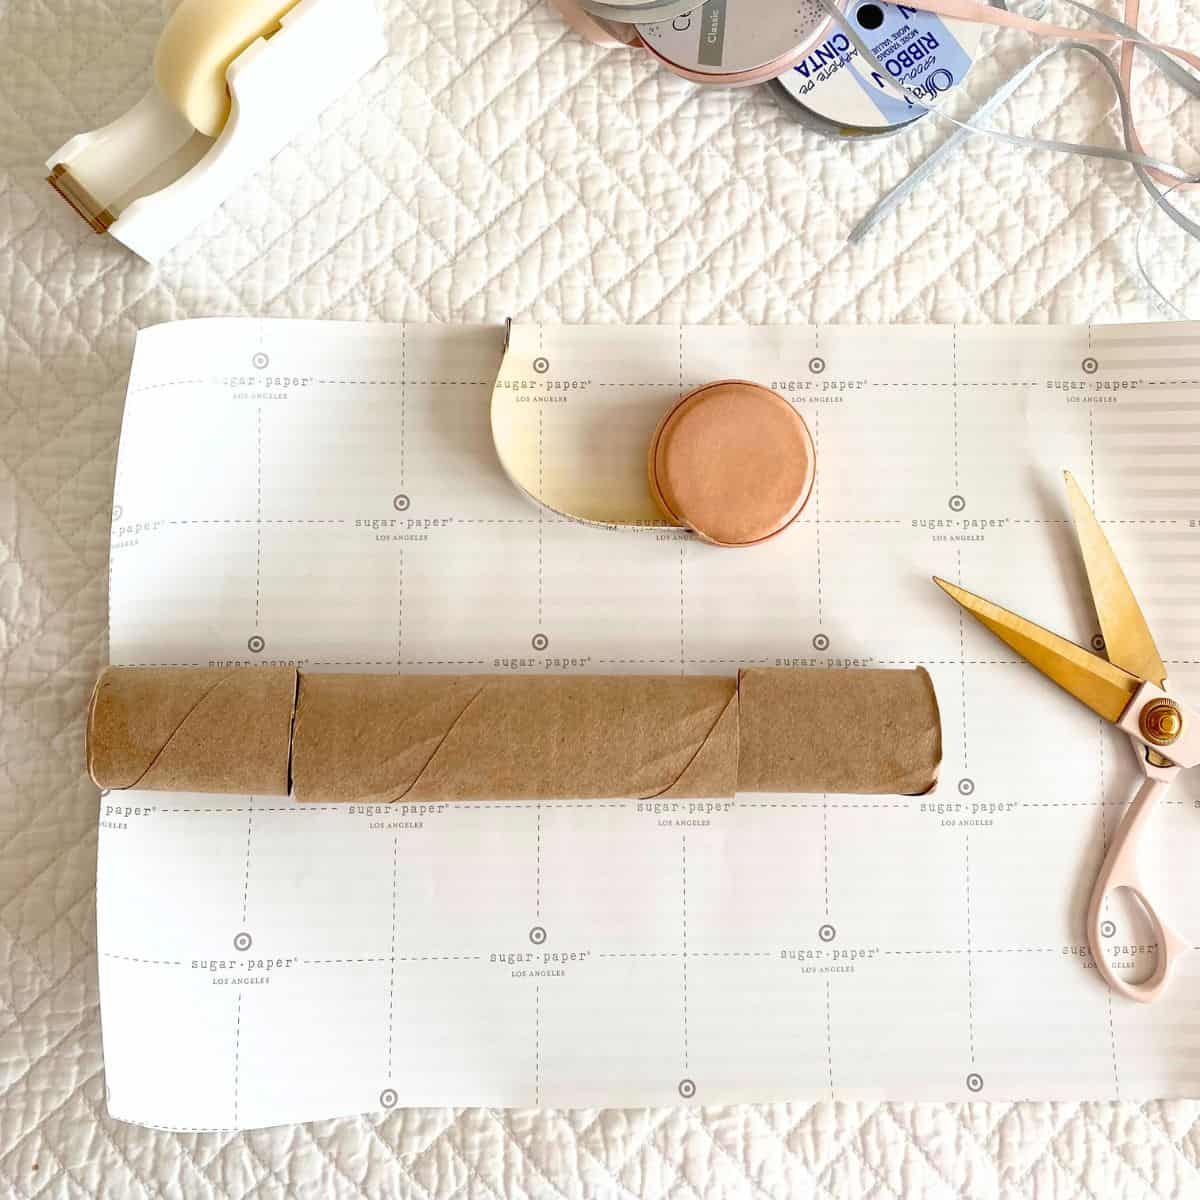
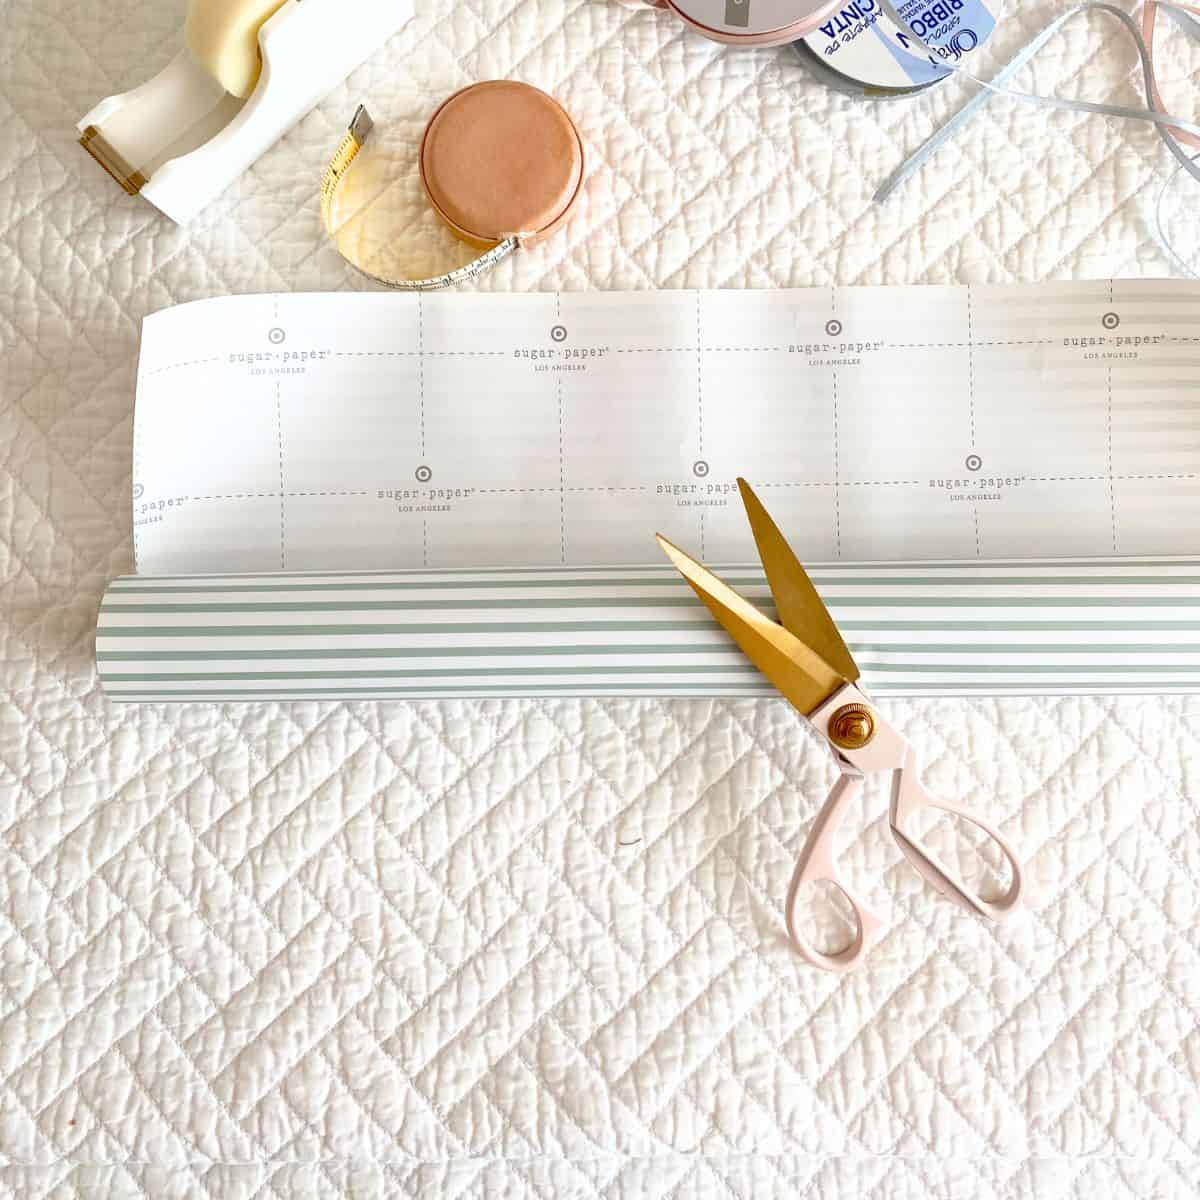
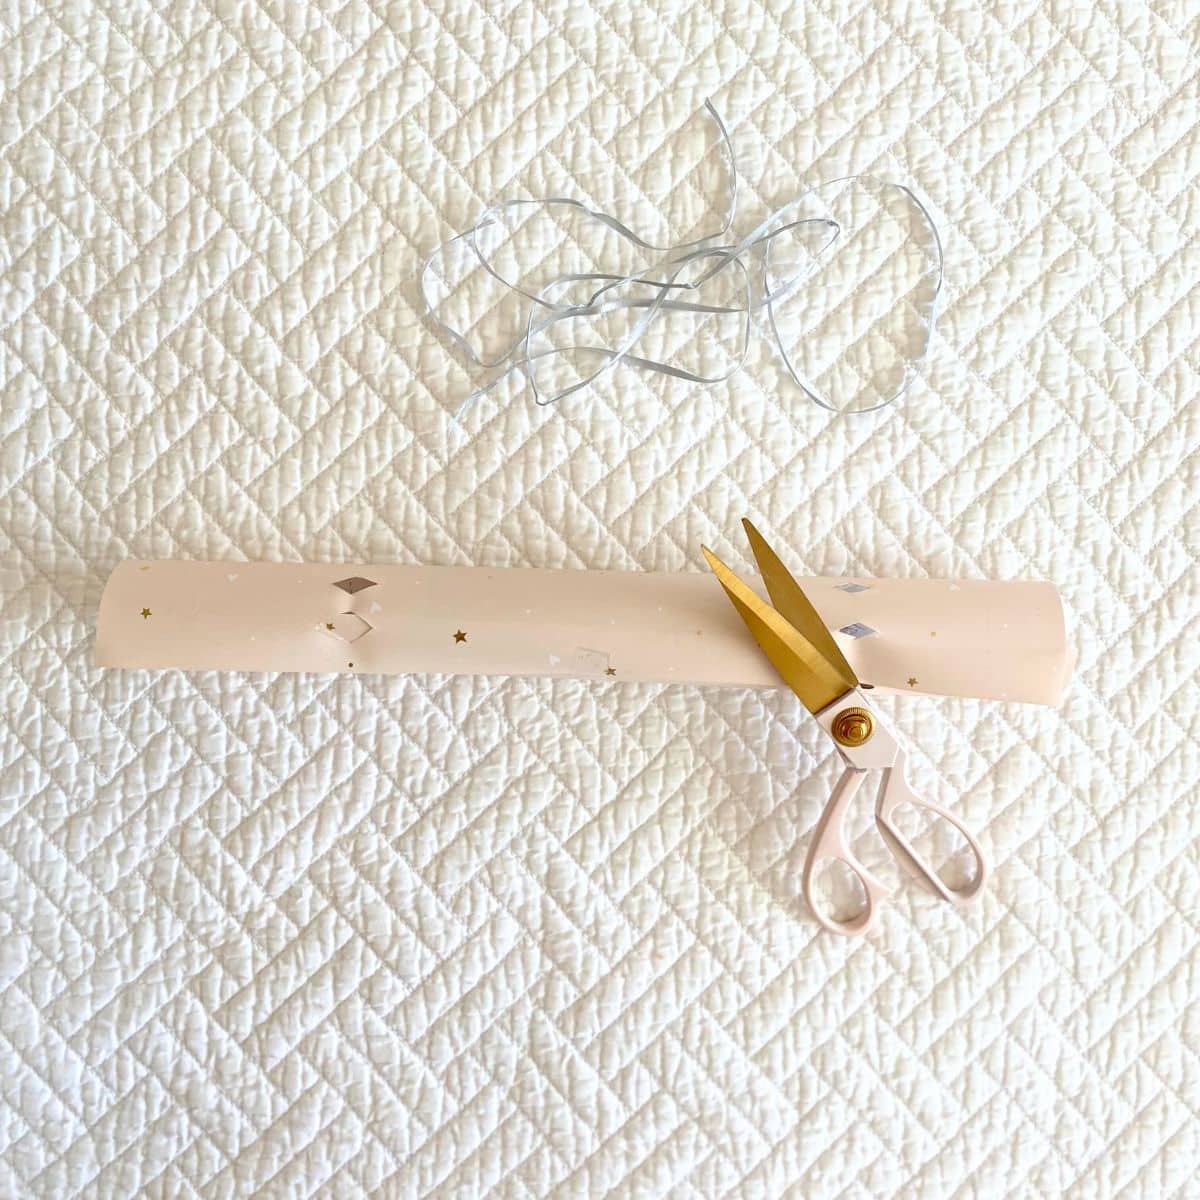
Step 3: Wrap the Cracker Tube in Pretty Paper
Here is where you can use scrap paper if you have any. Measure your tube for length. Then, wrap the paper around the tube, overlapping ever so slightly. Cut the paper to size, about three times the size of the roll, and secure it with tape/glue at the center of the tube where the slightly overlapped paper meets.

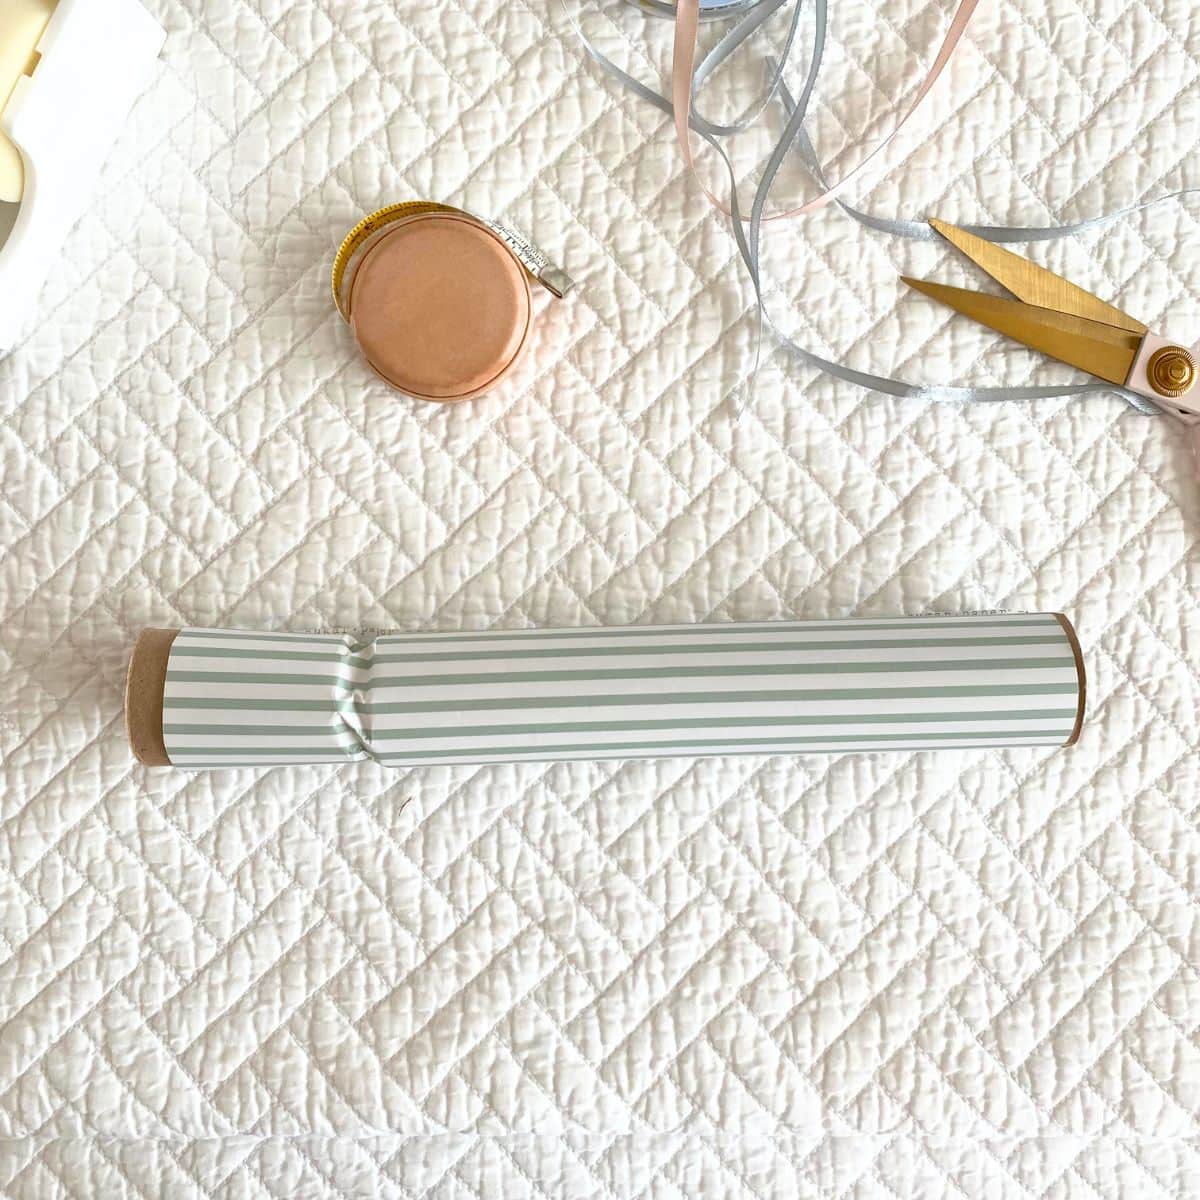
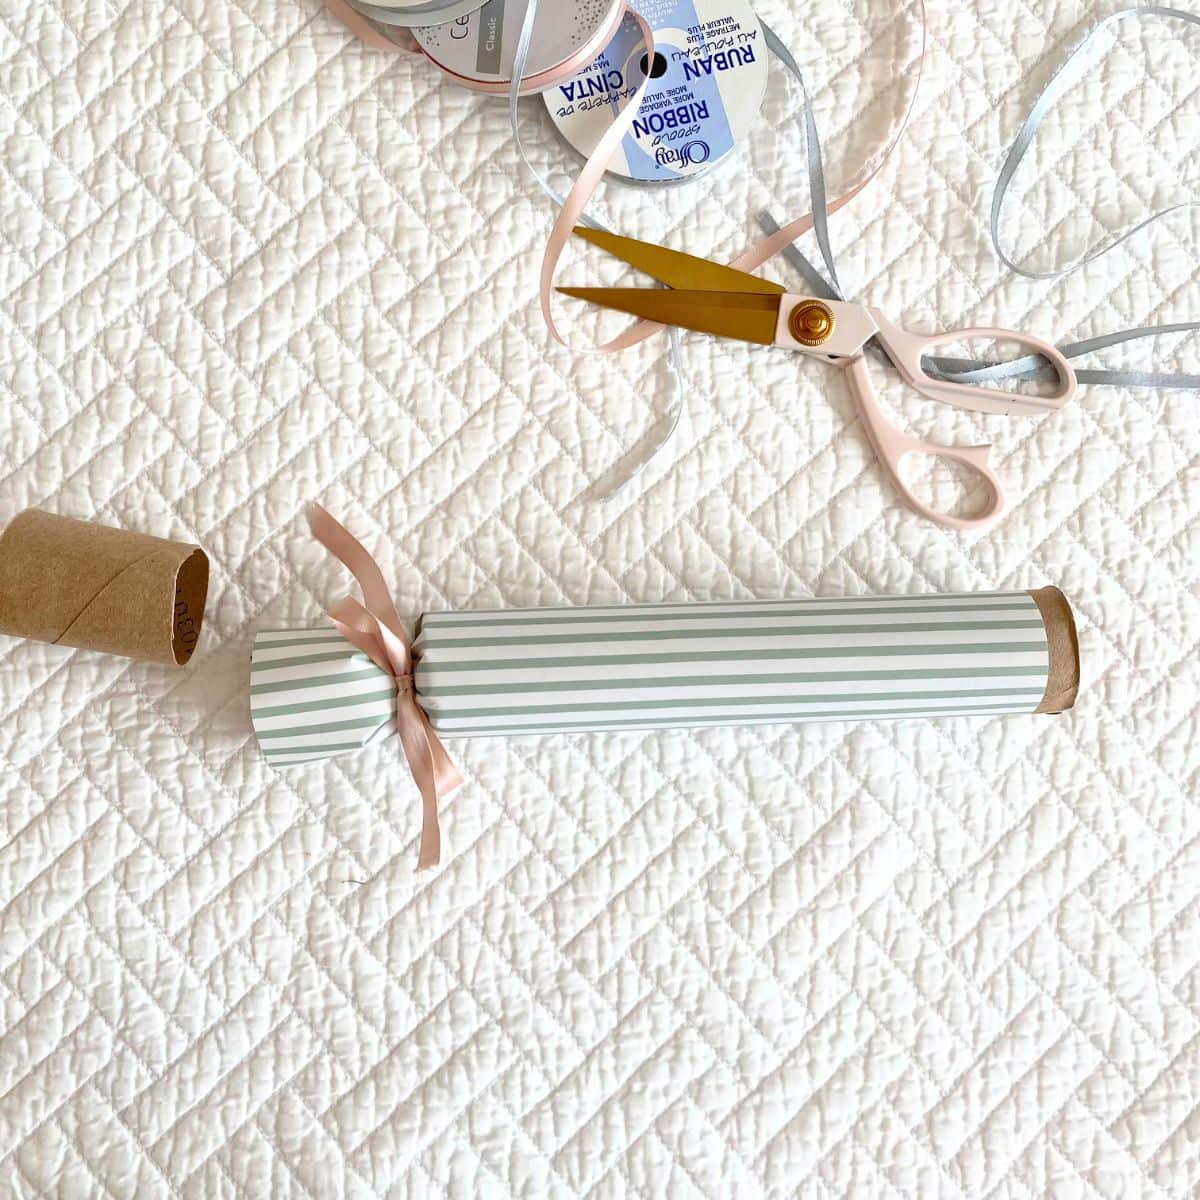
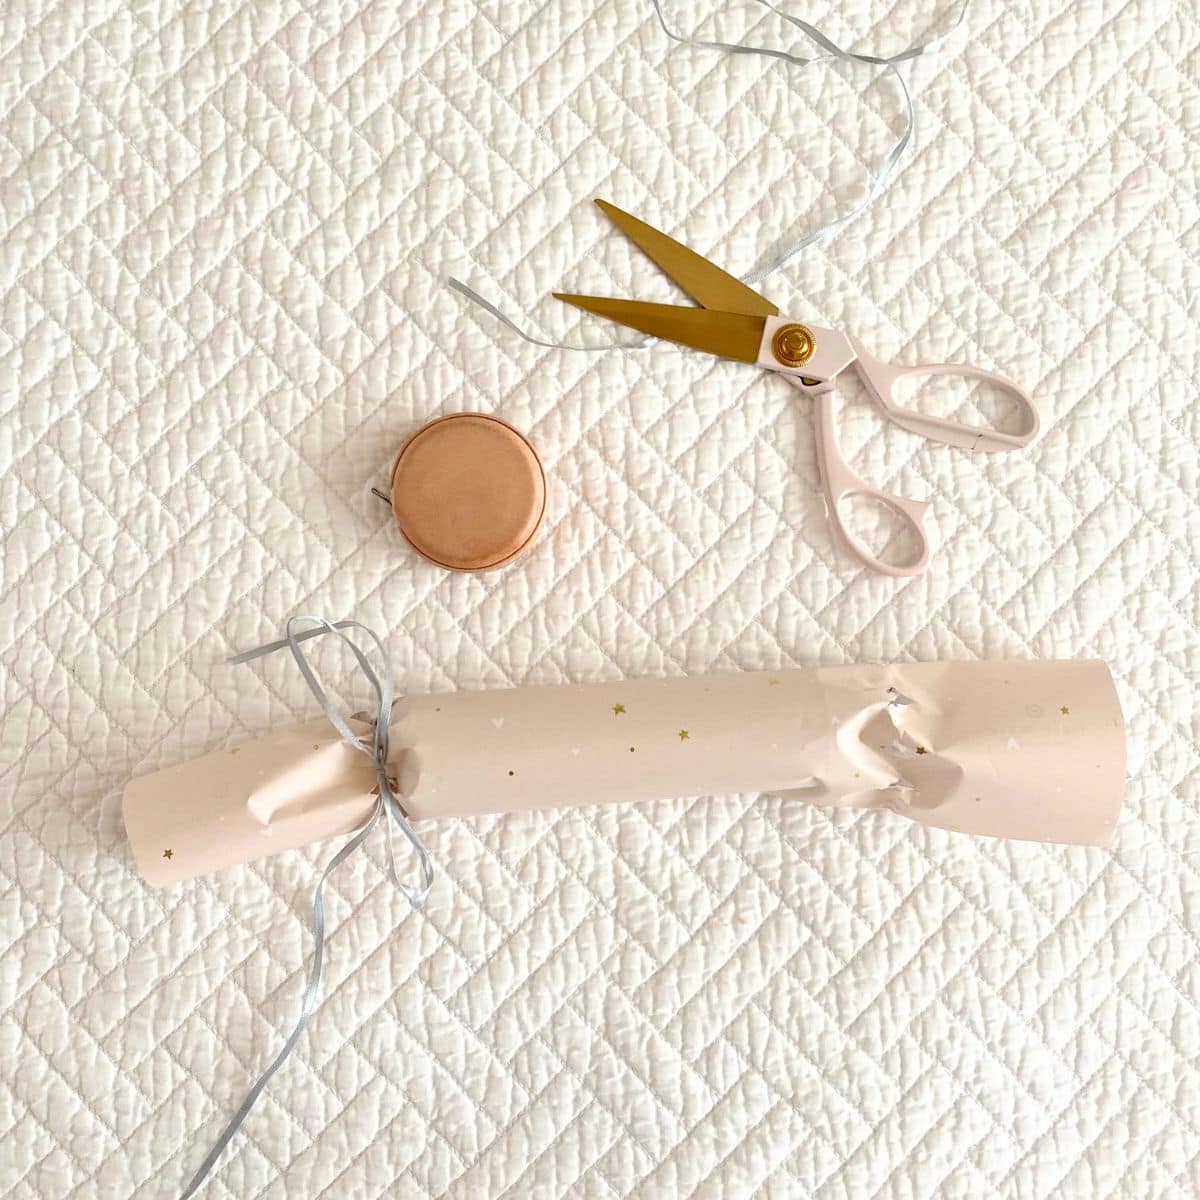
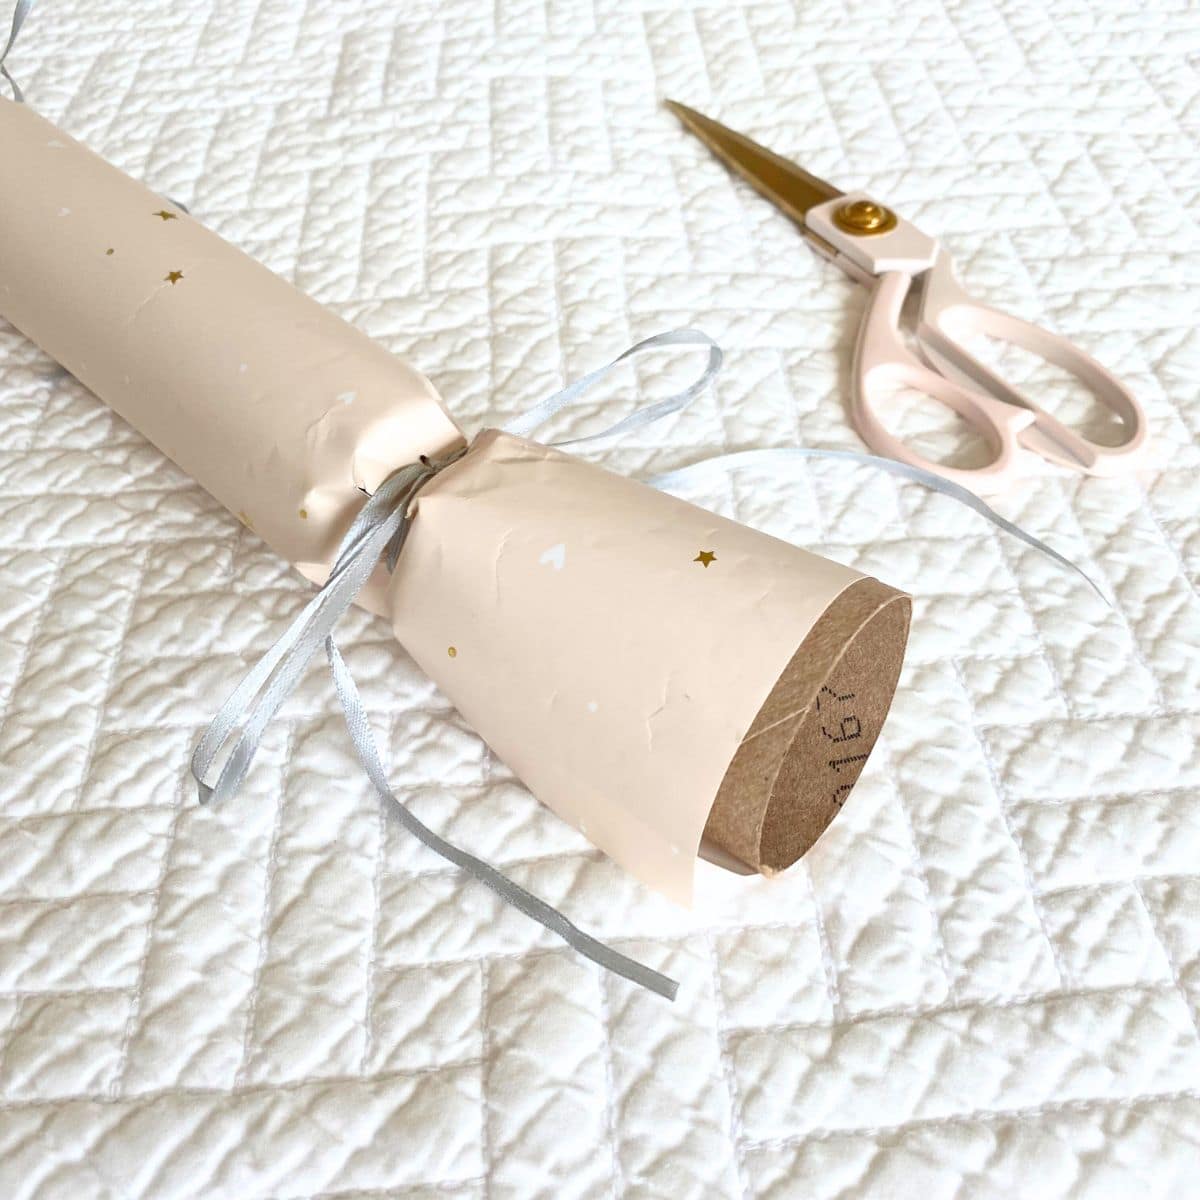
Step 4: Close One End with Beautiful Ribbon
At one end, find where the end tube meets the middle tube. Lightly twist the paper back and forth where it meets enough times to loosen it up. The goal is to loosen it enough to secure it in place with a pretty ribbon, bow or string. I find it helpful to pull the end tube out slightly away from the middle tube, using it as leverage to push and pull the paper to loosen it. When it's loose enough, scrunch it up a little and secure it with a ribbon or string. Remove and discard that tube end. Tape the snap to the paper to secure it in place. Leave the other end open.
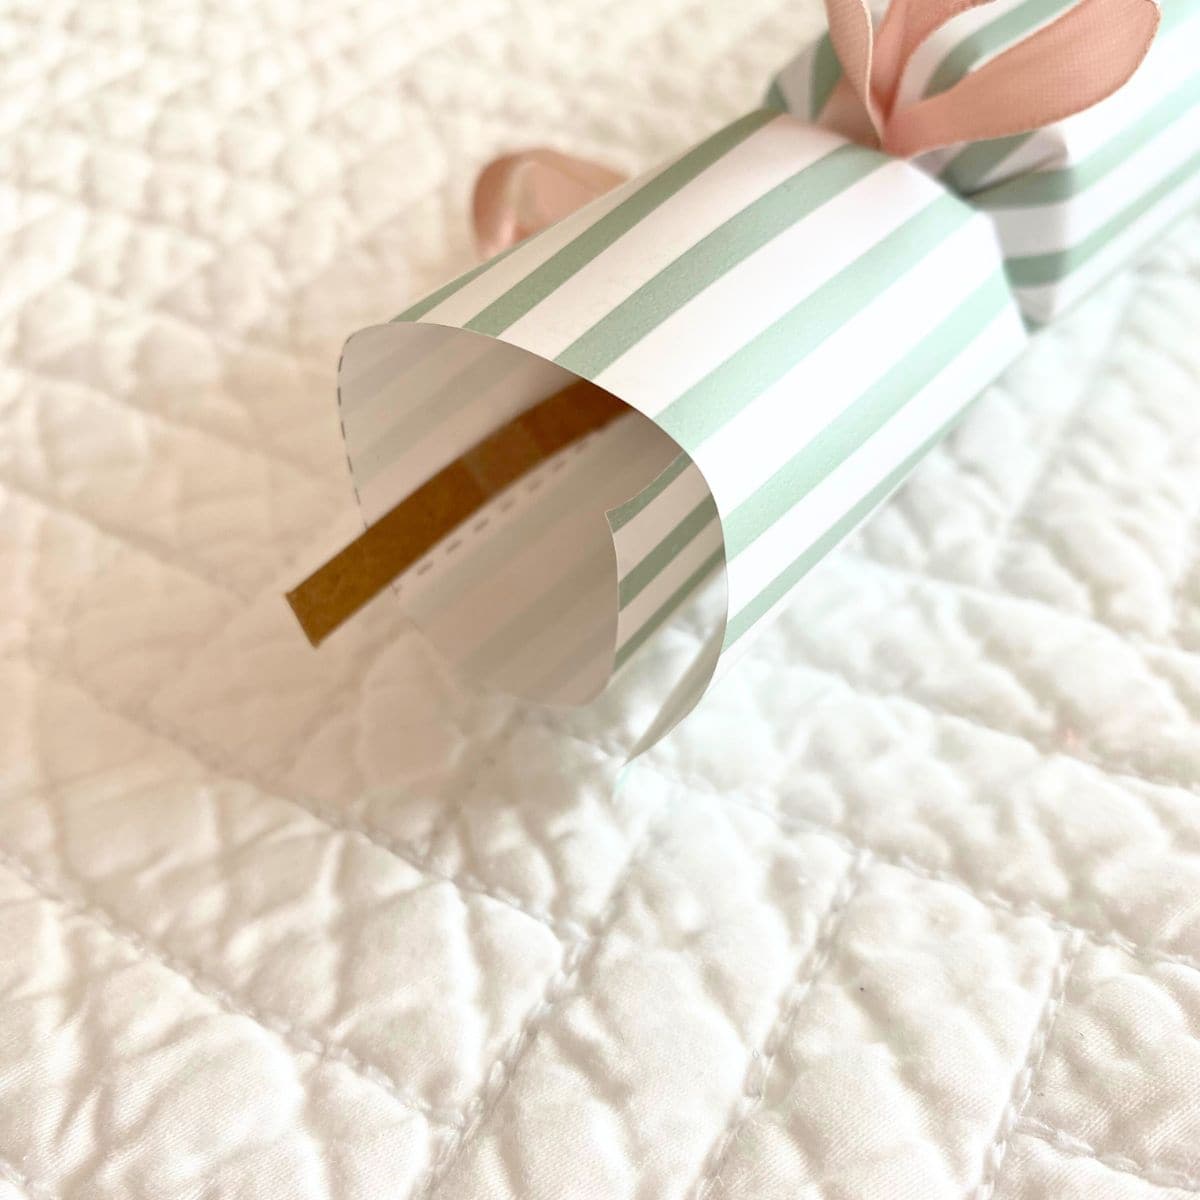
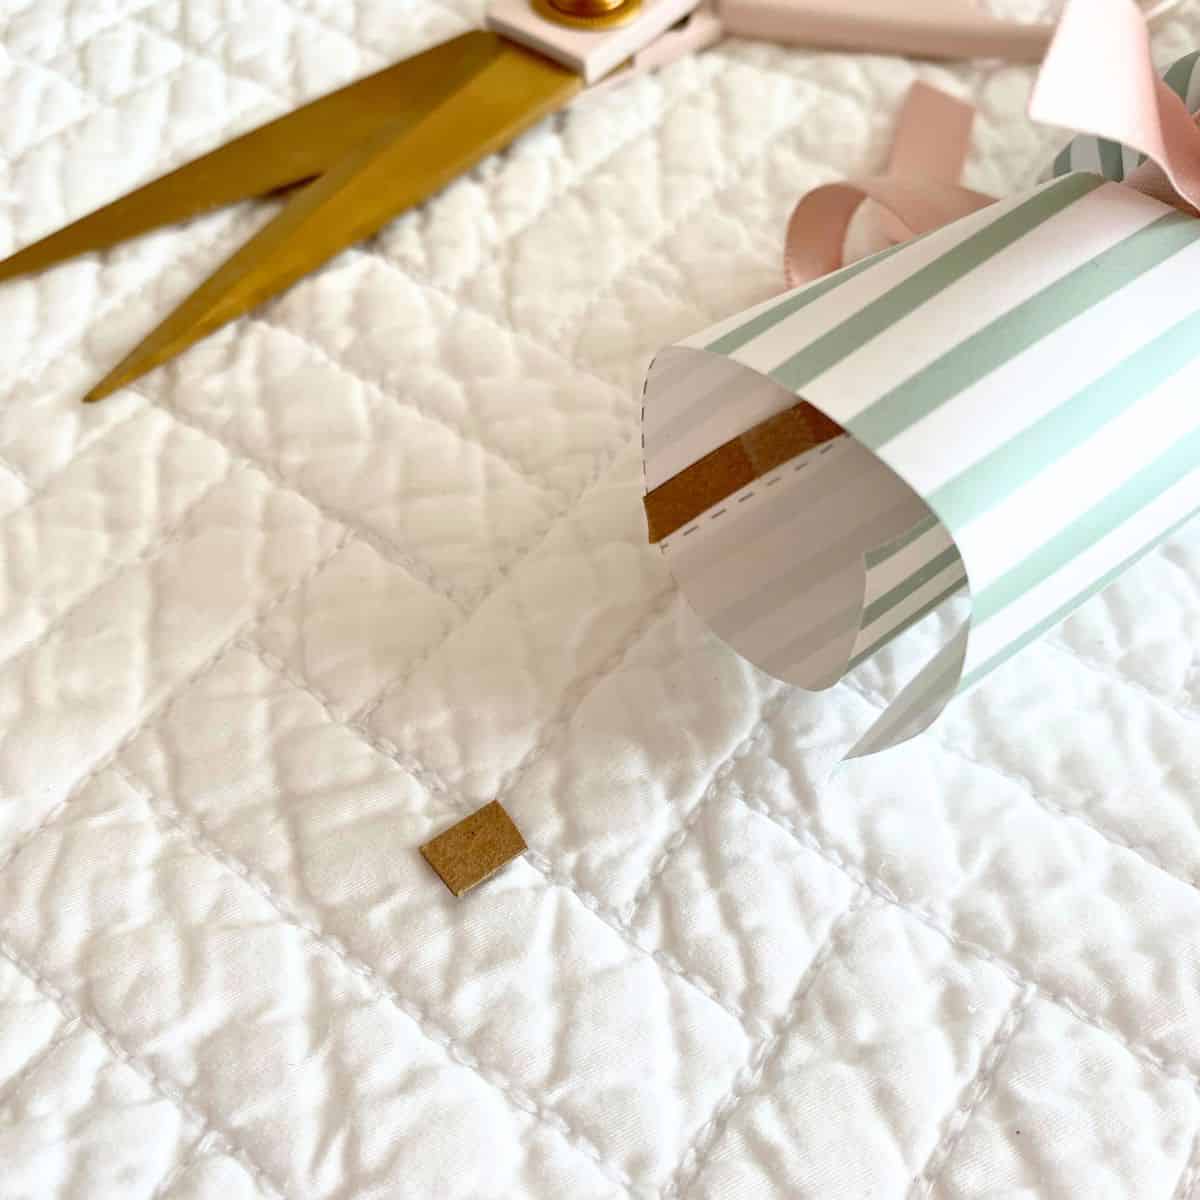
If the snap/popper goes beyond the paper, trim a little off so it doesn't show. Don't trim too much, because you need to be able to pull it with the paper to make the snap sound upon opening.
Step 5: Fill the Cracker with Treats
At the open end, fill the cracker with treats. Get creative with candy, little sweets, jewelry, or anything you can think of! As previously mentioned, try not to buy junk that will end up in the trash. Keep your audience, theme, holiday, or type of party in mind. Don't make it too heavy.
Step 6: Close and Secure the Other End
After you've filled the cracker, use the same process as step 4 to loosen the paper and secure it with ribbon, string or a bow as you did with the other end. Remove and discard the tube end and tape the snap to the paper.
As with the first end you secured, if the snap/popper goes beyond the paper, trim a little off.
Step 7: Embellish and Decorate Your Crackers
Add festive decorations, stickers, stamps, paint, or personalize each cracker for guests, as a final step before displaying your crackers. Be creative and have fun!
The Second Way to Make DIY Crackers
Step 1: Prepare the Cracker Tubes
Similar to the first method, at 11" in total length, I cut the craft tube about 5 ½ - 6 inches to make it look more like a bon-bon. If you prefer, you can cut each roll in thirds. Doing so makes crackers that are about the same size as a toilet paper roll, which you can also use.
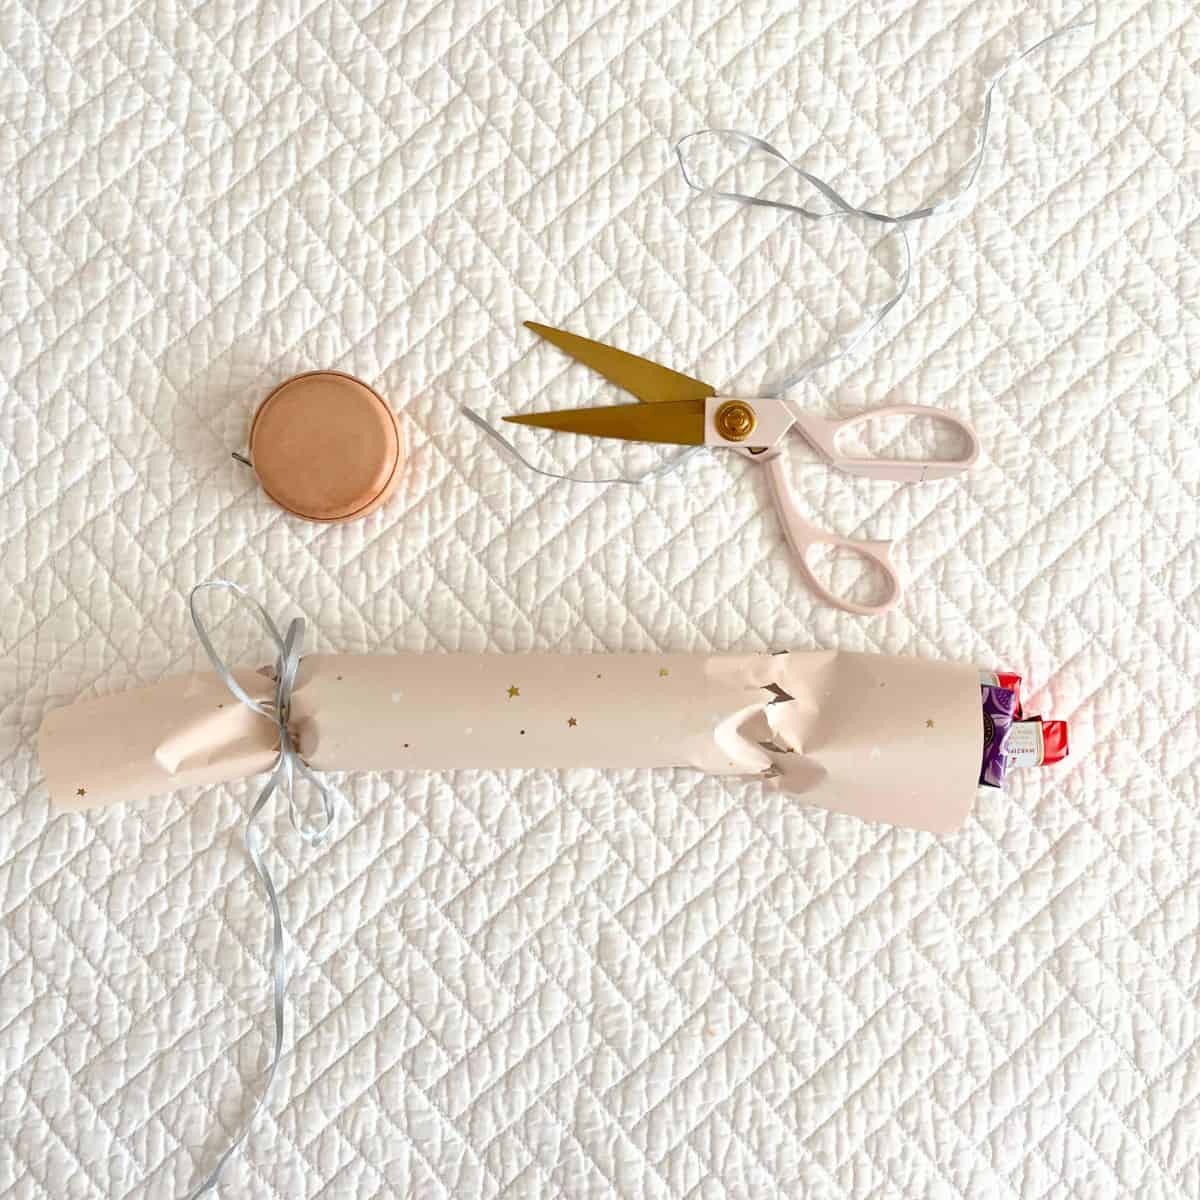
Step 2: Cut the Paper to Size
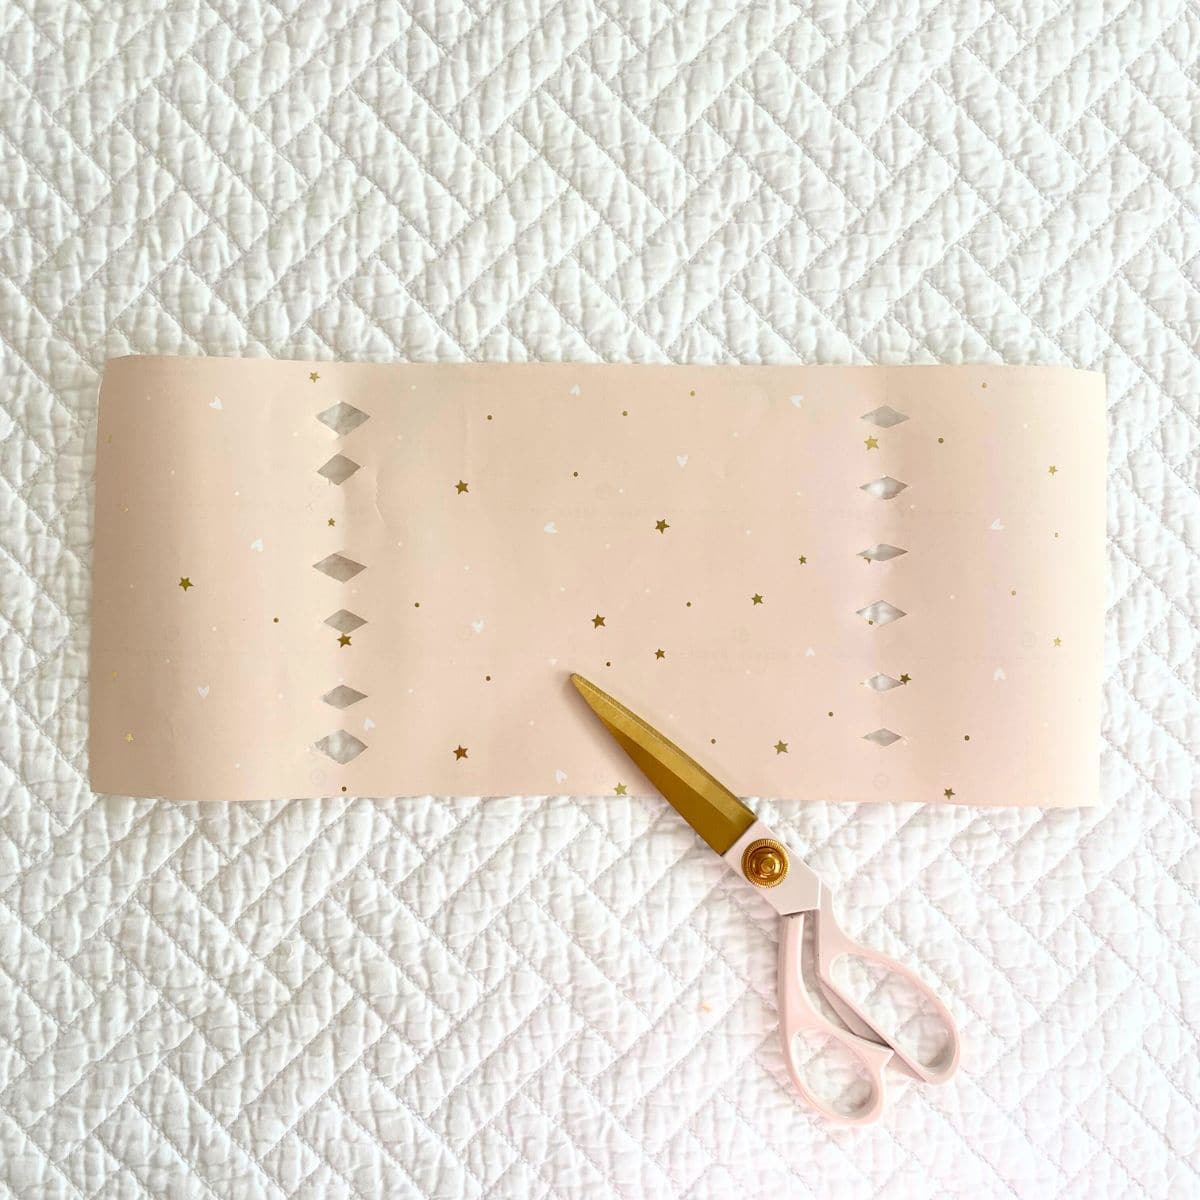
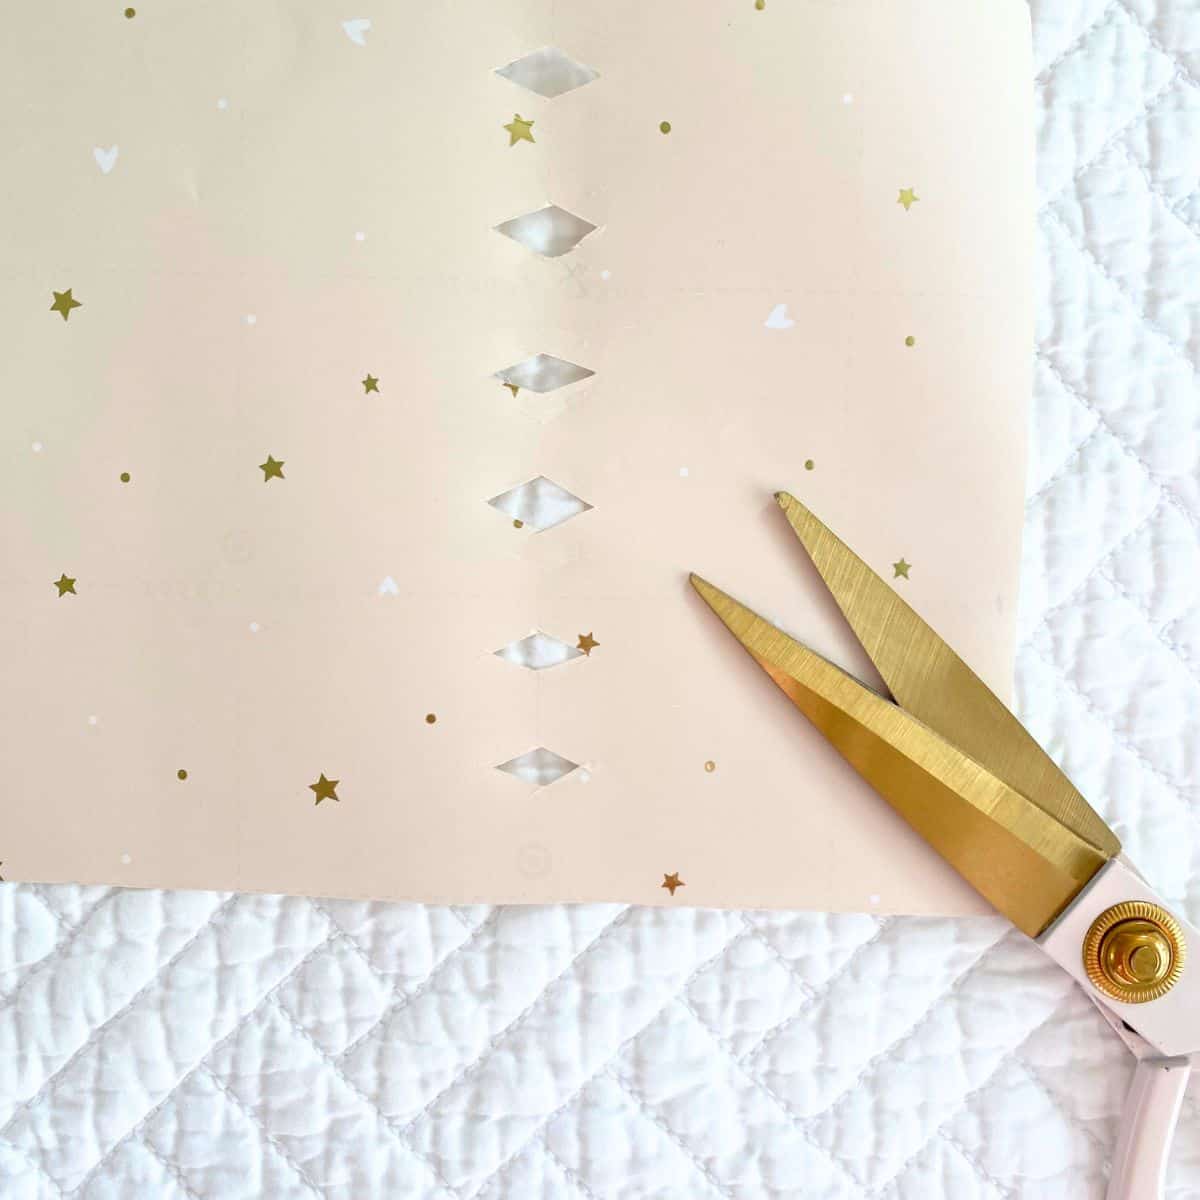
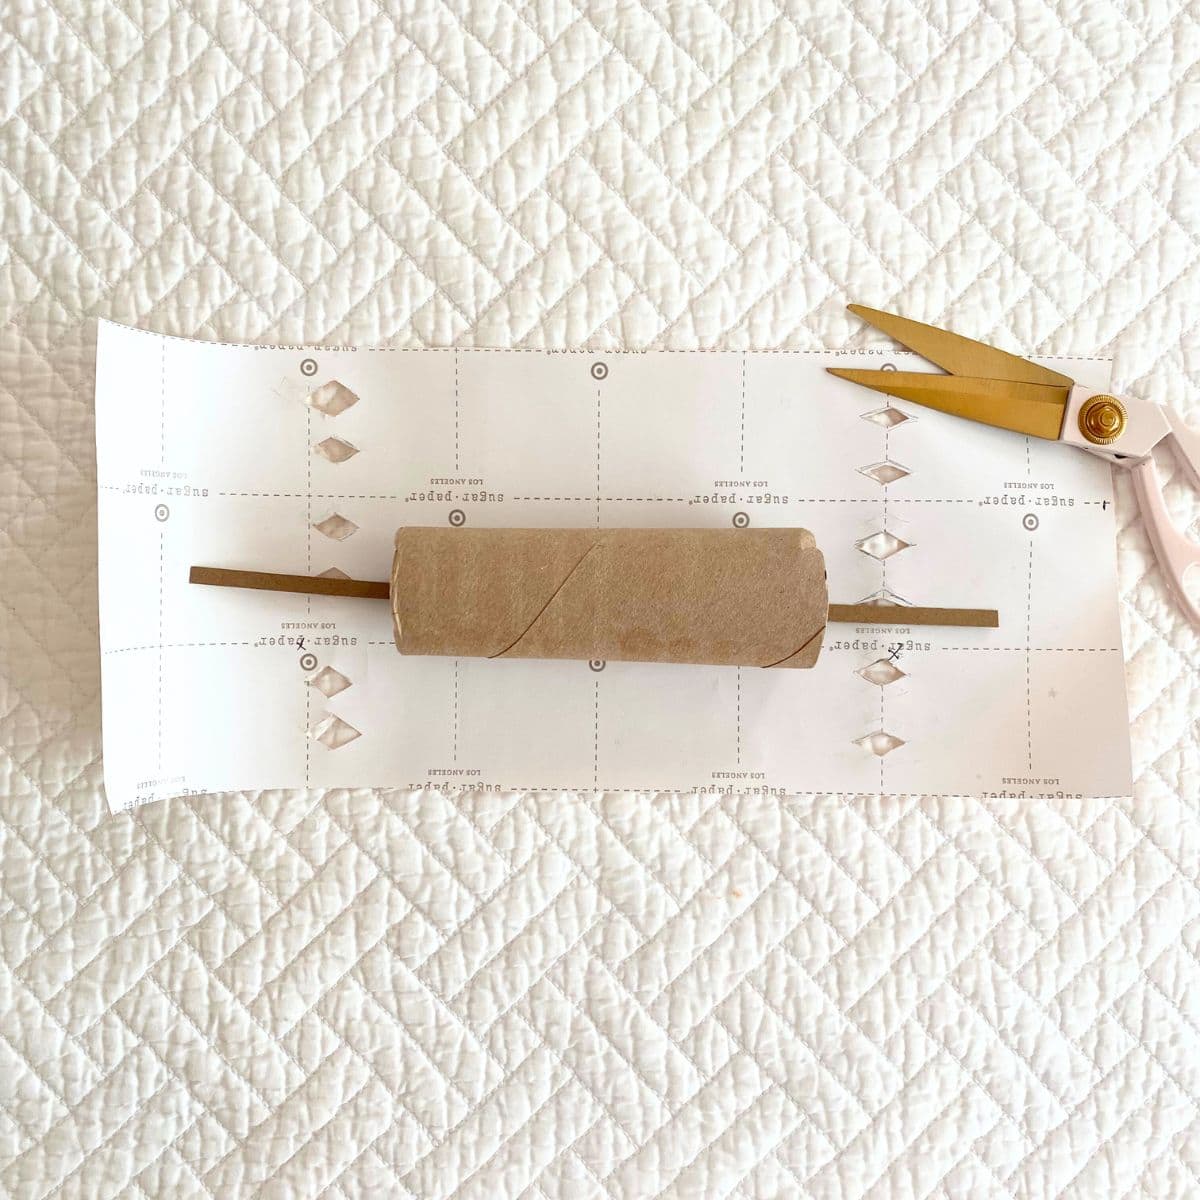
Since you will be cutting a diamond pattern in the paper, measure your paper to about three times the size of the cracker tube. With a pencil, draw diamonds along each end of the paper, but leave about ¼ to ½ inch of paper between the diamonds and the craft tube. Use an exacto knife to cut out the diamond shapes. Discard the diamond-shaped paper scraps.
Step 3: Add the Snap/Popper and Wrap the Cracker
Skip to step 4 if you are not using snaps/poppers in your crackers. Place the snap inside at the center of the middle tube and tape/glue it inside the tube at each end. Do NOT tape or glue the middle of the snap since that is where the snap/pop comes from and you don't want to interfere with it. Replace the tube ends. Then, wrap the paper around the tube, overlapping ever so slightly and secure it with tape/glue at the center of the tube where the slightly overlapped paper meets.
Step 4: Close One End with Beautiful Ribbon
At one end, pull the end tube out just beyond the diamond, scrunch the paper together at the diamond pattern and secure it with a ribbon, bow or string. Tape the snap to the paper to secure it in place. Leave the other end open.
If the snap/popper goes beyond the paper, trim a little off so it doesn't show. Don't trim too much, because you need to be able to pull it with the paper to make the snap sound upon opening.
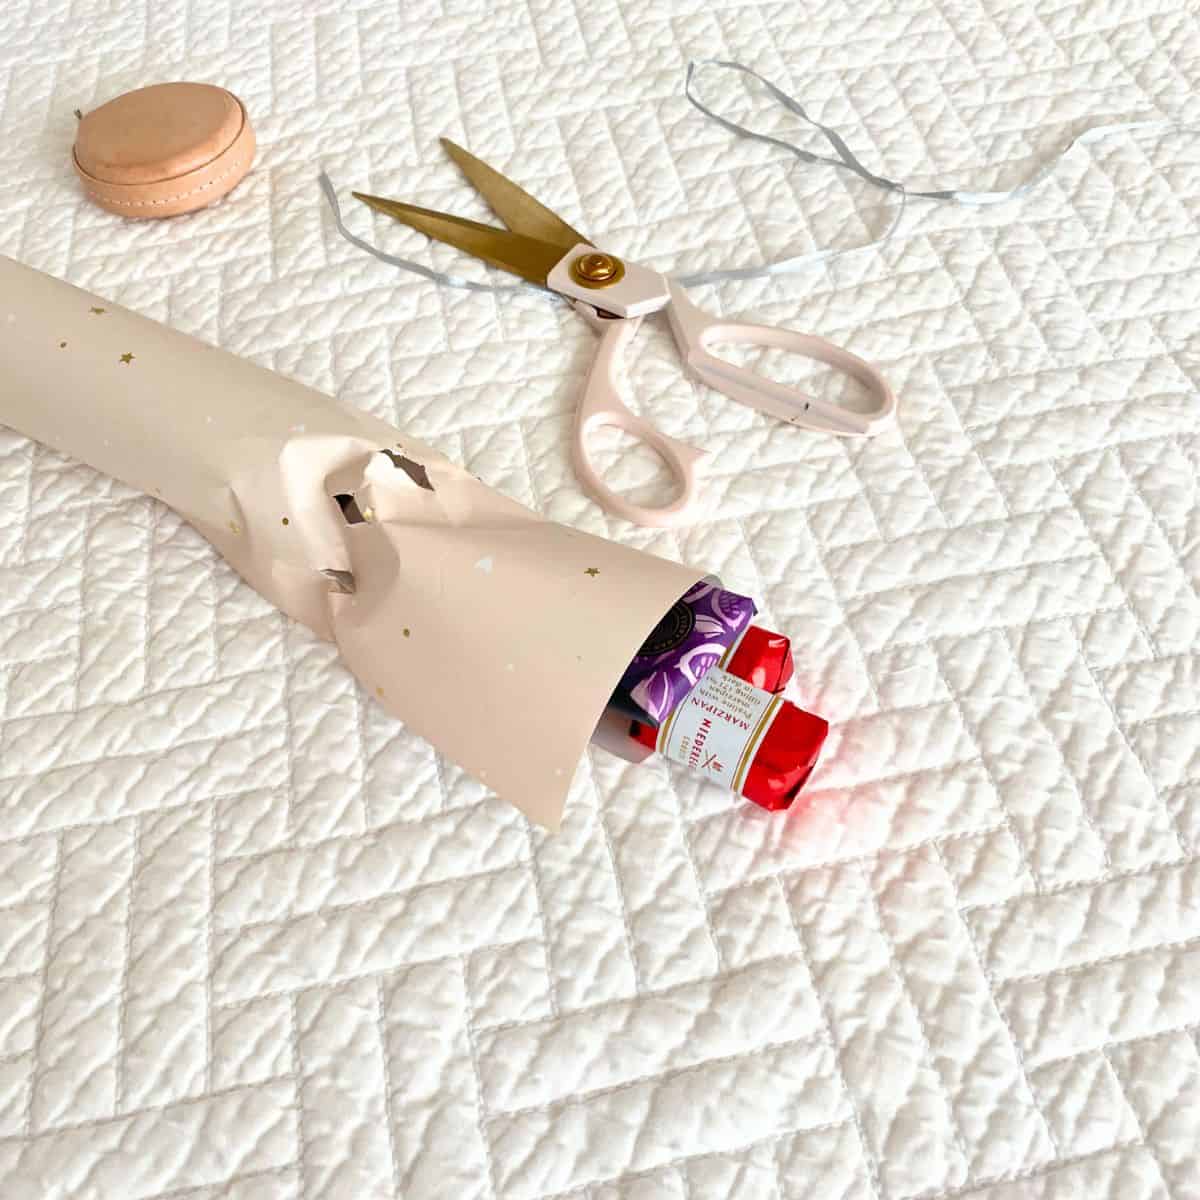
Step 5: Fill the Cracker with Treats
At the open end, fill the cracker with treats. This is where you can get creative with candy, little sweets, jewelry, or anything you can think of! As previously mentioned earlier, try not to buy junk that will end up in the trash. Keep your audience, theme, holiday, or type of party in mind. Don't make it too heavy.
Step 6: Close and Secure the Other End
After you've filled the cracker, use the same process as step 4 to secure the end with ribbon, string or a bow. Tape the snap to the paper to secure it in place. Remove and discard the tube end.
As with the first end you secured, if the snap/popper goes beyond the paper, trim a little off.
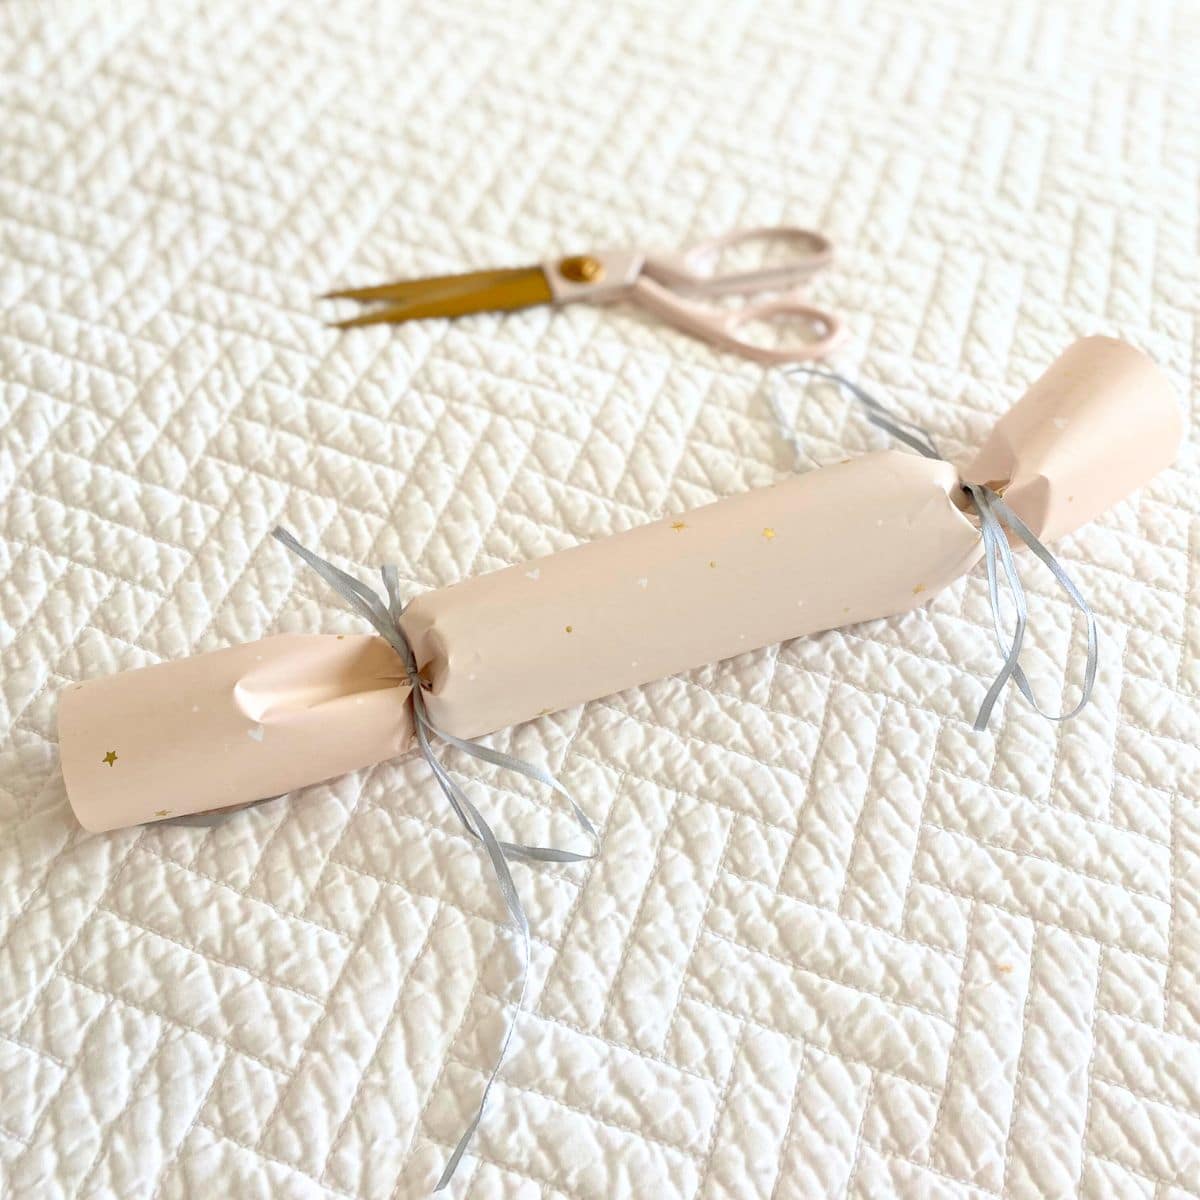
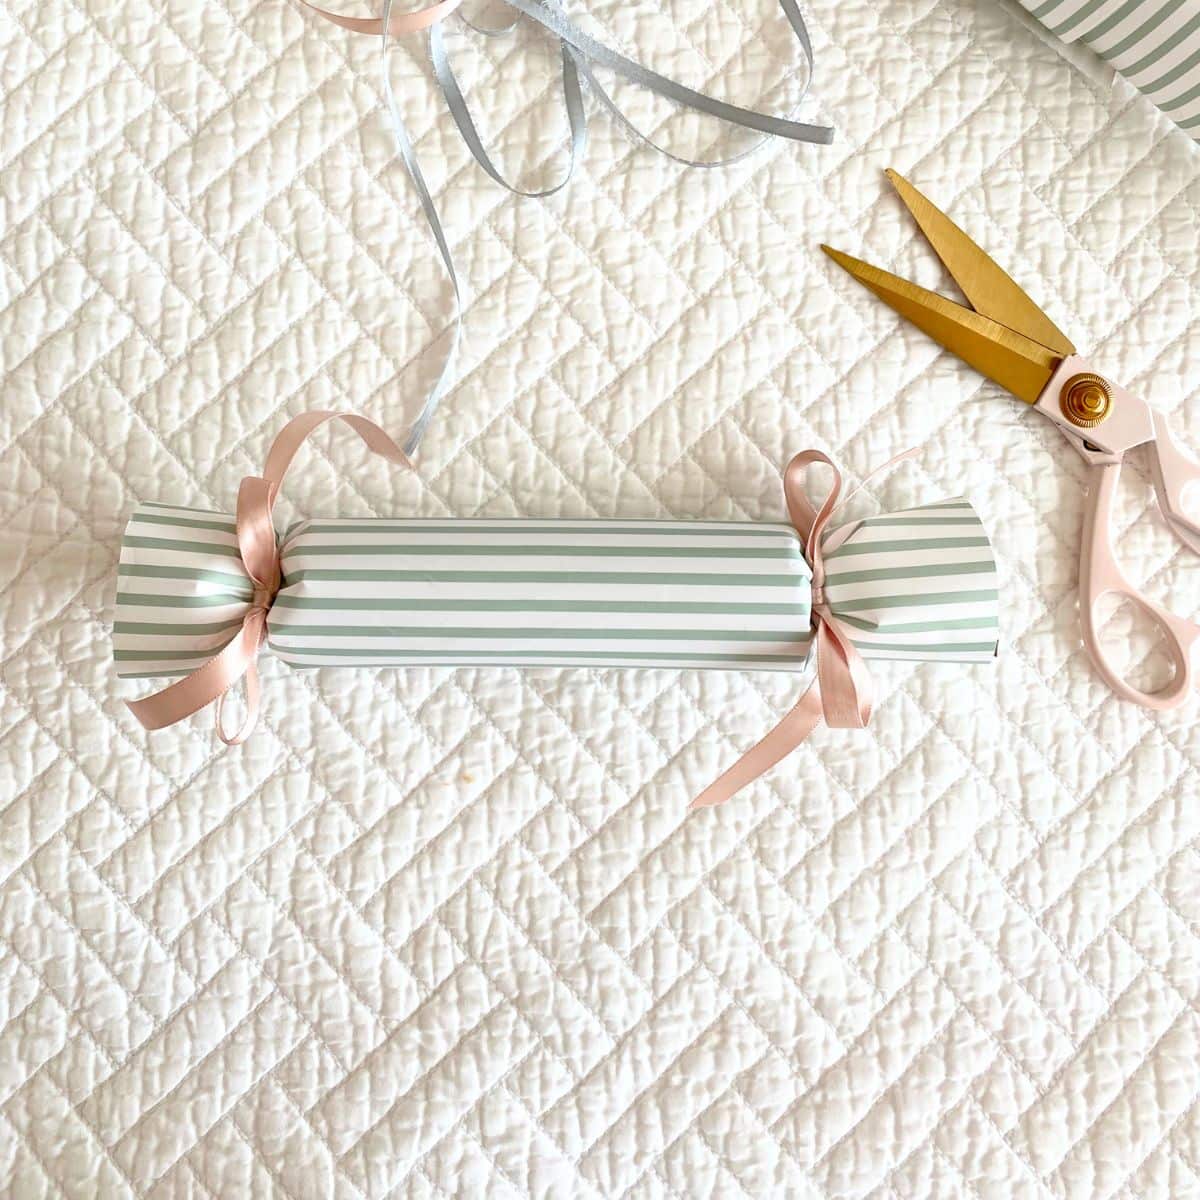
Step 7: Embellish and Decorate Your Crackers
Add festive decorations, stickers, stamps, paint, or personalize each cracker for guests, as a final step before displaying your crackers. Be creative and have fun!
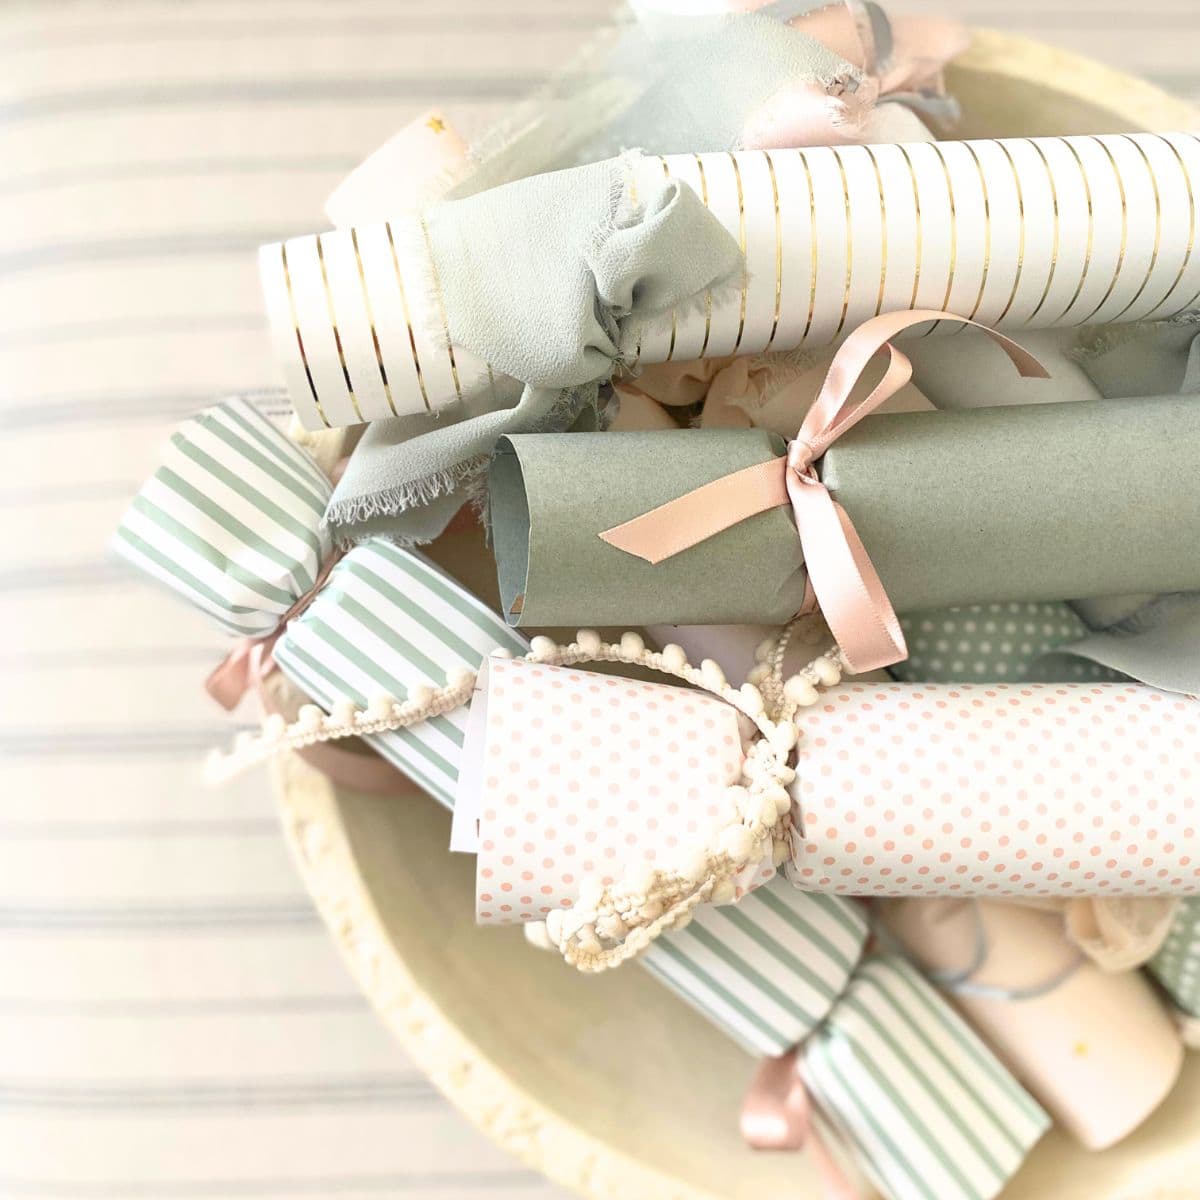
Now, display your crackers for all to see while they anticipate what's to come!
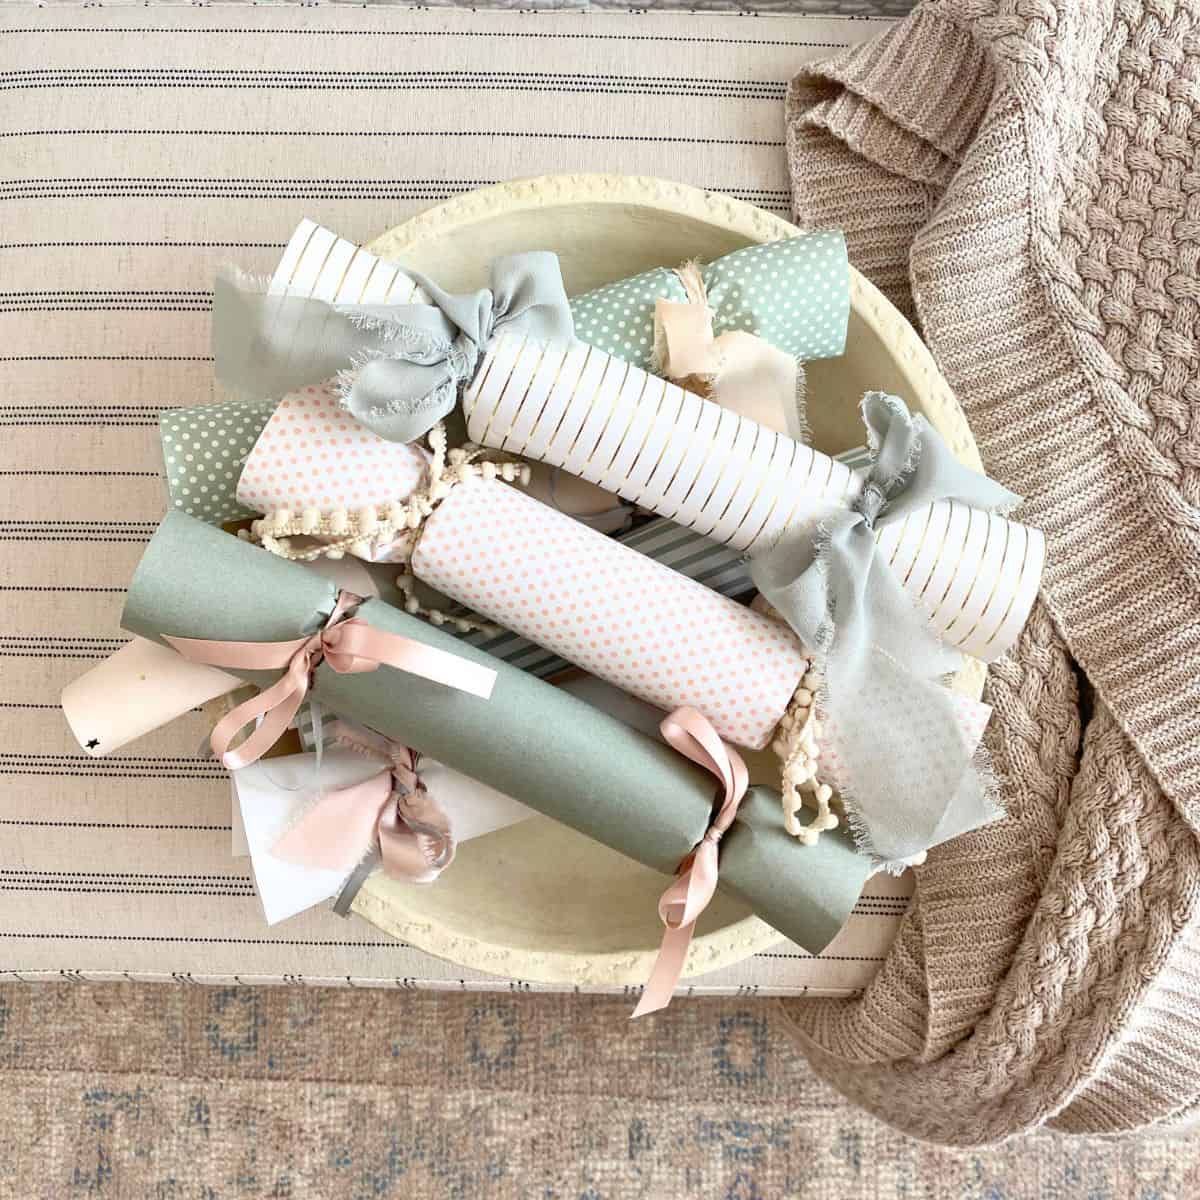
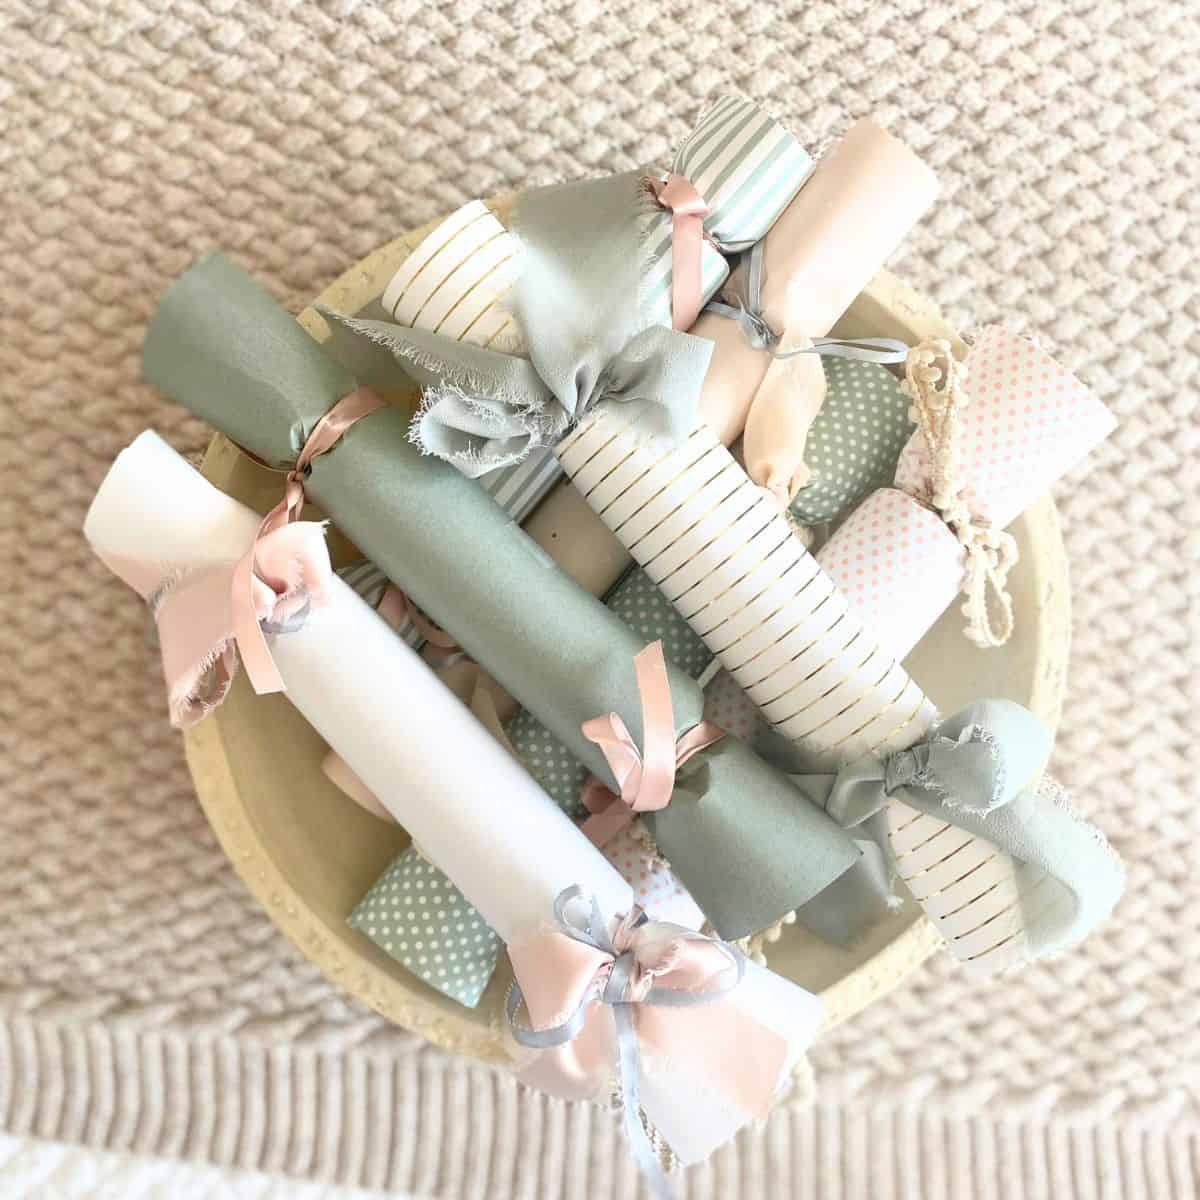
- Neatly stack them in a decorative basket or tray
- Lay them under the Christmas tree with other presents
- Hang them on the tree with pretty ribbon
- Position one at each place setting on a table decorated for the festivities
When you're ready, gather round to pop them open!
I hope your Christmas crackers are the hit of your holiday party this year! Leave a comment and let me know how it went!
Leave a Reply