
Making your own DIY mini frame Christmas ornaments is an easy craft project that adds sentimentality and charm to your holiday decor. Store bought ornaments are wonderful, but mixing in handmade ornaments makes the holiday season feel even more special.
Using mini photo frames, create one-of-a-kind Christmas ornaments to fit in with the rest of your decor. These are just a few ideas to make your own DIY mini photo frame ornaments.
This post may contain affiliate links which we may receive a small commission when some items are purchased at no additional cost to you. As an Amazon Associate we earn from qualifying purchases. Read the full disclosure.
If you have ever seen tiny photo frames, you know how charming they can be. Adding a few of those frames to your Christmas tree, mantel, or hanging from garland is magical around the holidays.
I picked up a few mini glass float picture frames at a local craft store. These mini picture frames or these mini float frames variety set are similar, but you get more and maybe at a better price.
What to Put in Mini Picture Frames
At Christmas you can really get creative with colors and patterns. Beyond family photos, you can put whatever suits you in a mini photo frame, such as
- Pressed flowers
- Ribbon art
- Family photos
- Landscape painting
- Printable art
- Gorgeous wallpaper
- Piece of pretty fabric
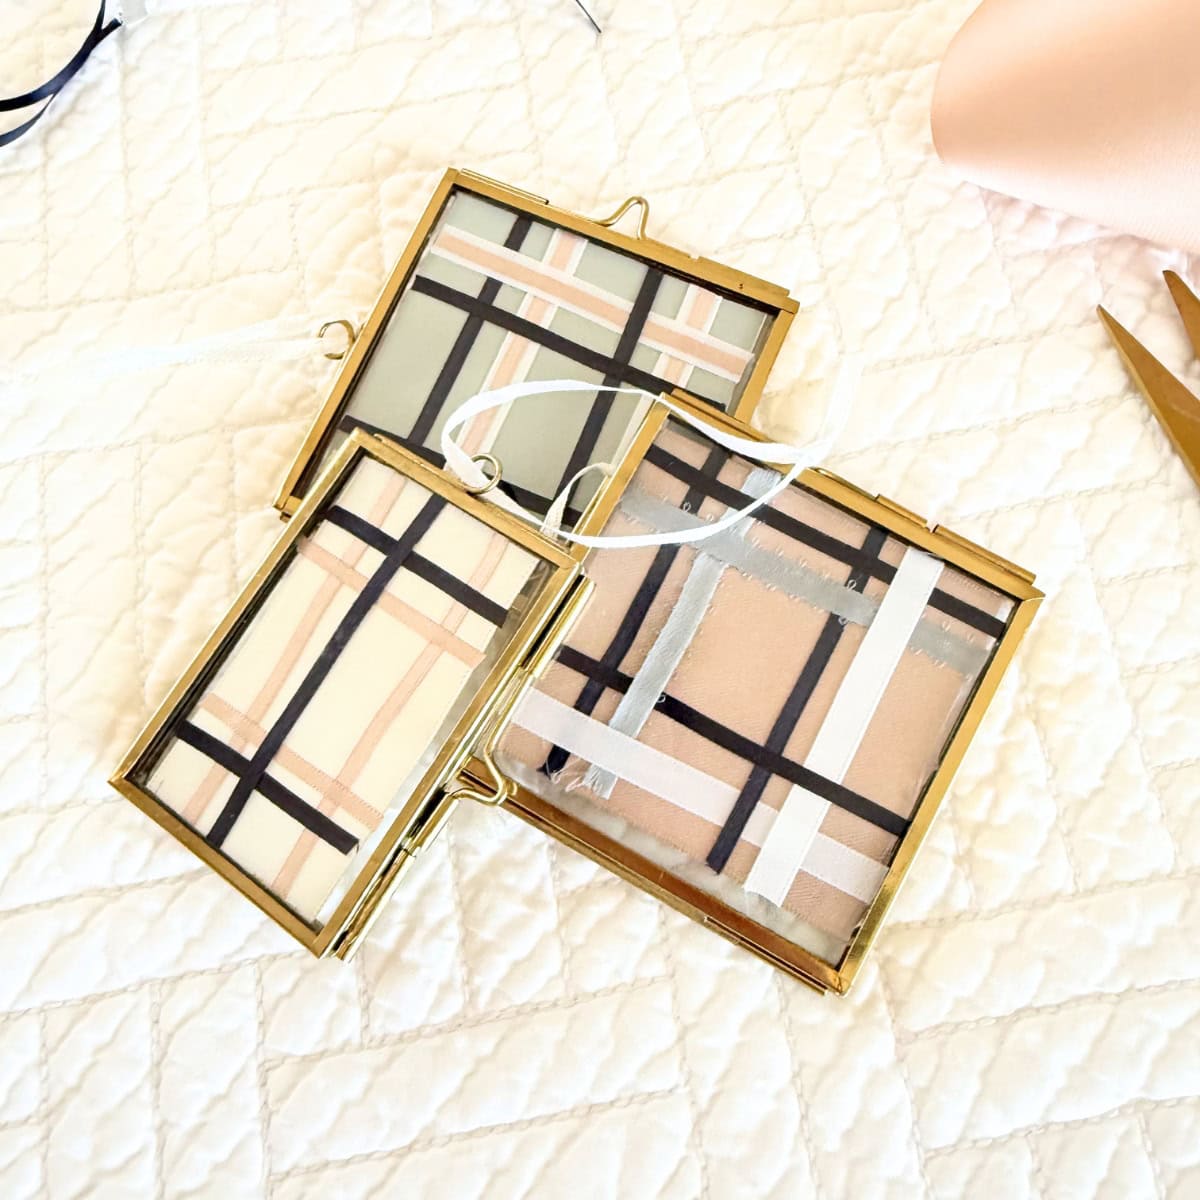
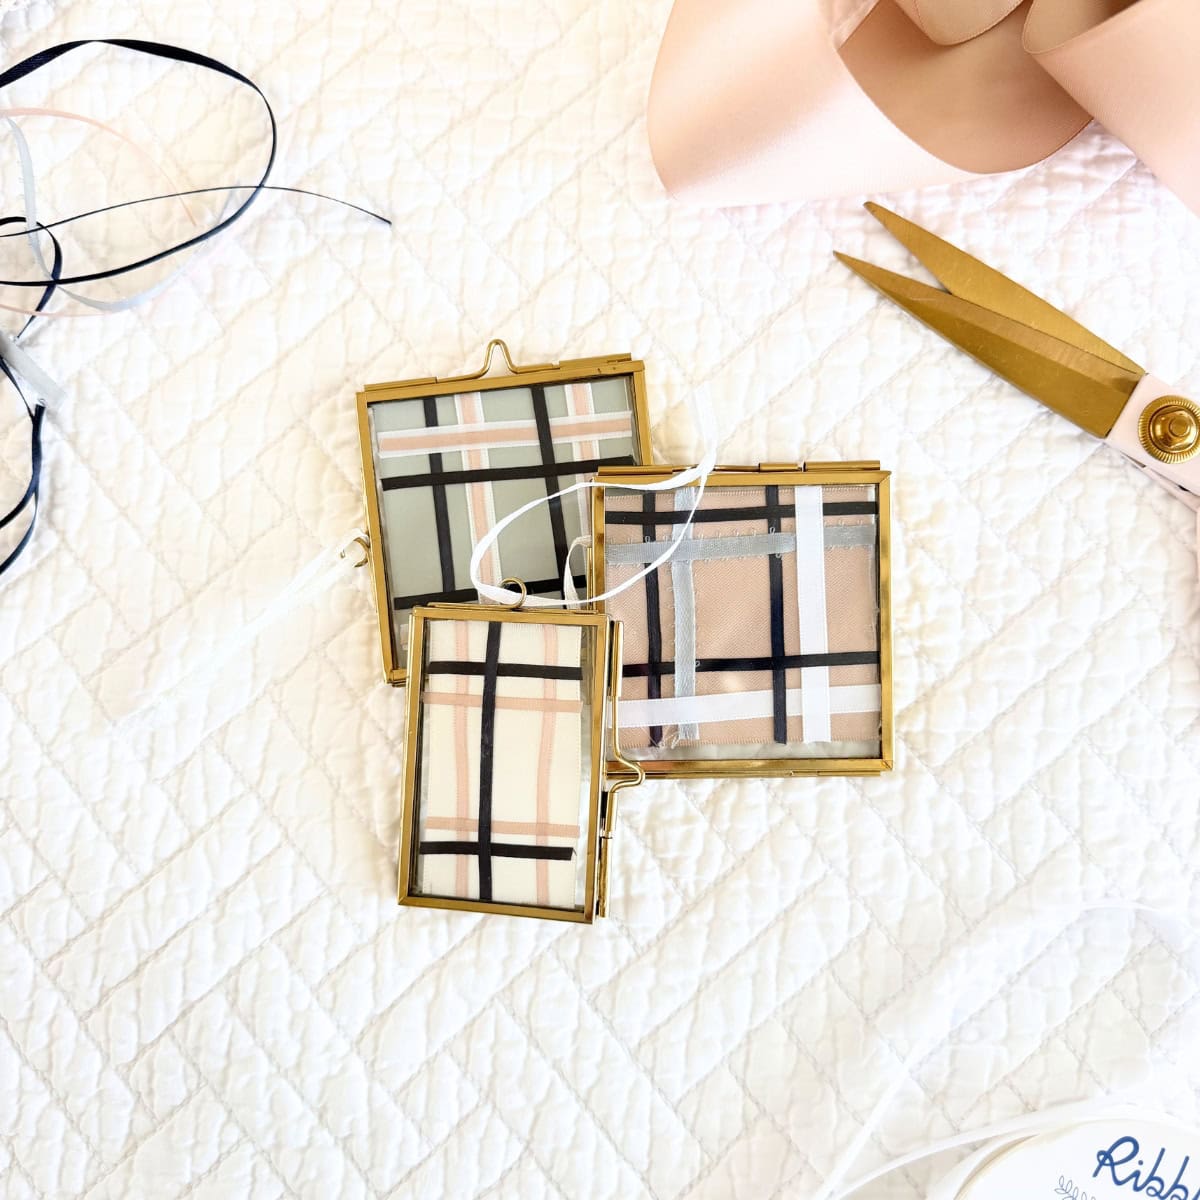
For my mini frame Christmas ornaments, I wanted to create a plaid design using ribbon in the color palette that would go with our other Christmas decor. A few years ago, I switched out our Christmas color palette to dusty blues, creams and whites, blush pinks, and sage green to make it feel more calm, and I haven't looked back.
Last year I created a Captivating Christmas Tree Decorated with Flowers, while the prior years I did a Coastal Inspired Christmas Tree and a Dreamy Pastel Christmas Tree.
Supplies You May Need
To make a lovely DIY mini frame ornament, you will need a number of supplies. Your list may also differ from mine, depending on what you plan to put in the frames.
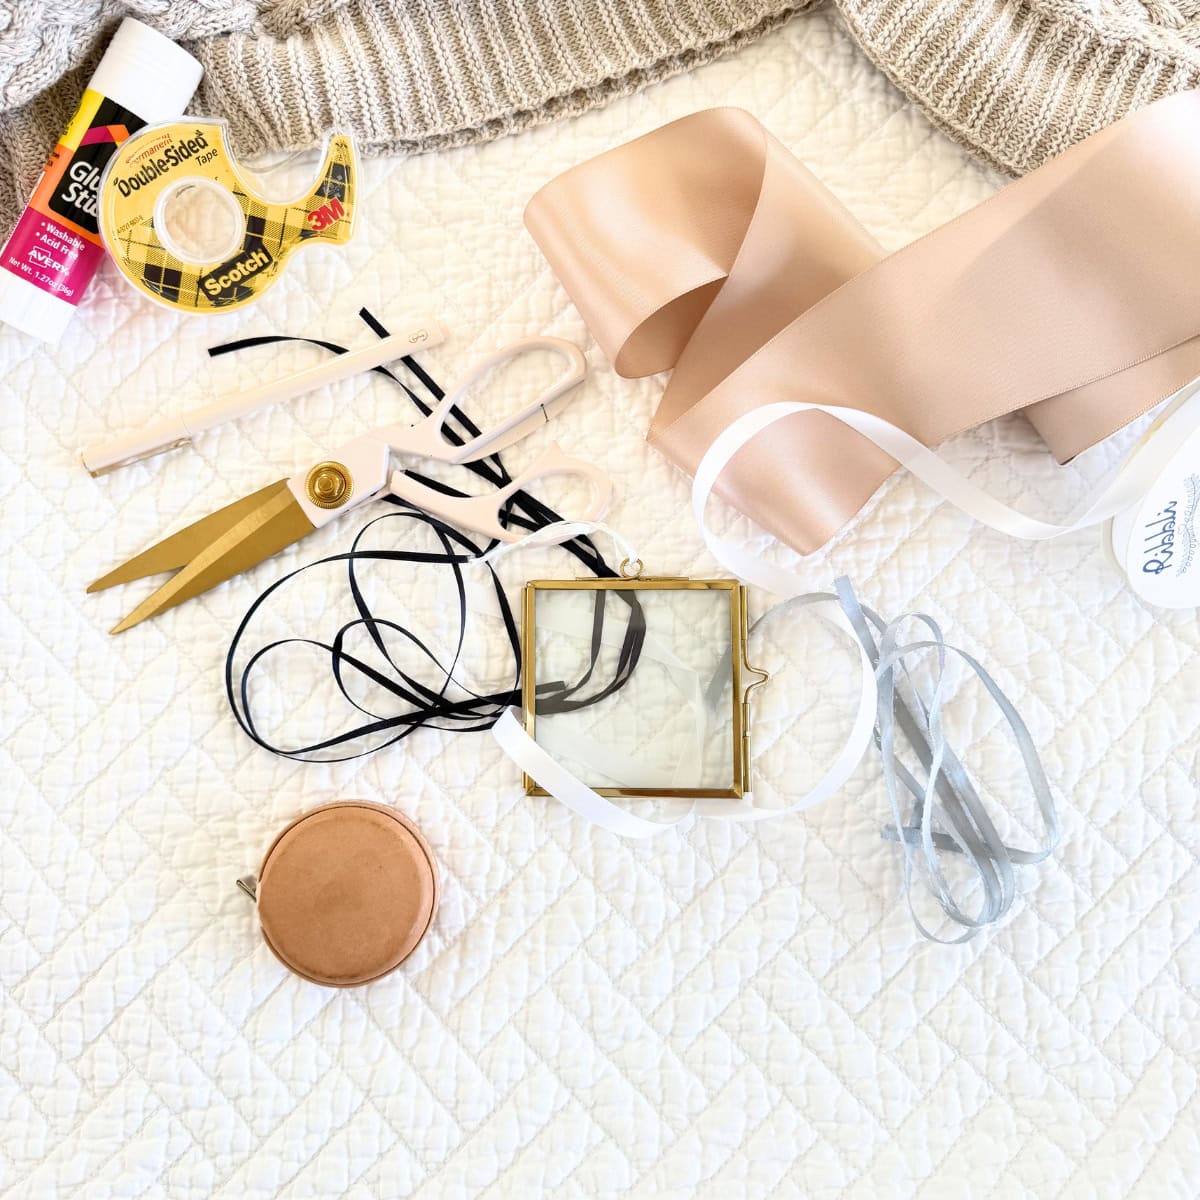
You may need some of these supplies:
- Mini glass picture frames - You don't have to use glass picture frames. Instead, you could use porcelain or wood, whatever look you're going for. I used these mini glass float picture frames that have a brass frame and latch closure that I found at a local craft store. These mini picture frames or these mini float frames variety set are similar, but you get more and maybe at a better price.
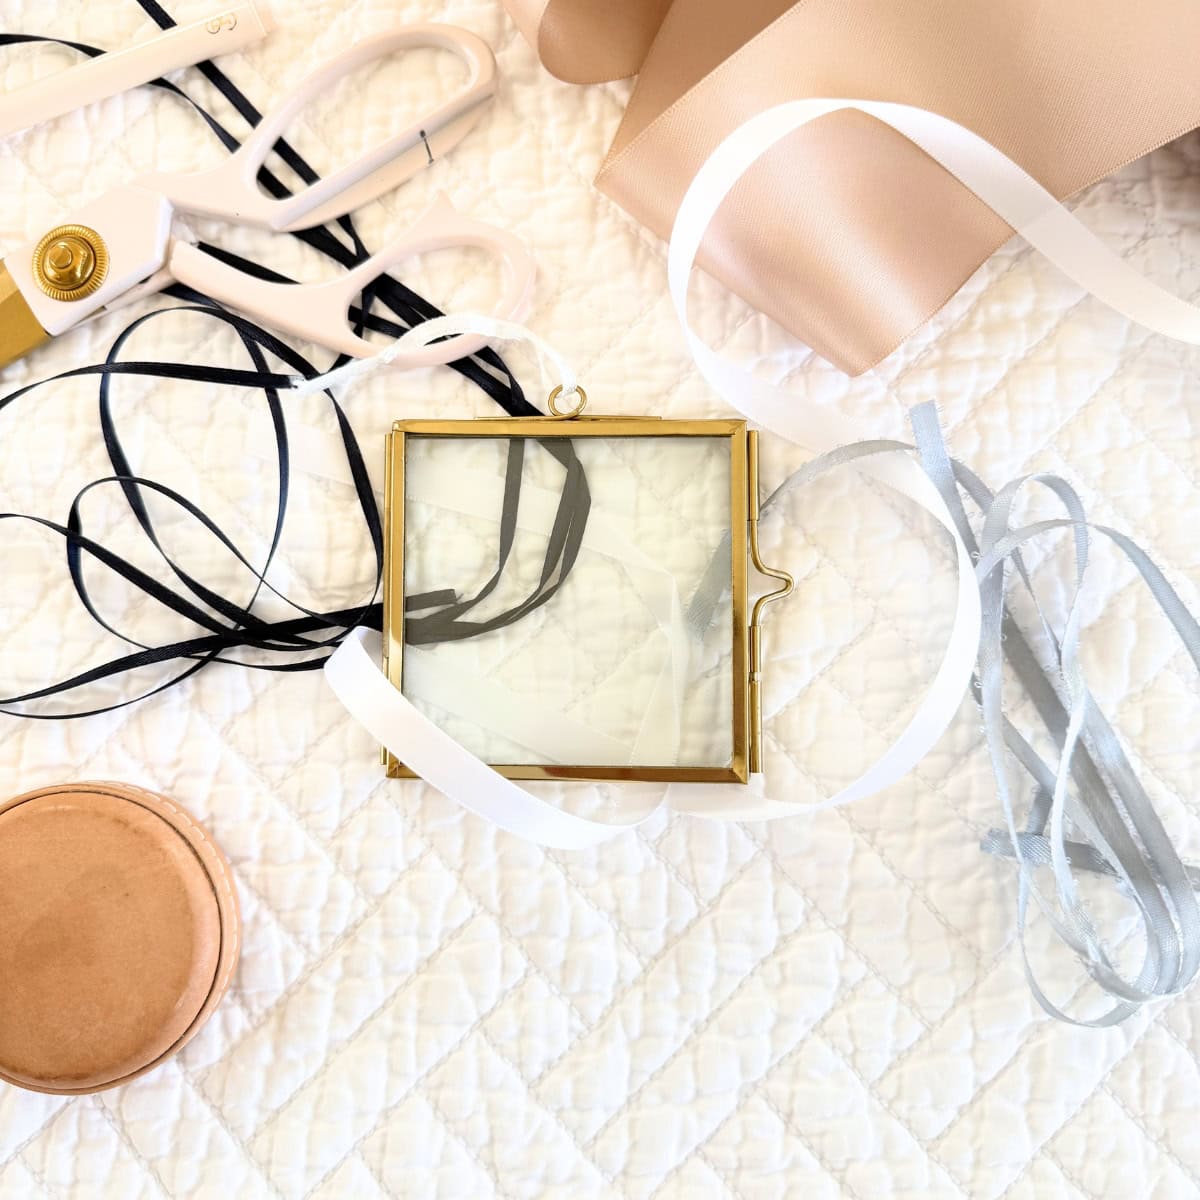
- Ribbons (optional) - Because I was making ribbon art in my frames, I used a few different colors and sizes for my ornaments. These are the ribbons I used: 2 ½ inch blush pink satin ribbon (similar, but 3 inches), 1 ½ inch ivory satin ribbon (similar), ¼ inch white satin ribbon, ¼ inch light blue satin ribbon (similar), ⅛ inch taupe pink satin ribbon (similar), and ⅛ inch navy blue satin ribbon (similar).
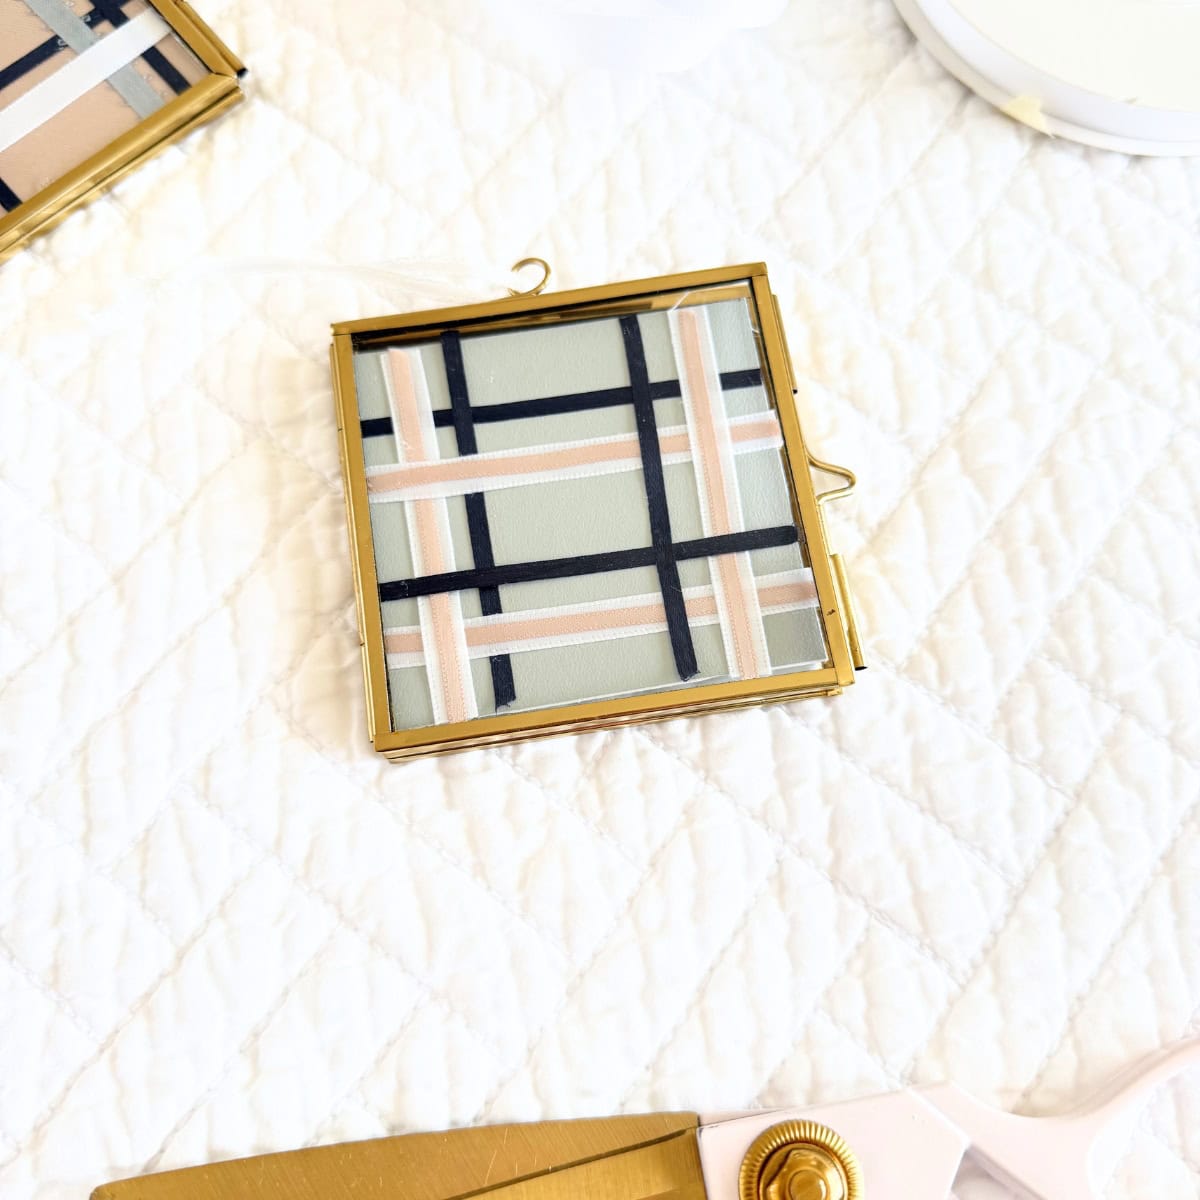
- Peel and stick paint sheet (optional) - Real peel & stick paint sample sheet. It's real paint which means the sheen and quality is great for this DIY project, without the mess of painting. I used a portion of a Farrow & Ball Light Blue paint sheet as a background for a design in one of the square frames.
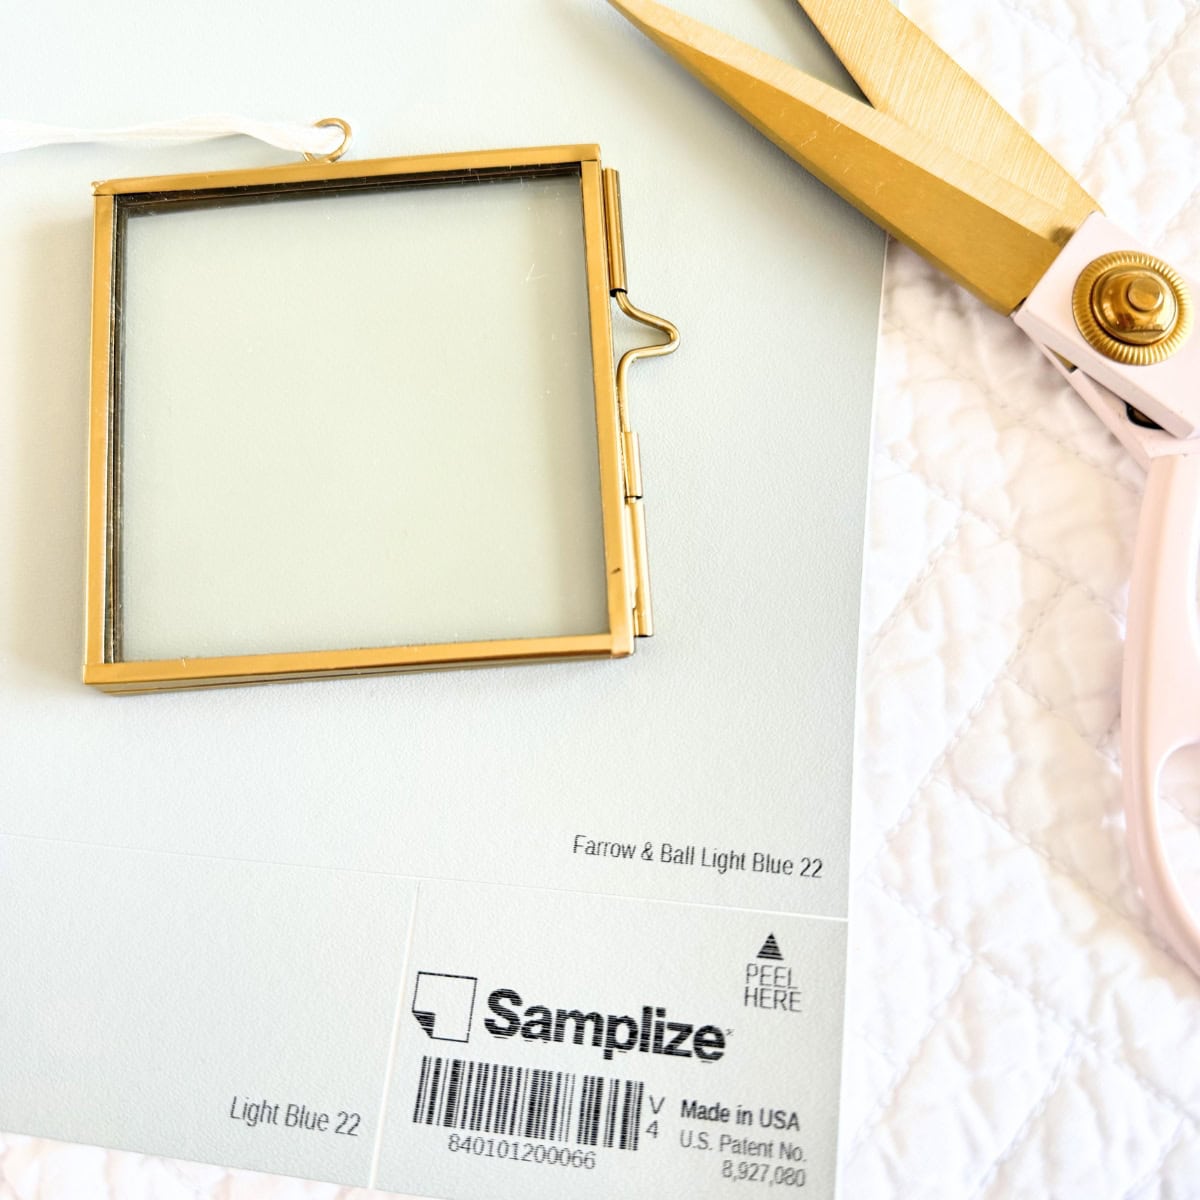
- Scissors - A sharp pair of scissors is crucial for this project. Sadly they don't sell the gorgeous stainless steel blush scissors that I have, these pretty gold scissors or these gold scissors from one of my favorite brands, Sugar Paper, may also work.
- Measuring tape - I find a fabric tape measure to be much easier to use when working with ribbon. Any fabric tape measure will work. That said, if you've read any other posts here on Mornington Lane, you know that I'm extra. I try to buy aesthetically pleasing everyday items. So, this pretty leather tape measure or this tape measures set should work.
- Double sided tape or glue - Double sided tape, a glue stick, or a hot glue gun should work for this project. To keep things simple, I used this acid free glue stick.
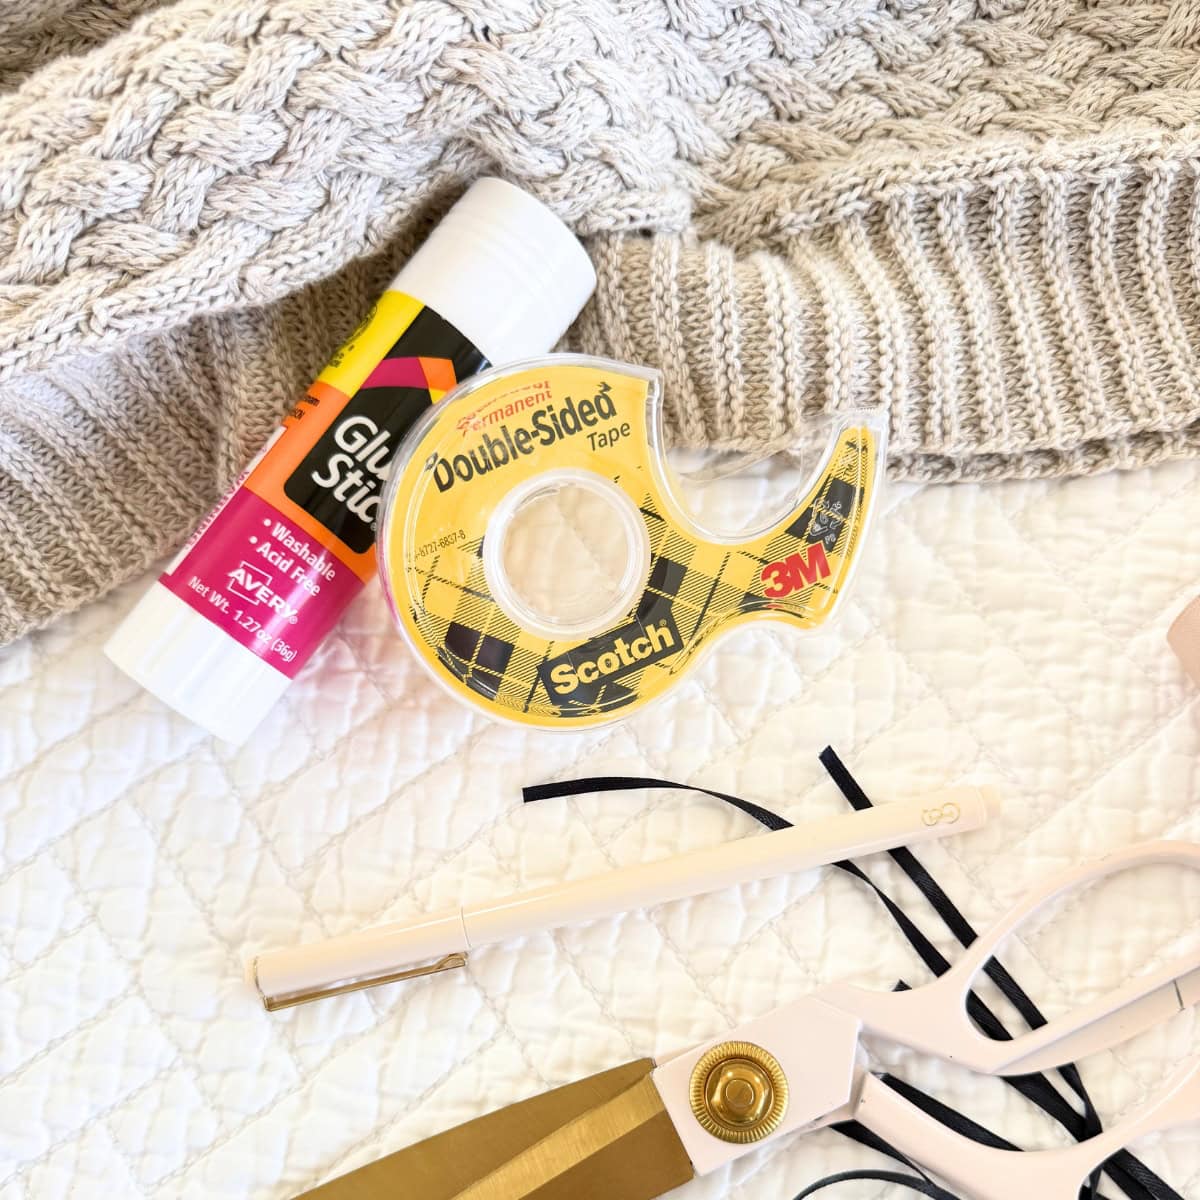
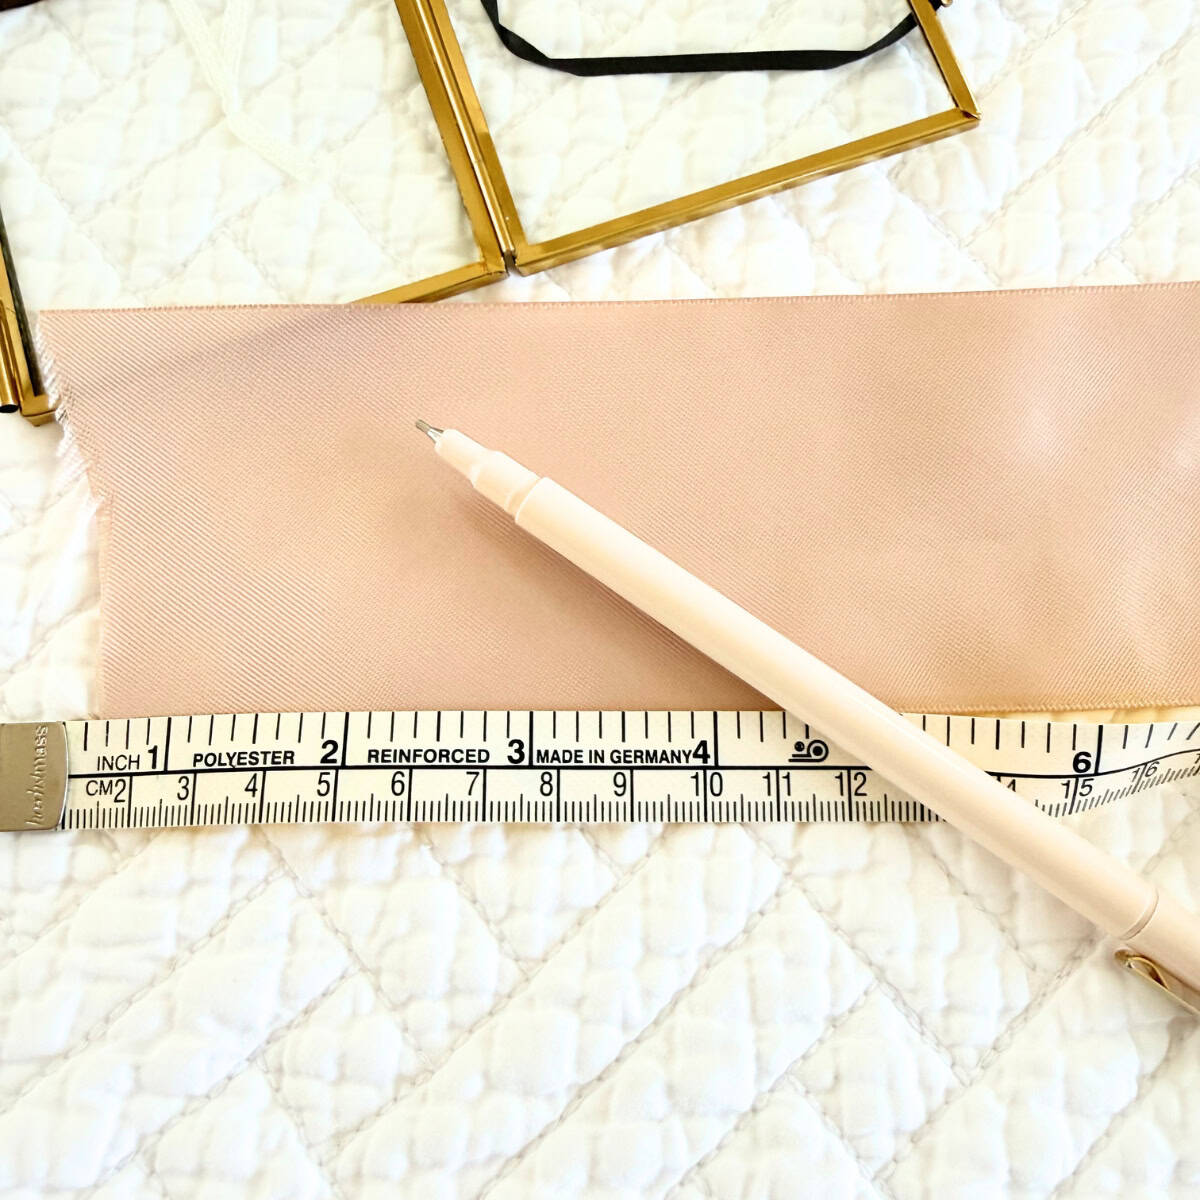
- Pen/Pencil - Should you need to mark a spot to cut, having a pen or pencil on hand is a good idea. I used a pretty felt tip pen (the pale pink color) to mark cutting placement on ribbon and a pencil for the peel and stick paint sheet.
- Scrap paper - Use scrap paper on top of the surface you are crafting on, especially if you are using glue. I have plenty of scrap paper, so that's what I used.
- Other optional embellishments - Pressed flowers, family photos, printable art, landscape painting, wallpaper, or pretty fabric.
Instructions for Mini Frame Ornaments - Two Ways
These steps may differ from what you will do, because there are near endless possibilities to designing what you want.
Below, there are steps describing the two different ways I made my mini frame ornaments: the first is all ribbon and the second is using a peel & stick paint sheet as the background with ribbon on top.
These are the ribbons I used across all three designs:
- 2 ½ inch blush pink satin ribbon (similar, but 3 inches)
- 1 ½ inch ivory satin ribbon (similar)
- ¼ inch white satin ribbon
- ¼ inch light blue satin ribbon (similar)
- ⅛ inch taupe pink satin ribbon (similar)
- ⅛ inch navy blue satin ribbon (similar)
Steps to Make Tiny Frame Ornament with Wide Ribbon Background:
For the first frame, I wanted to create a plaid design using all ribbon in two of the mini frames. So these steps will walk through that process.
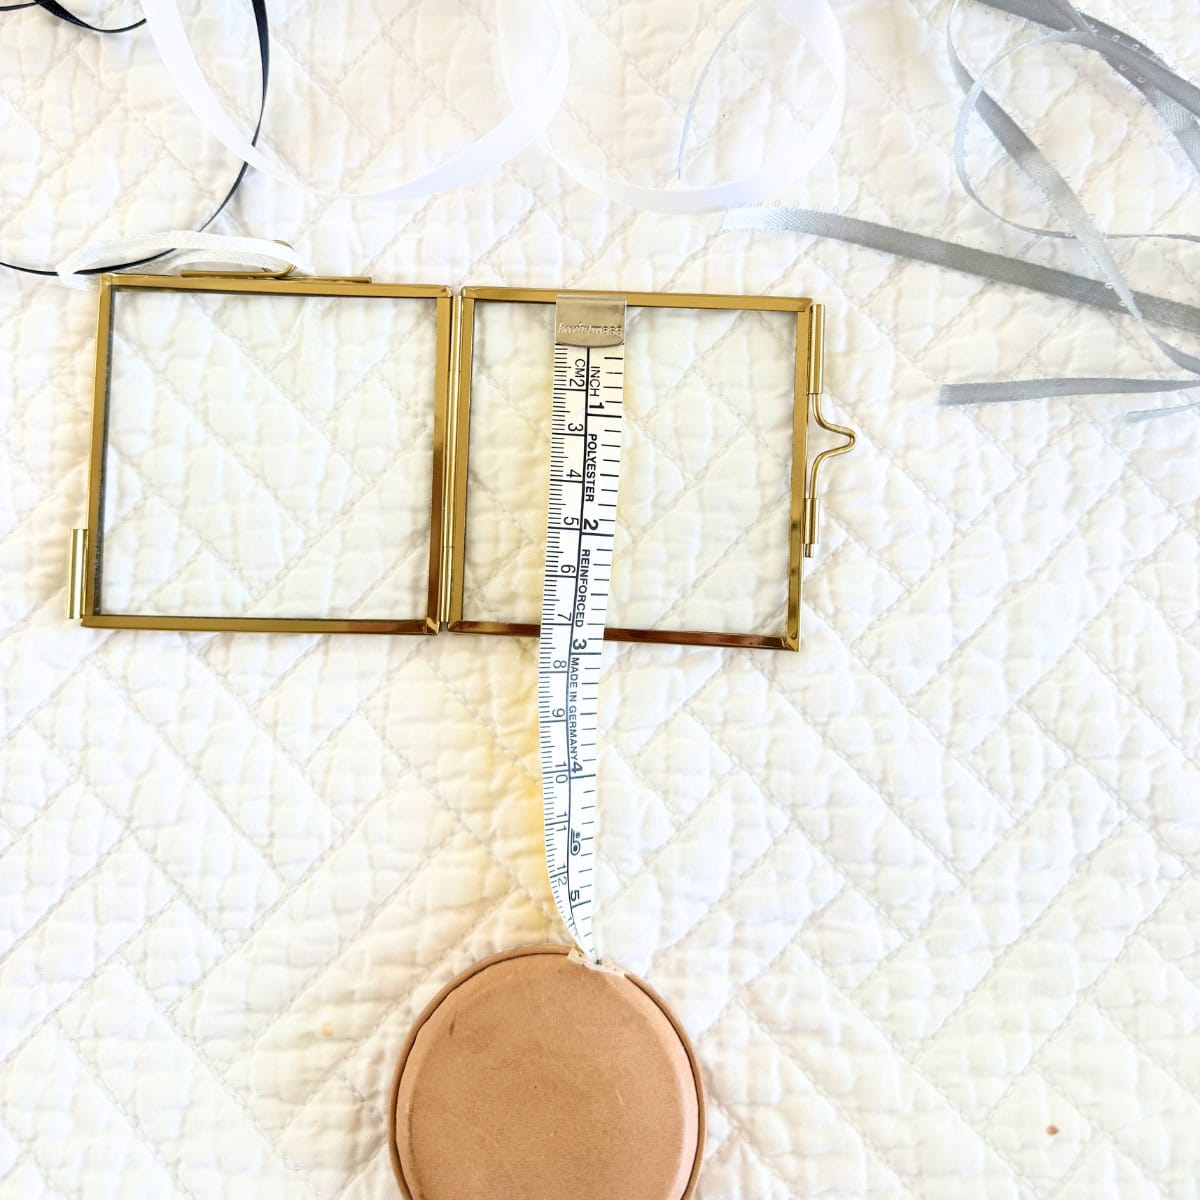
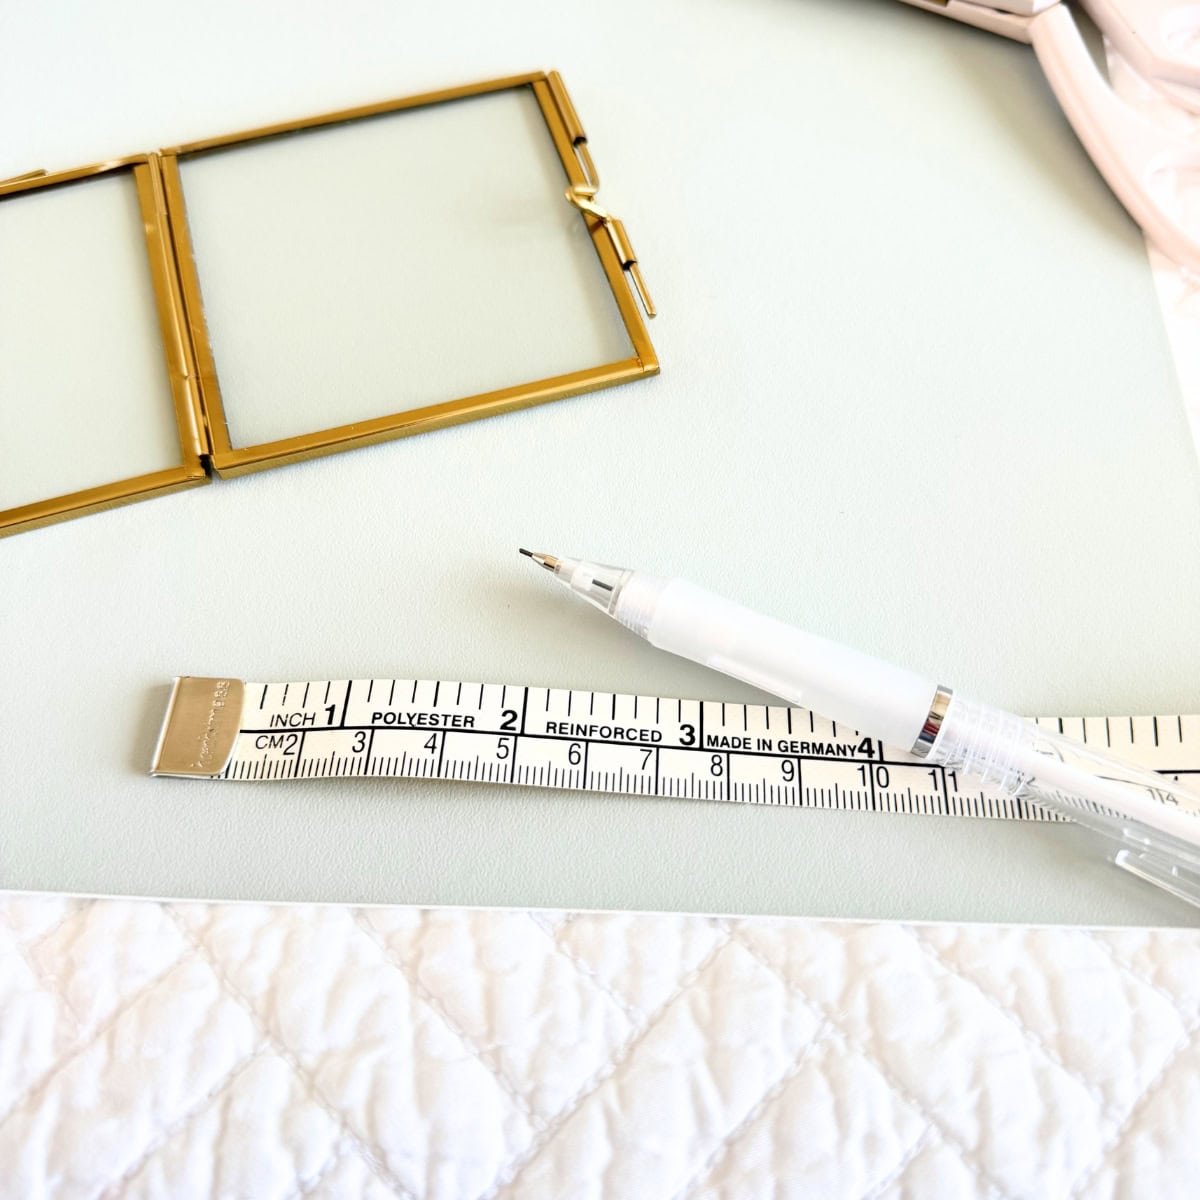
Step 1
Start by measuring the inside of a mini picture frame. Cut the ribbon that will be the background ribbon to the size of the inside frame, but not over the frame edges. You want it to be right up to the edge so it doesn't move, but you don't want it to be over the edge or it won't close. Dry fit the ribbon you cut to the inside frame to ensure it will work for you.
Step 2
Create your design using ribbon and a glue stick on the background ribbon you just cut, but not while inside of the frame. I believe it is much easier to assemble and glue all the pieces on a tabletop versus inside the tiny frame. I mocked up plaid designs in Canva, a graphic design tool I use, to make sure it turned out how I wanted. Place the finished design inside the frame to ensure it can close.
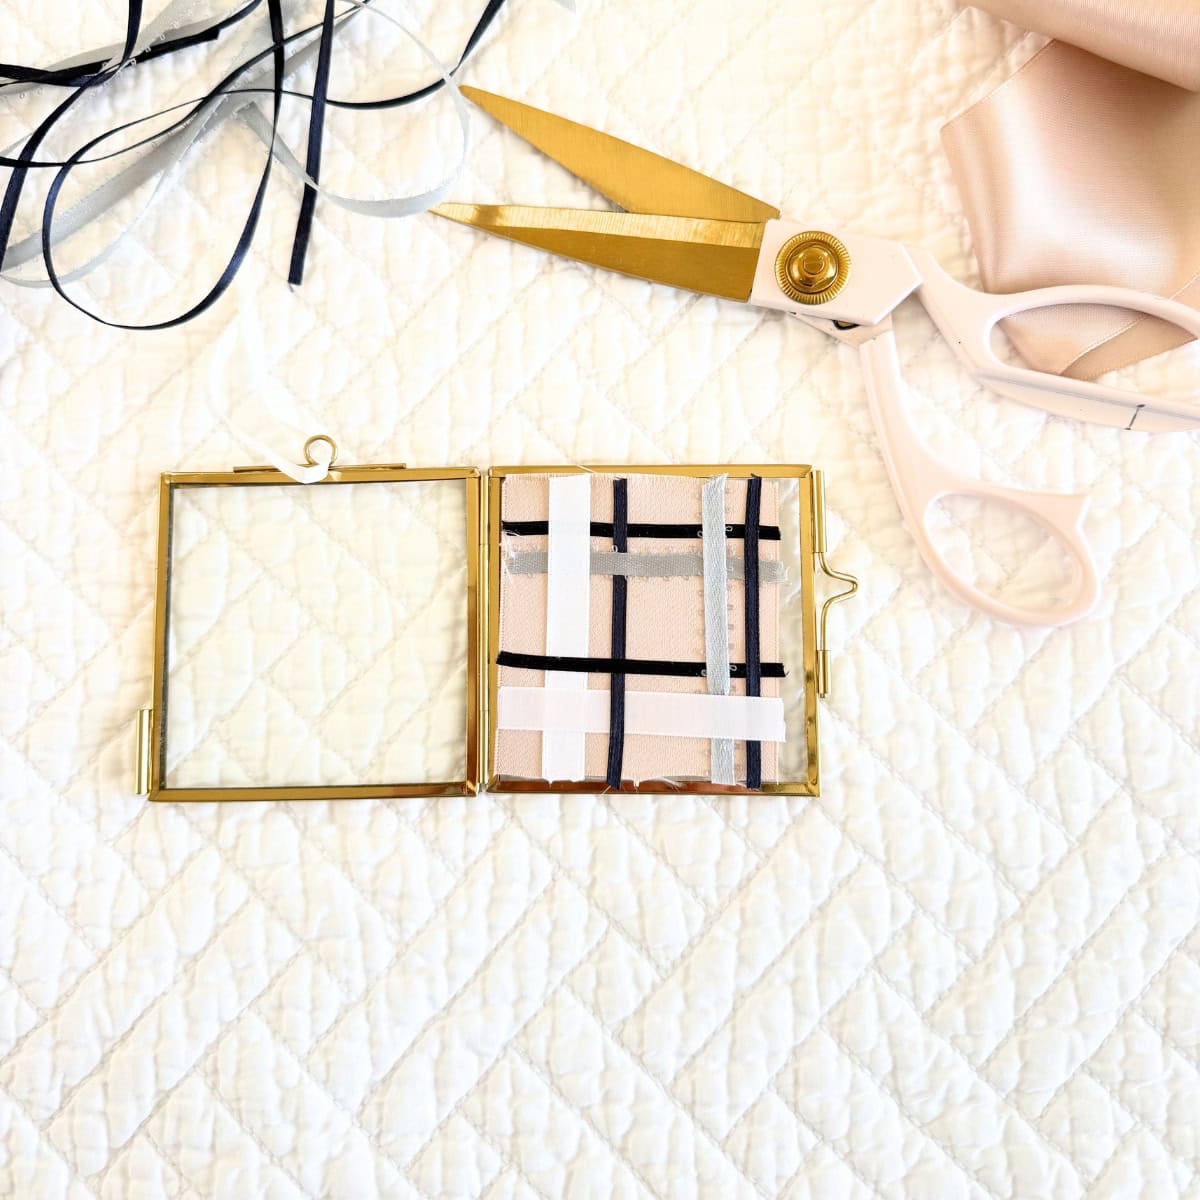


Step 3
There are a couple ways to finish this project. You could glue or use double sided tape to adhere the finished ribbon design to the inside of the frame. Or, you may be able to pressure fit it to the frame and not have to adhere it with glue/tape, but I will leave that up to you. I did not adhere it to the frame, so I can reuse the tiny frames for another project or season when I want to. Instead, I just placed it in the frame and secured the closure and it stayed in place. Note that I used two different size frames for the all ribbon designs, but the steps were identical for the smaller frame.

You can see my cuts aren't perfect and neither are the placement of the ribbons, but that imperfection is what makes them so charming to me. They are clearly handmade ornaments and I love that it shows.
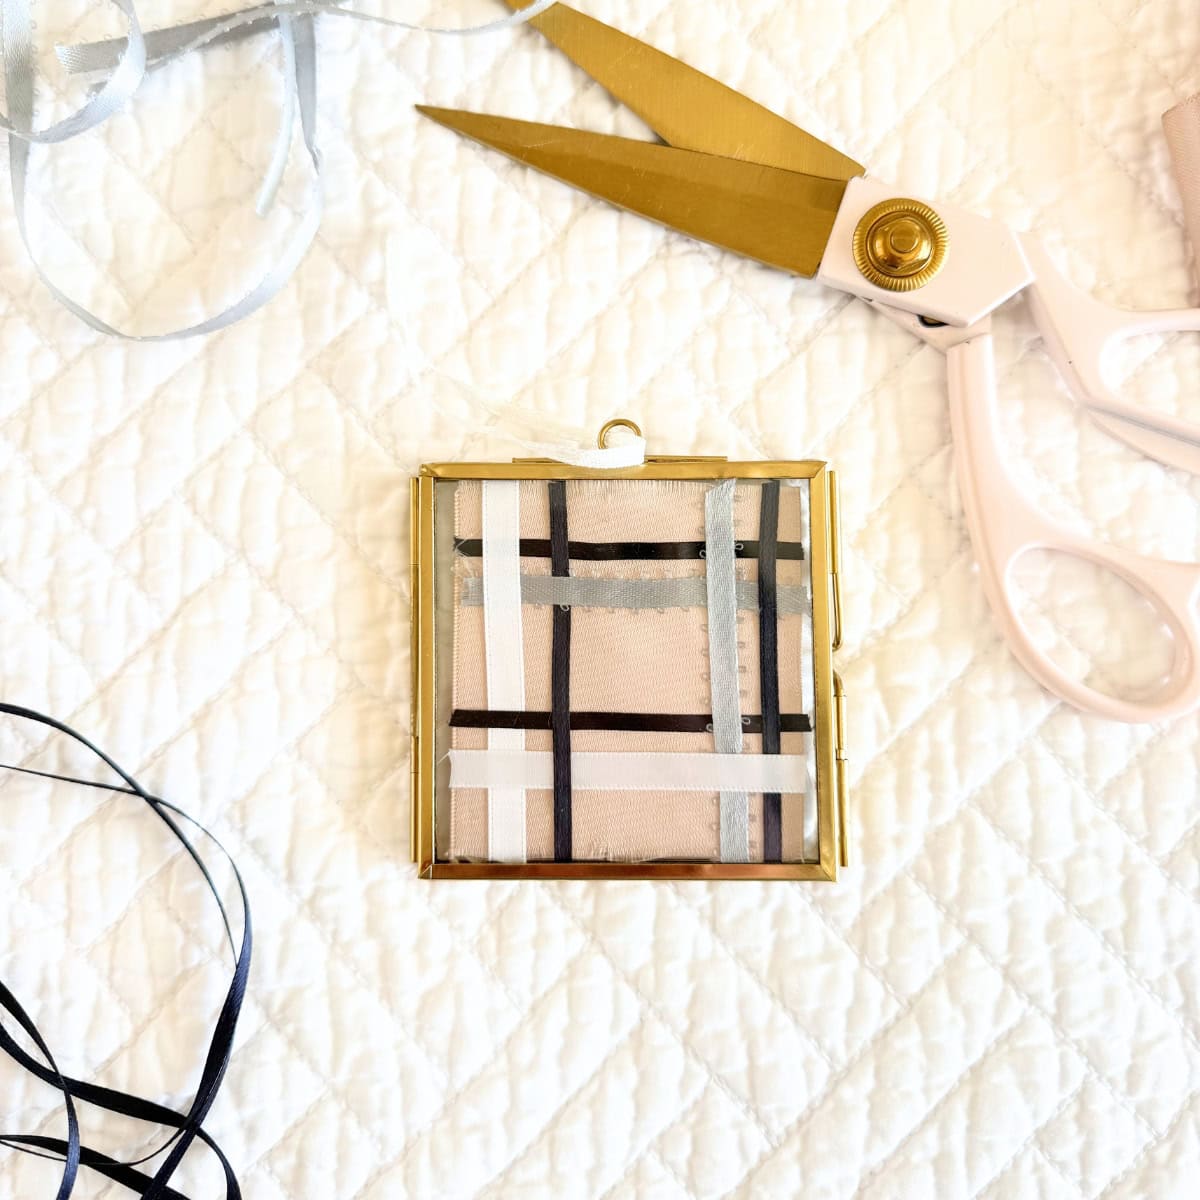
Steps to Make Tiny Frame Ornament with Peel & Stick Paint Sheet Background
For the second frame, I wanted to try using a peel and stick paint sheet as the background. These short instructions walk through that process, which only slightly differ from the previous steps.
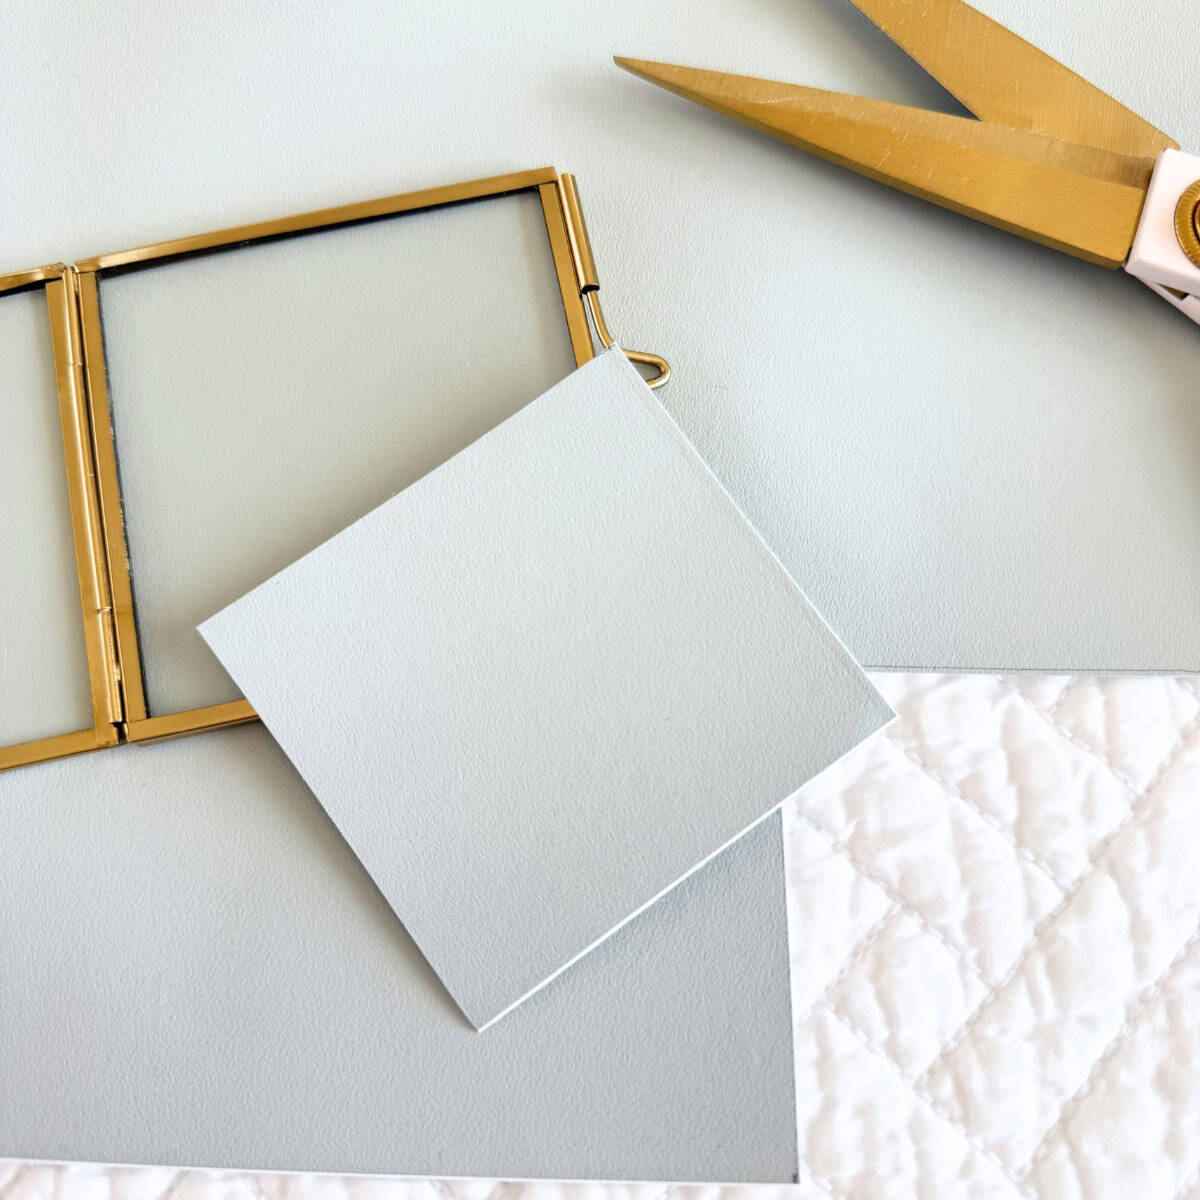
Step 1
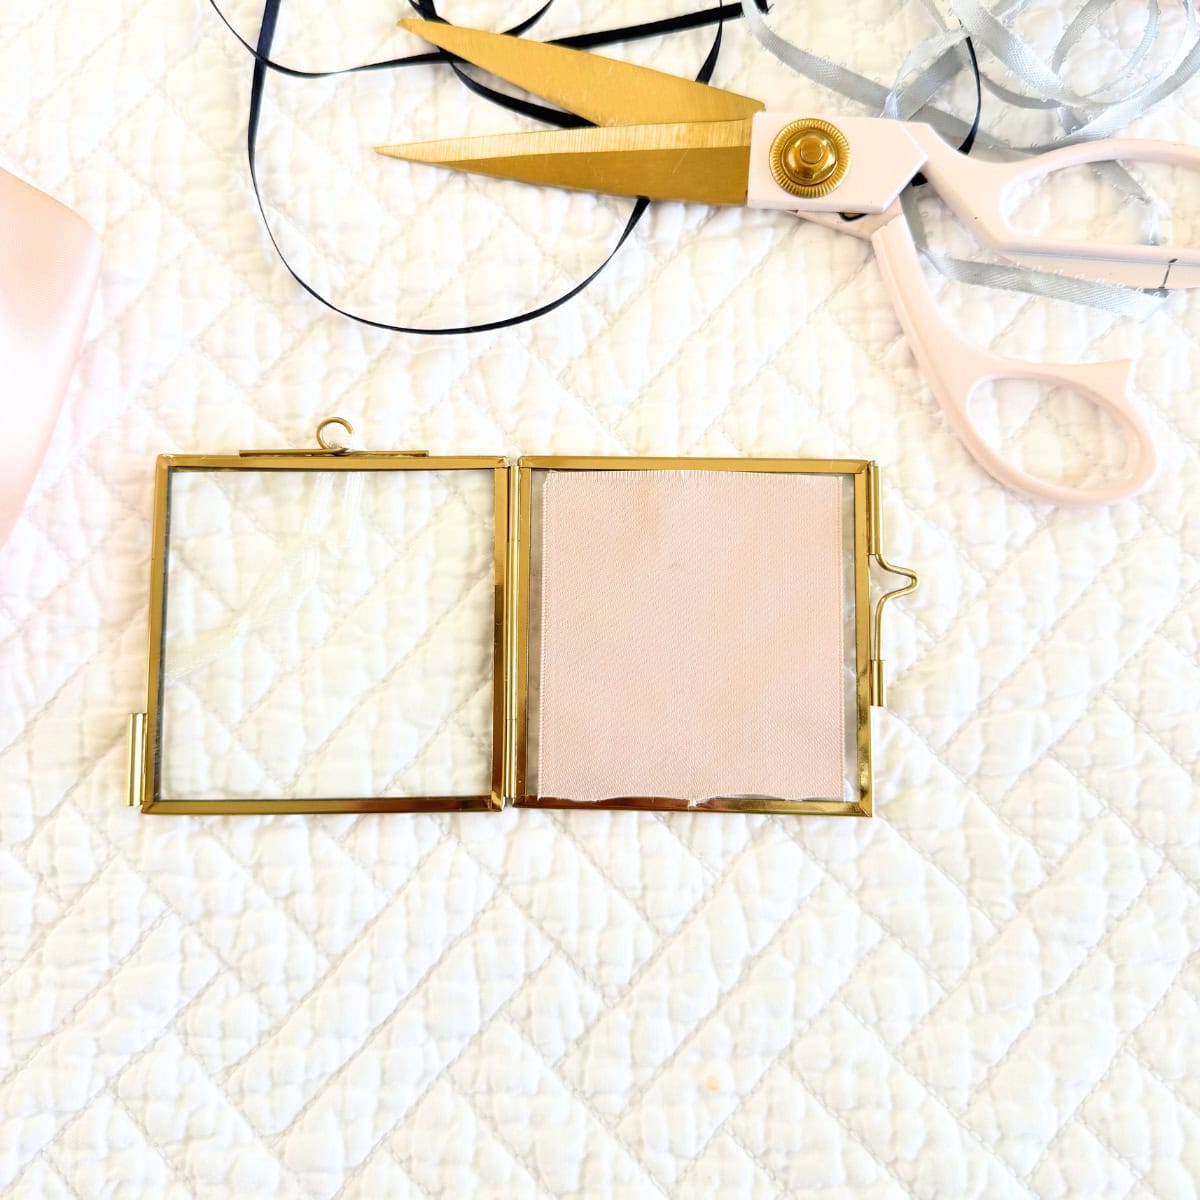
Start by measuring the inside of a mini picture frame. Cut the peel & stick paint sheet that will be the background to the size of the inside frame, but not over the frame edges. You want it to be right up to the edge, but you don't want it to be over the edge or it won't close. Dry fit the paint sheet you cut to the inside frame to ensure it will work for you.
Step 2
Create your design using ribbon and a glue stick on the background paint sheet you just cut, but not while inside of the frame. I believe it is much easier to assemble and glue all the pieces on a tabletop versus inside the tiny frame. I mocked up plaid designs in Canva, a graphic design tool I use, to make sure it turned out how I wanted. Place the finished design inside the frame to ensure it can close.

Step 3
There are a couple ways to finish this project. You could peel off the back of the paint sheet to adhere the design to the frame, or use glue or use double sided tape to adhere the finished design to the inside of the frame. Or, you may be able to pressure fit it to the frame and not have to adhere it with glue/tape, but I will leave that up to you. I did not adhere it to the frame, so I can reuse the tiny frames for another project or season when I want to. Instead, I just placed it in the frame and secured the closure and it stayed in place.
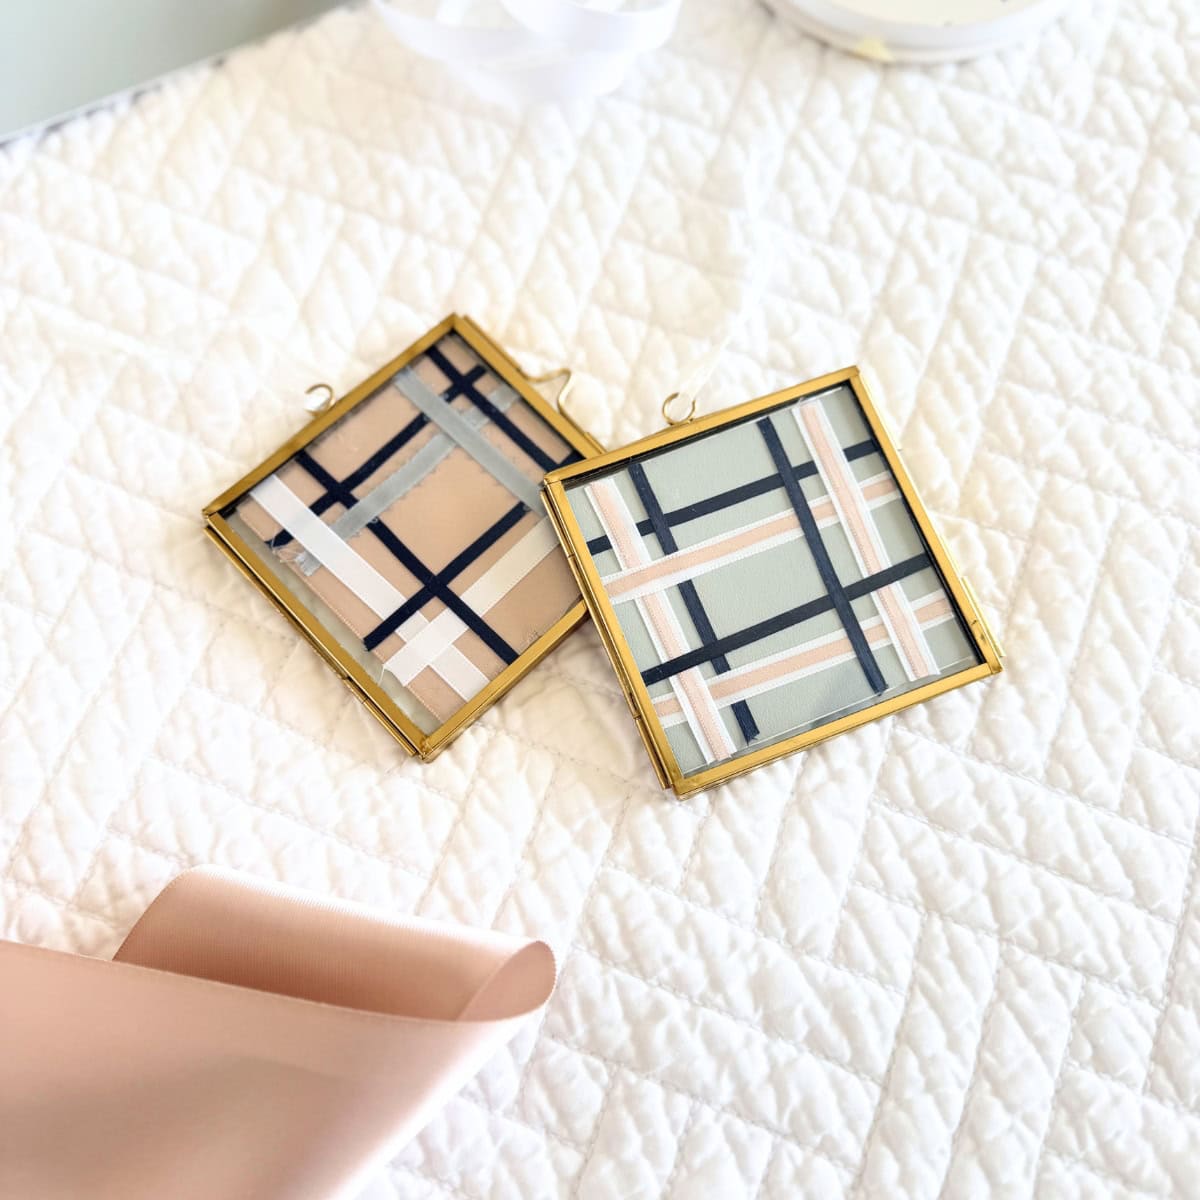
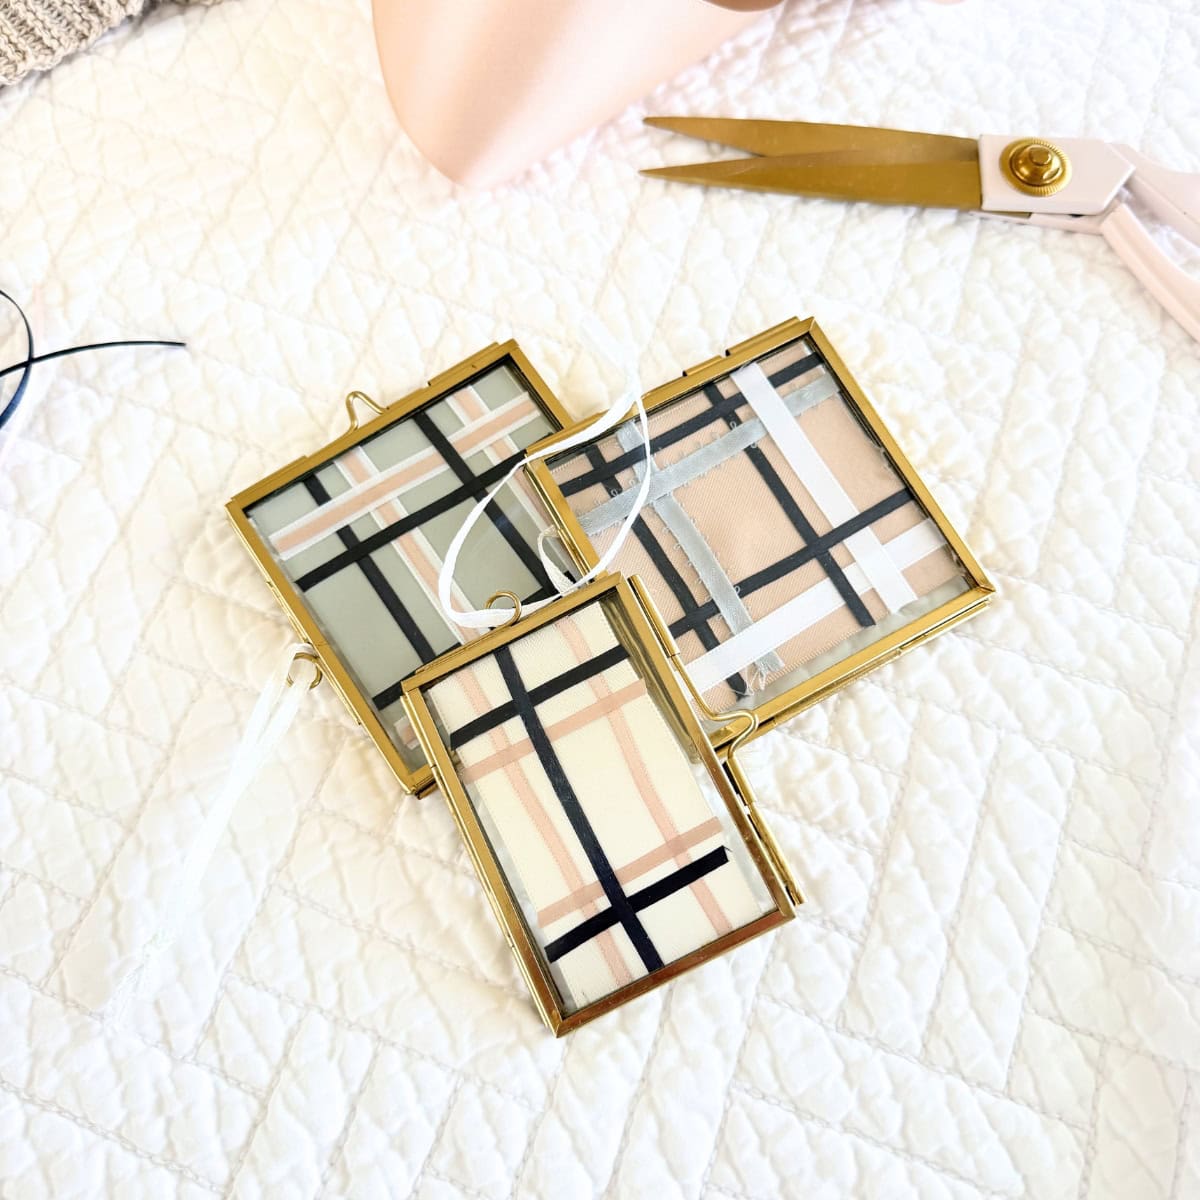
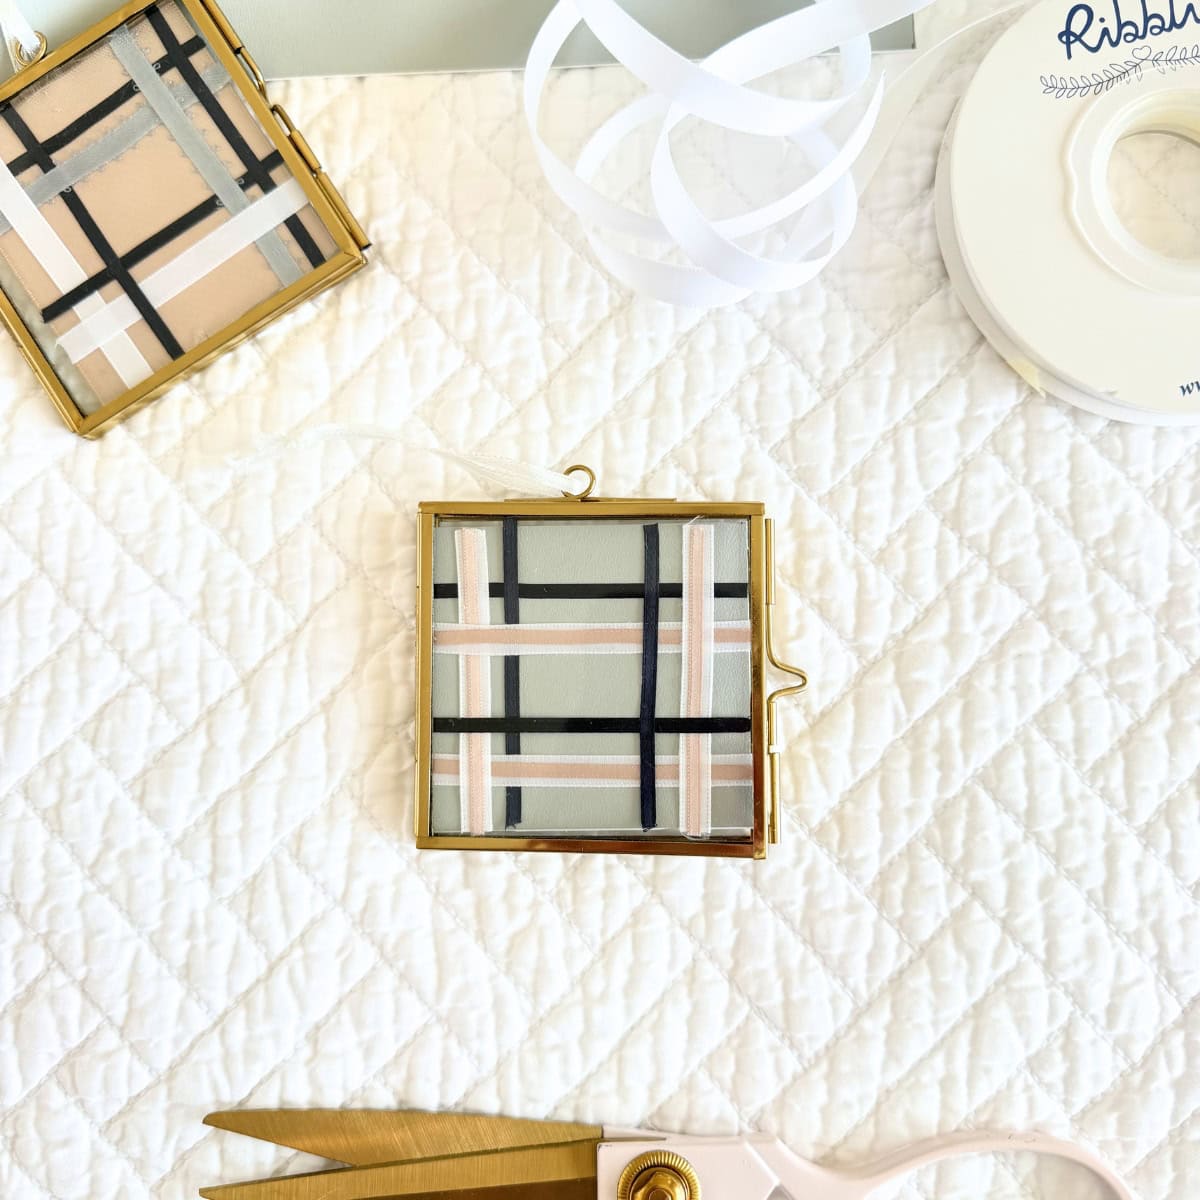
Next to one another the colors work so well together!
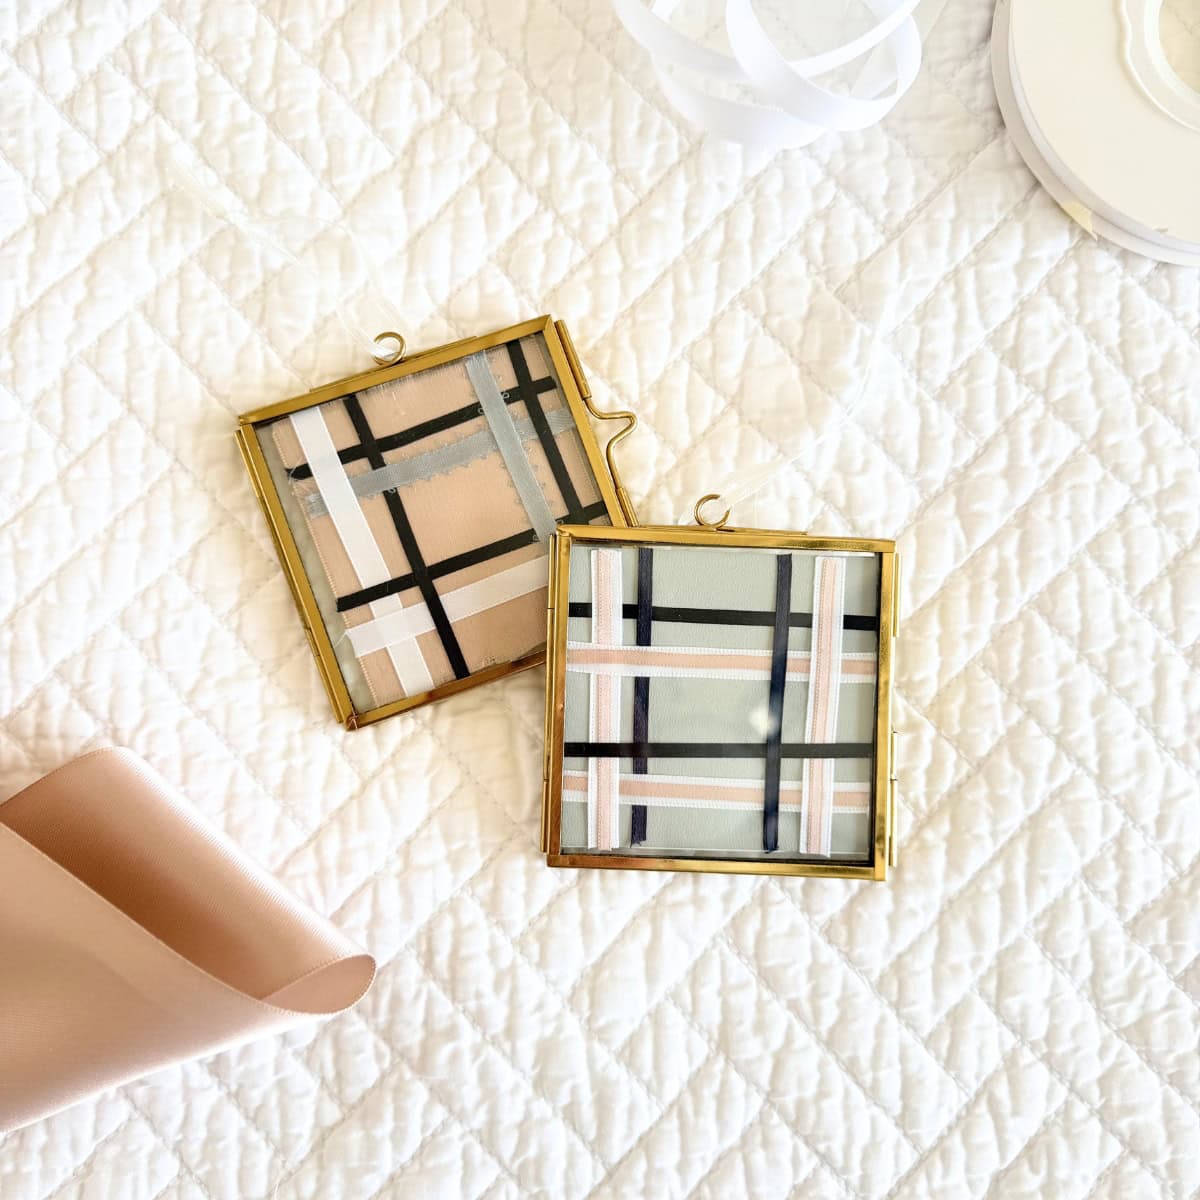
I made a slightly smaller mini frame ornament with just ribbons. This one had a soft creamy white ribbon background with a blush pink and navy satin ribbon plaid pattern.
I love how they all turned out! Now you can decorate your Christmas tree, mantel, or garland with your beautiful DIY mini frame ornaments!
Christmas is not for several months, so I will update this post later in the year to show you how they look on our tree. I just know they are going to be beautiful.
What did you put in your mini frame ornaments? Leave a comment below!


Leave a Reply