
Making your own festive DIY mini Christmas present ornaments is an easy, fun, and inexpensive way to elevate your holiday decorations.
When the snow is flying and all you want to do is huddle around a fire, this is a great holiday craft project to bring family together. You get a chance to be creative, decorating tiny Christmas present ornaments within your chosen color palette-traditional red, green, and gold; pastels of blush pink, dusty blue, and sage green; or coastal classic blue and white-whatever brings you joy!
This DIY focuses on reusing tiny boxes from items you already have, such as skincare products or a bar of soap. Grab your supplies and learn how to make your own charming DIY mini gift box Christmas ornaments!
This post may contain affiliate links which we may receive a small commission when some items are purchased at no additional cost to you. As an Amazon Associate we earn from qualifying purchases. Read the full disclosure.
Why Make Tiny DIY Christmas Present Ornaments
When you can't find the Christmas decorations you've dreamed up in your head at the store, you either have to give up on your dream or you have to get… crafty 😏.
And that's where this story begins.
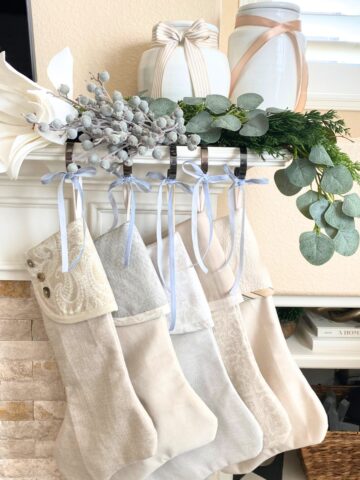
A few years ago I decorated our house for Christmas in a beautiful, non-traditional pastel color palette of blush pink, dusty blue, sage green, creamy white, antique brass, and natural wood elements. The muted colored holiday decor brought such a feeling of calm that I haven't looked back. While I do love traditional Christmas colors of red, green and gold, I value being comfortable at a time of year that can be busier than usual.
As I began planning my holiday decorations for this year, I came up with creating charming mini Christmas present ornaments to hang on our tree. I love wrapping gifts, which is why I have written at least two separate posts on the subject: Charming Christmas Present Wrapping Ideas and Beautiful Gift Wrap Ideas, both of which are absolutely worth reading.
I thought tiny present ornaments in the same style as the much larger gift creations I make would be so charming on our tree.
Supplies Needed to Make Mini Christmas Present Ornaments
You will need similar supplies to make mini Christmas present ornaments as you would for wrapping typical presents.
That said, with a craft project like this you can get even more creative. For instance, since you only need a little wrapping material and you will be using these ornaments year after year, you could use materials that cost a little more, such as fabric or wallpaper.
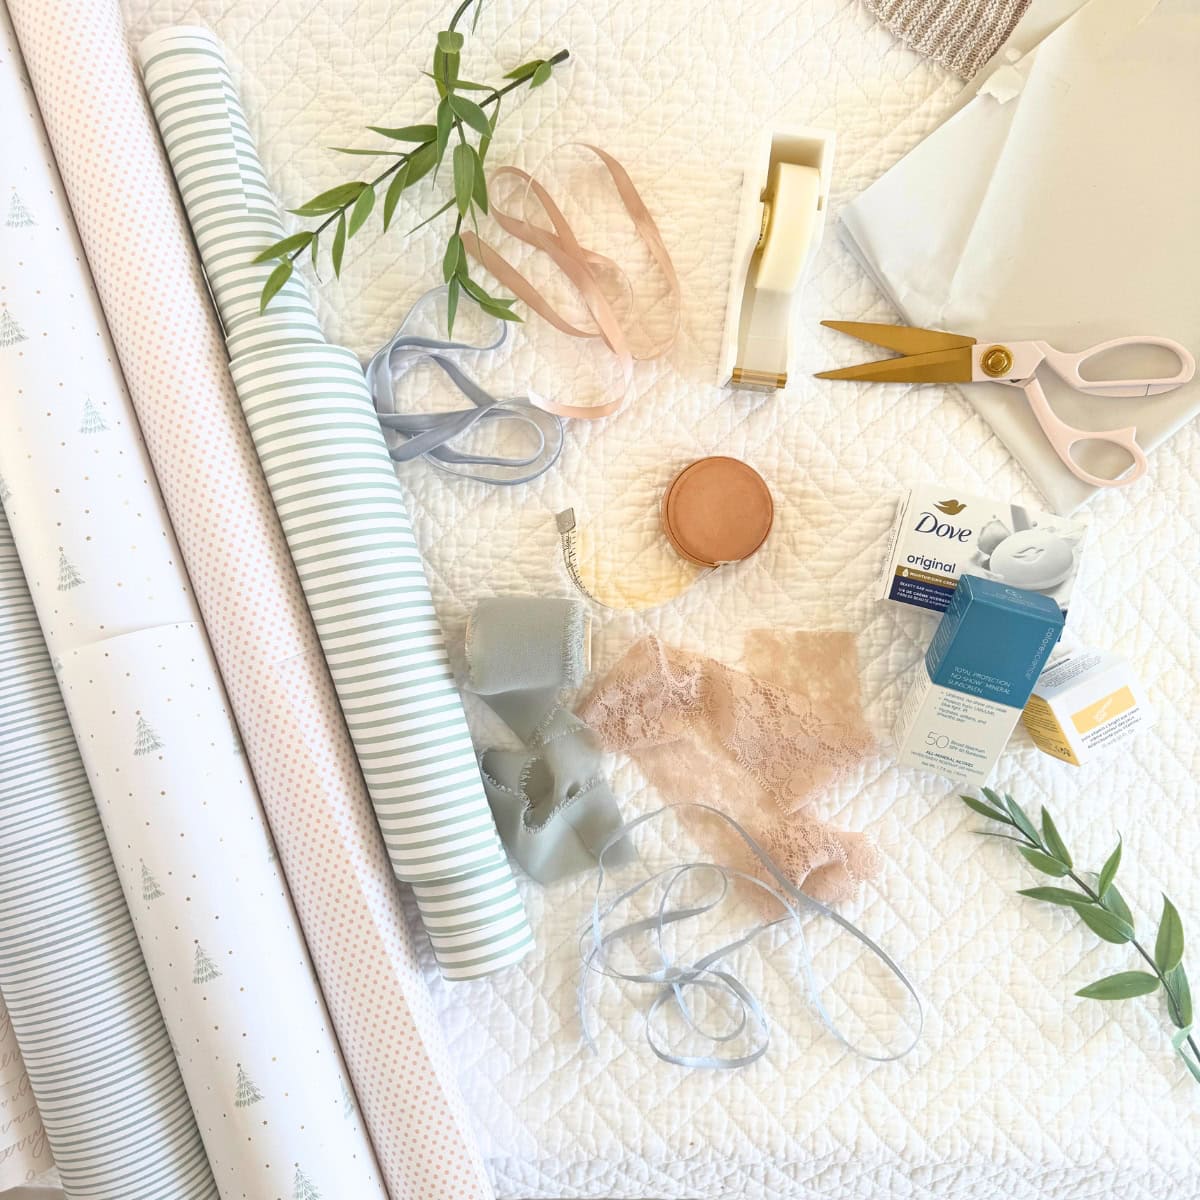
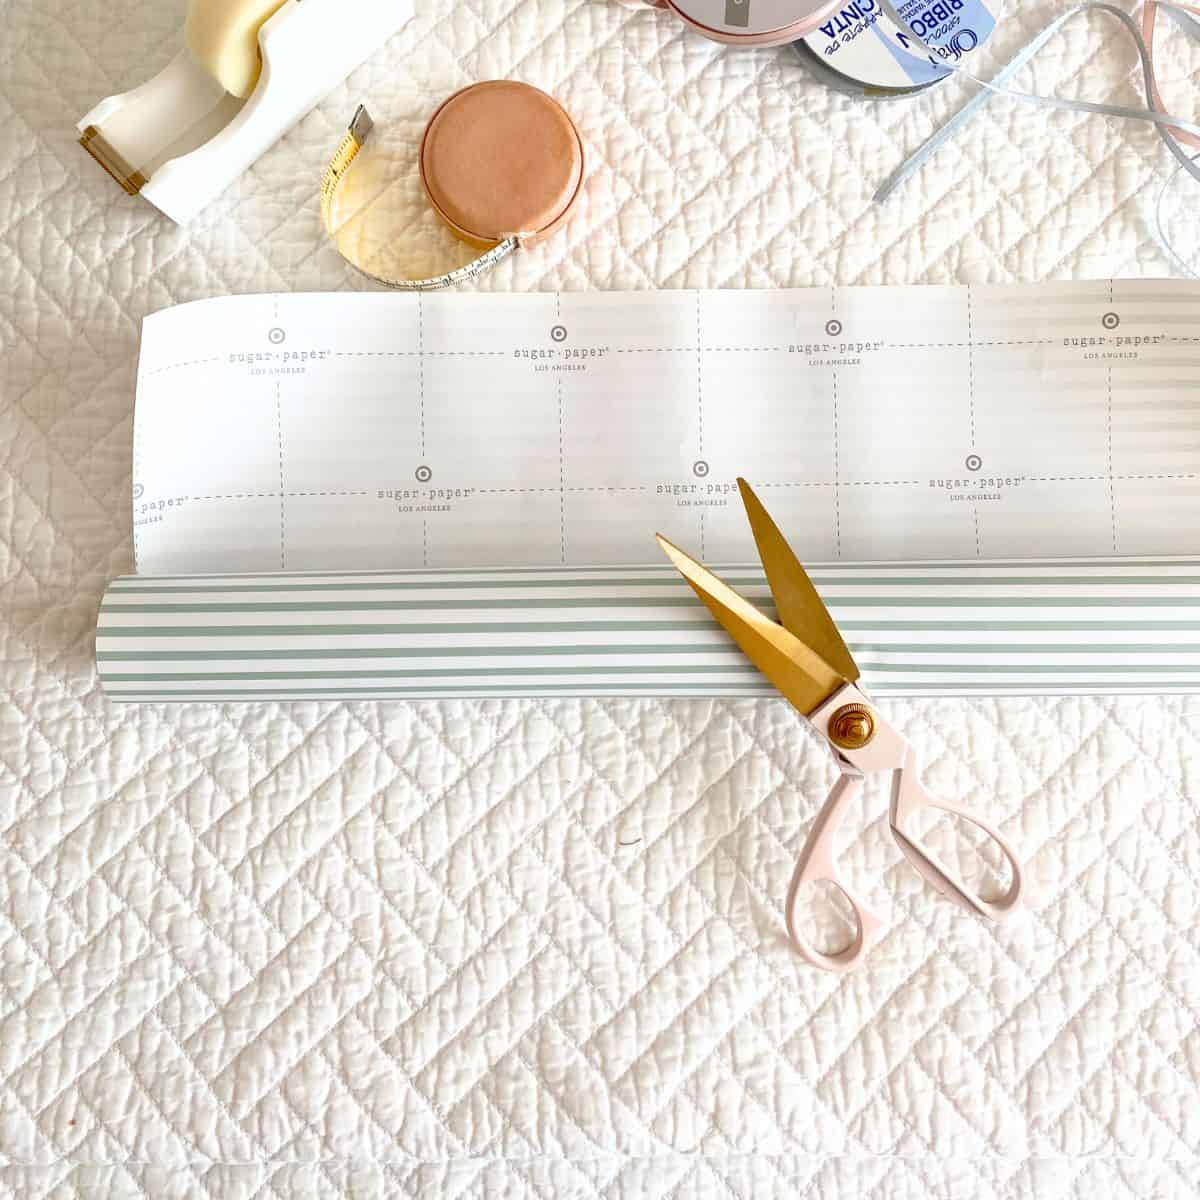
Wrapping Paper, Craft Paper, Fabric, or Wallpaper
Use traditional wrapping paper to wrap the mini presents, or buy sample sizes of your favorite fabric or wallpaper. Since you will only need a small amount, while it might cost a little more, you will have these ornaments for years to come. With that in mind, style them how you want.
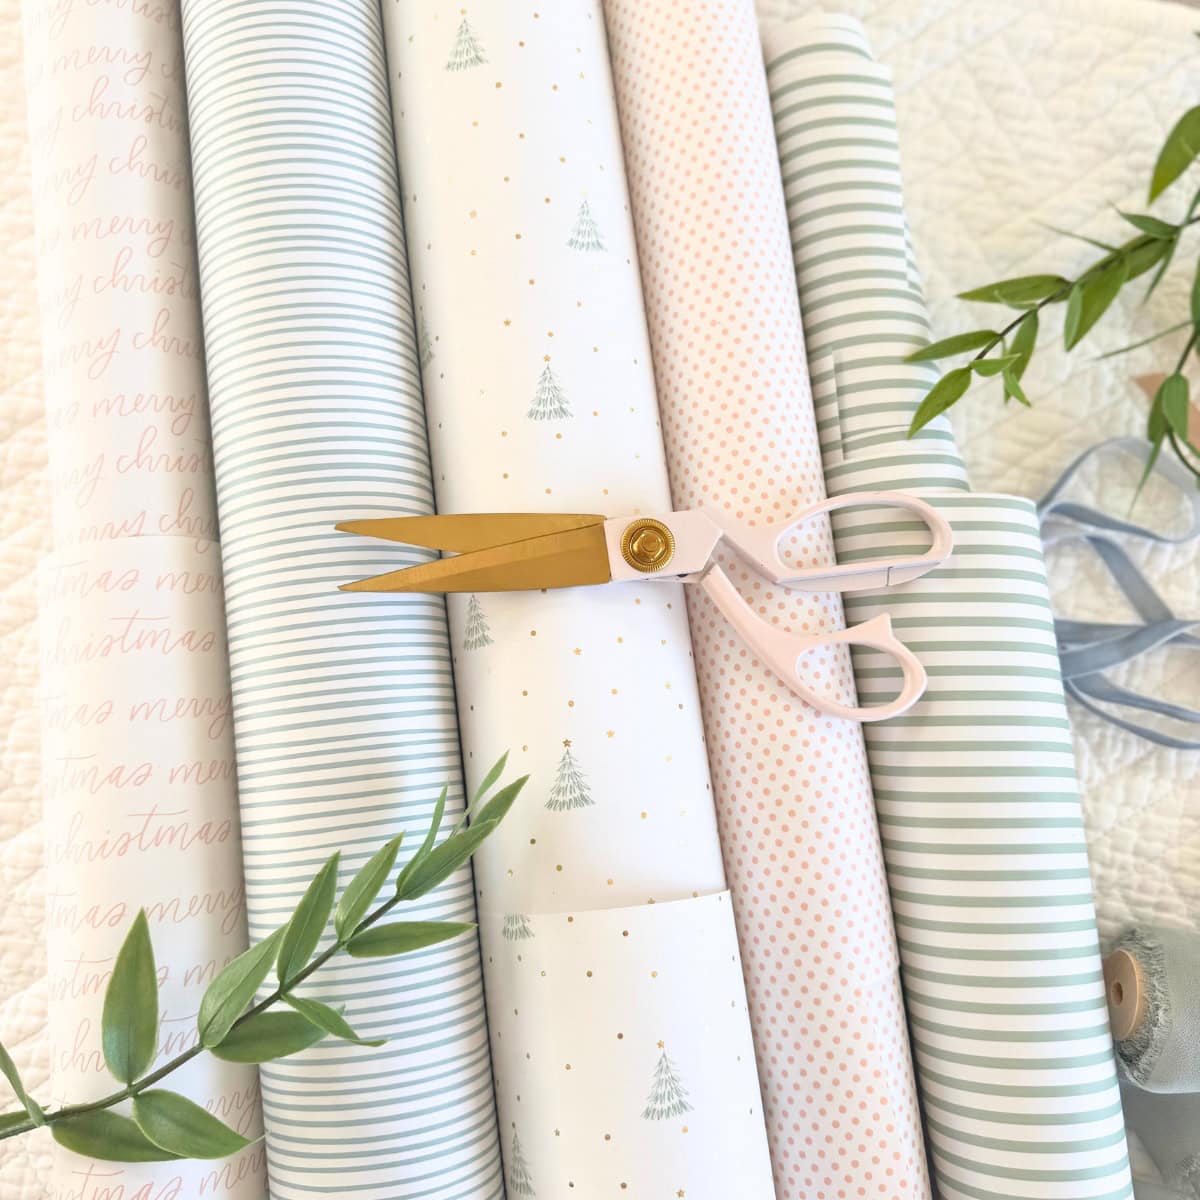
I love the pretty wrapping paper by Sugar Paper. They have a great selection to coordinate and curate a theme for any occasion.
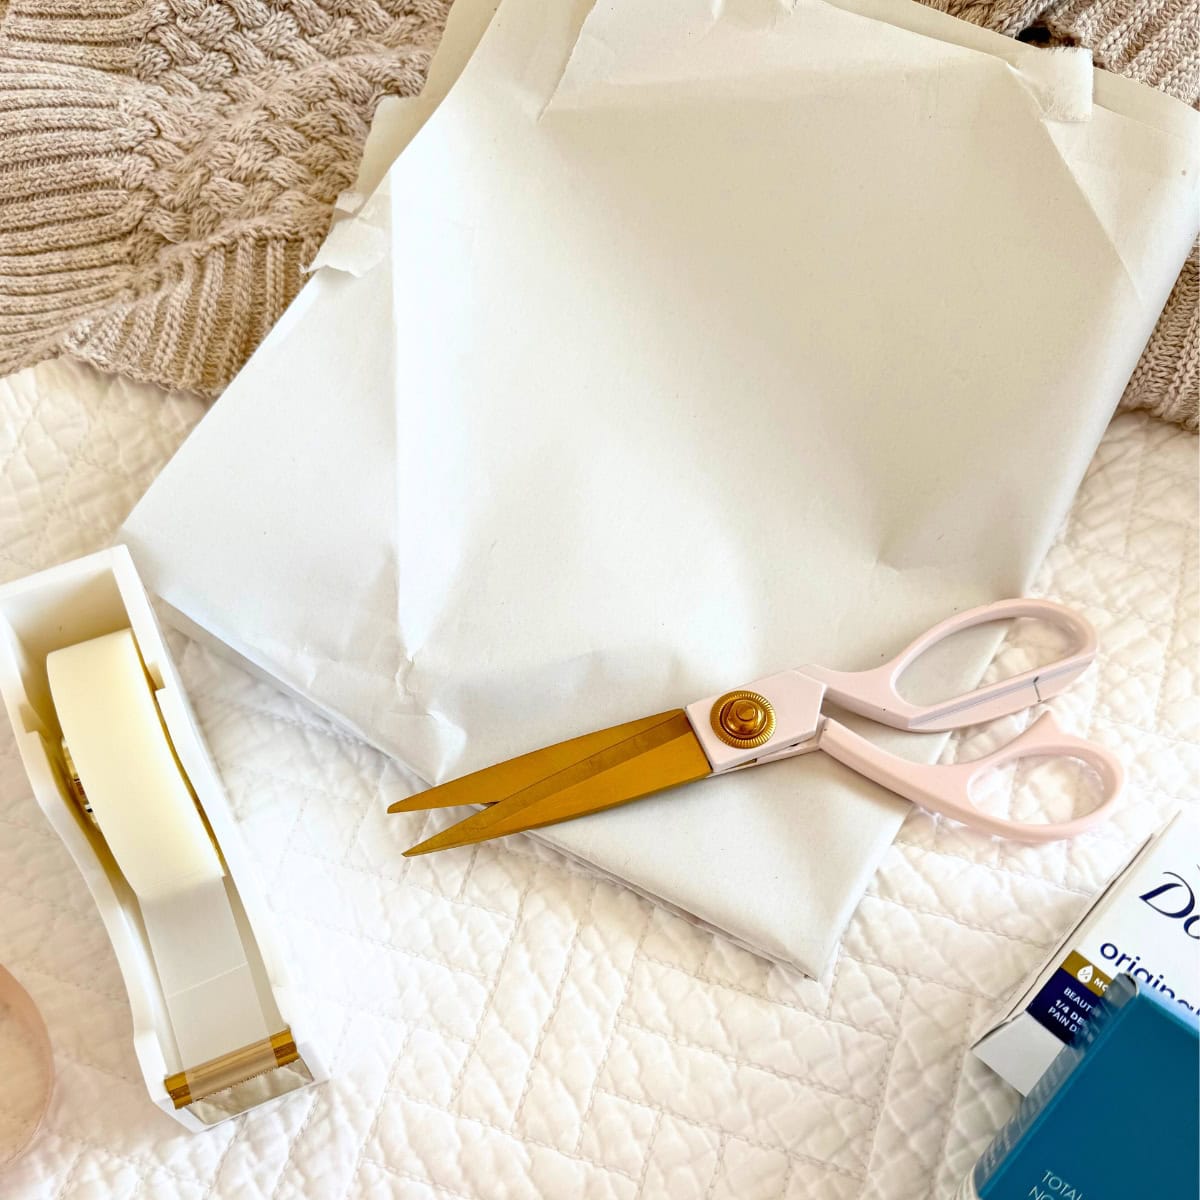
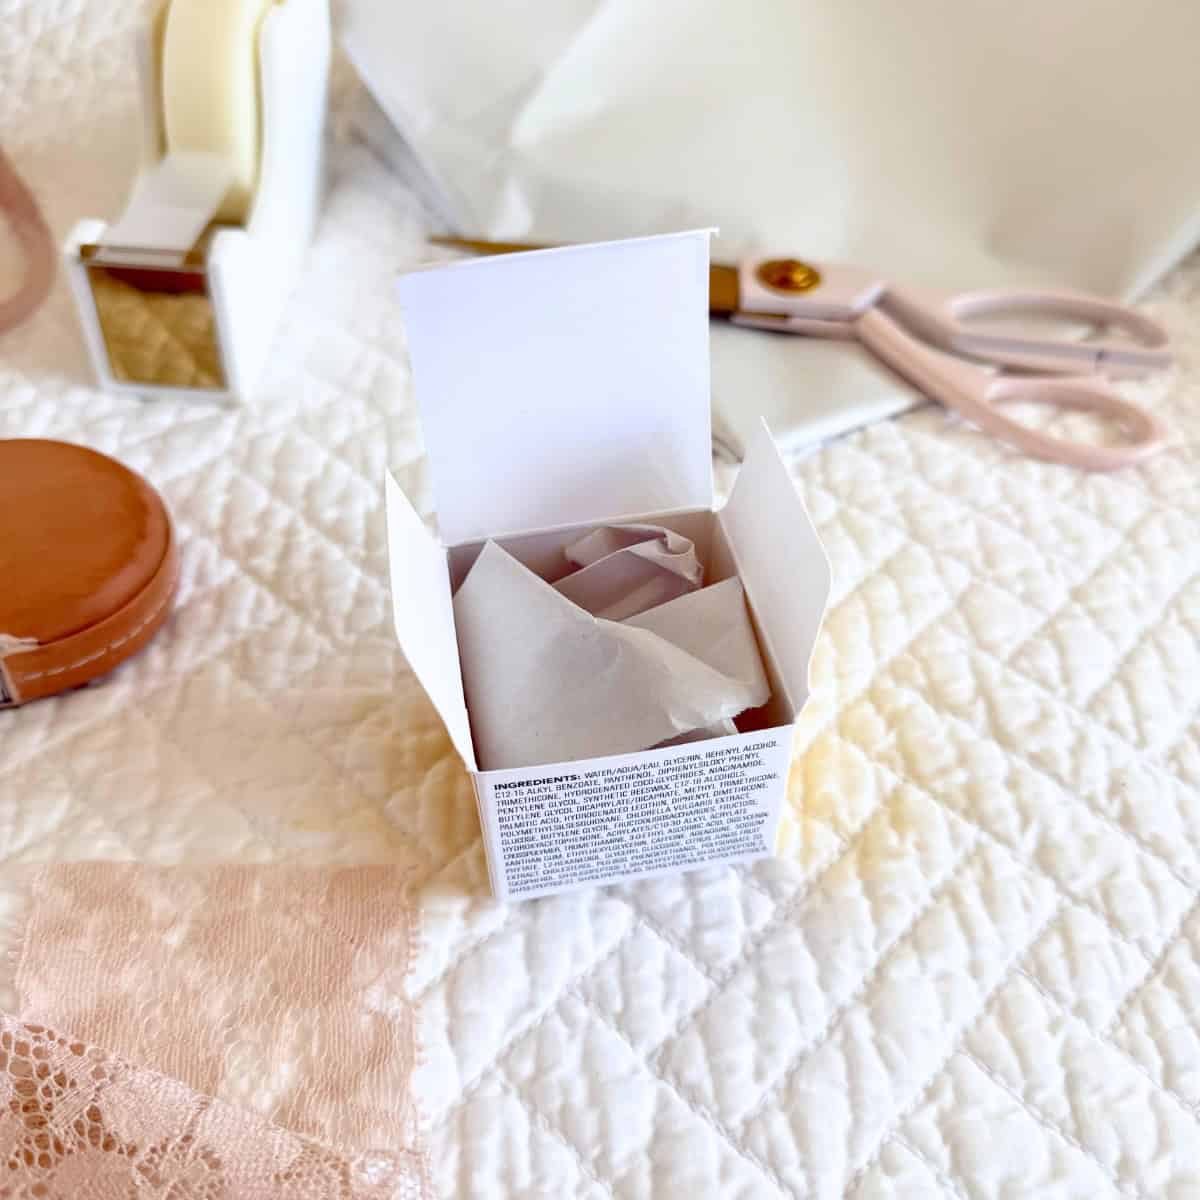
Cardboard or Tiny Boxes
A very inexpensive way to make mini presents is to reuse cardboard from home deliveries to make your own tiny box. For my mini gift boxes, I reused tiny boxes from skincare products I use-an eye cream, sunscreen, and a bar of soap.

For reference, below are the dimensions of each box I used:
- Sunscreen Box: 4 ½" H x 2" W x 1 ¼" D
- Eye Cream Box: 2" H x 2" W x 1 ½" D
- Bar Soap Box: 3 ¾" H x 2 ½" W x 1 ½" D
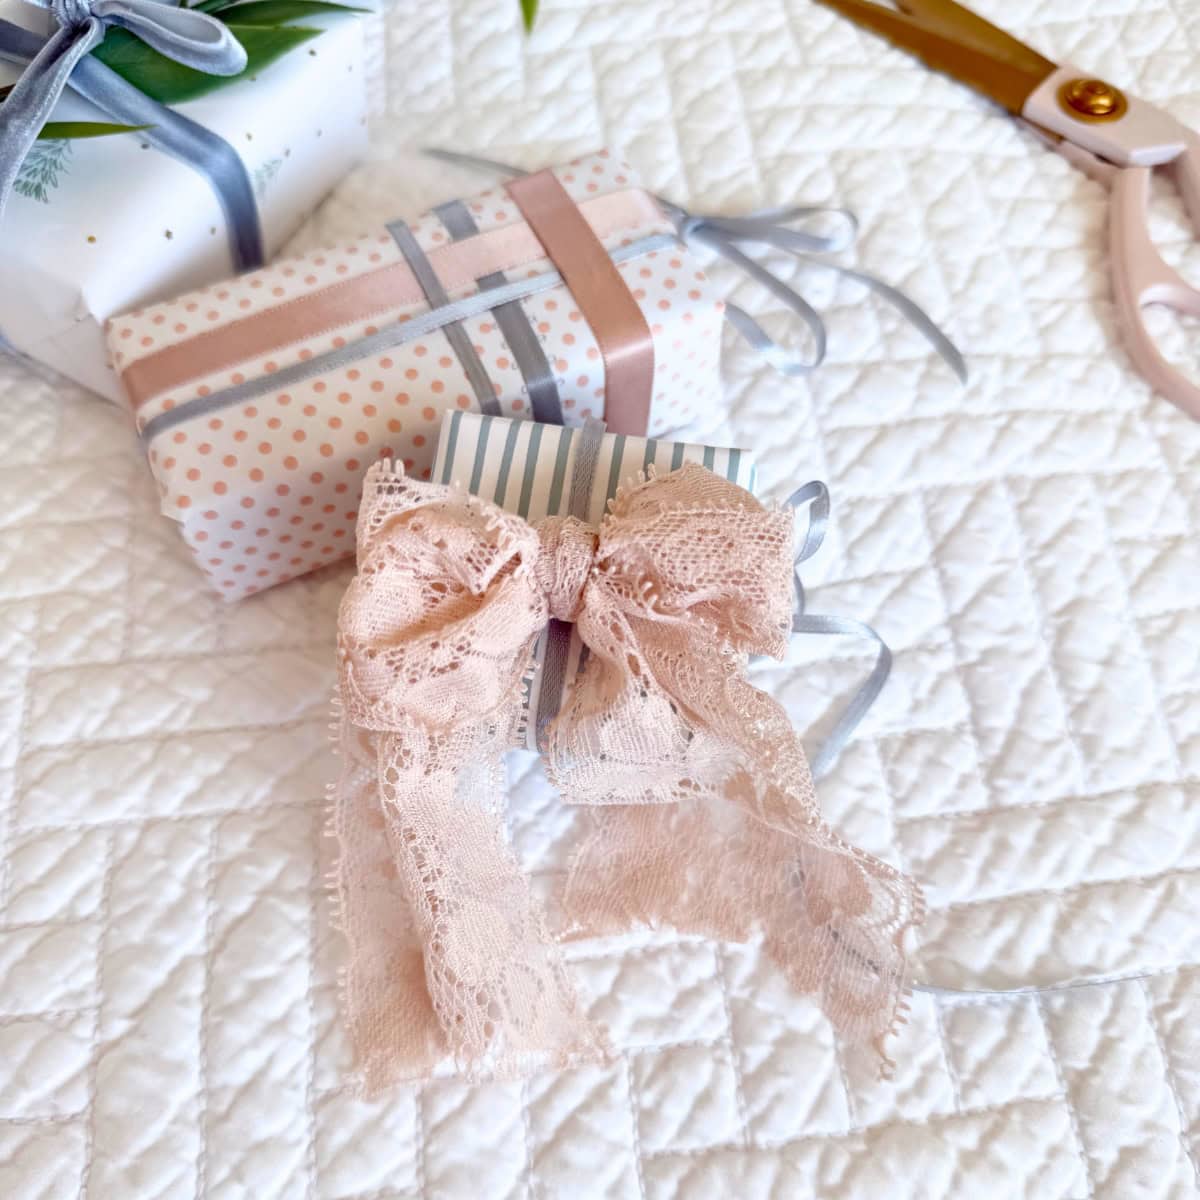
I like the interest provided by a mix of different size boxes, especially the almost square former eye cream box that I wrapped in a soft blue-grey striped wrapping paper, adorned with an oversized blush pink bow.
Scissors
Sharp scissors that can easily cut through fabric and paper are a necessity for this DIY project. I own these gorgeous stainless steel scissors in a blush pink color that are just as sharp as they are beautiful. They no longer carry the pink, but the taupe scissors color is just as stunning. Russell+Hazel's beautiful gold acrylic scissors may also work, but make sure to check that they can cut through fabric.
Scrap Paper
To give the empty box more structure, I recommend stuffing each box with some scrap paper. Not only will it make it much easier to wrap the tiny gifts, but it helps to provide additional structure to store the ornaments when the season is over.
Ribbon, Twine and Yarn (Oh, My!)
This is not the first time that I will profess my love of ribbon here on Mornington Lane. I have repeatedly mentioned I have a growing collection of all sorts of ribbon, from satin to taffeta and everything in between. In fact, two drawers of the dresser I use for storage in my home office are filled with ribbon. Moreover, a pretty pink lacquered tray that sits on top of the dresser is also filled with different styles of ribbon.
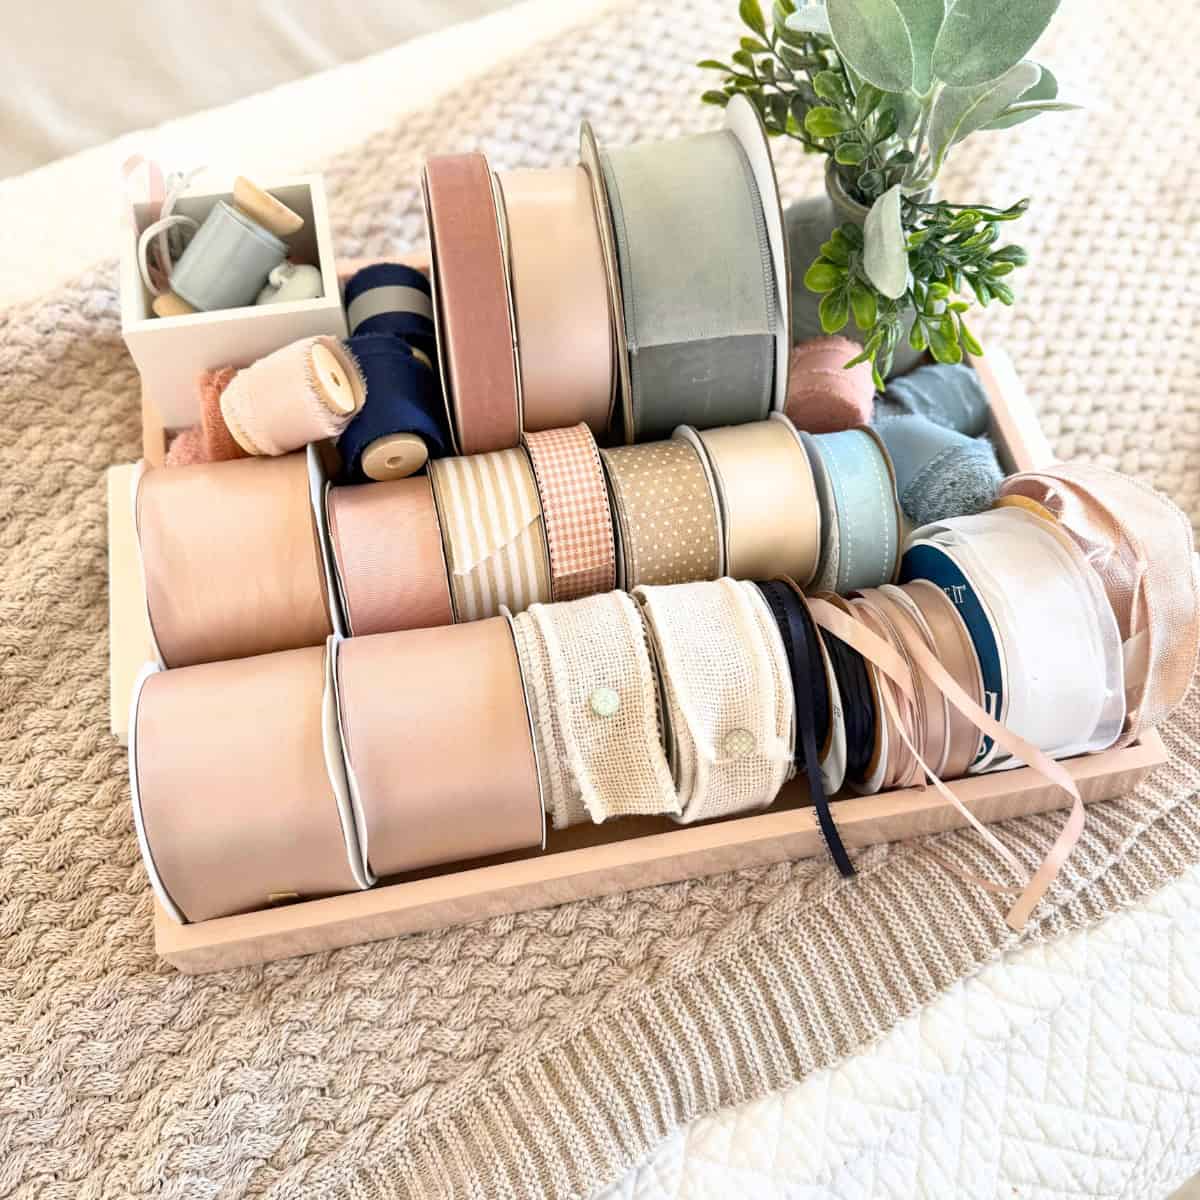
Throughout our home you may find ribbon on a vase or hanging from a mirror; anywhere I want to add just a little something extra.
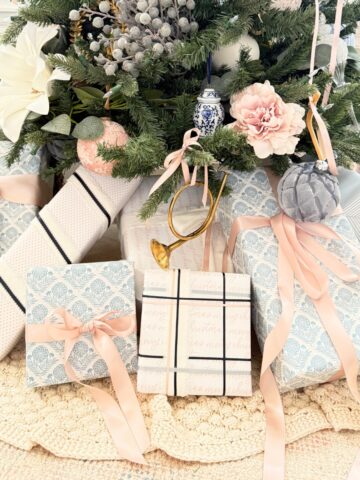
Layering different styles and types of ribbon is my favorite. I also love plaid patterns, which is evident in the tiny Christmas present ornament where I weaved soft pink and blue satin ribbons together to form a plaid pattern.
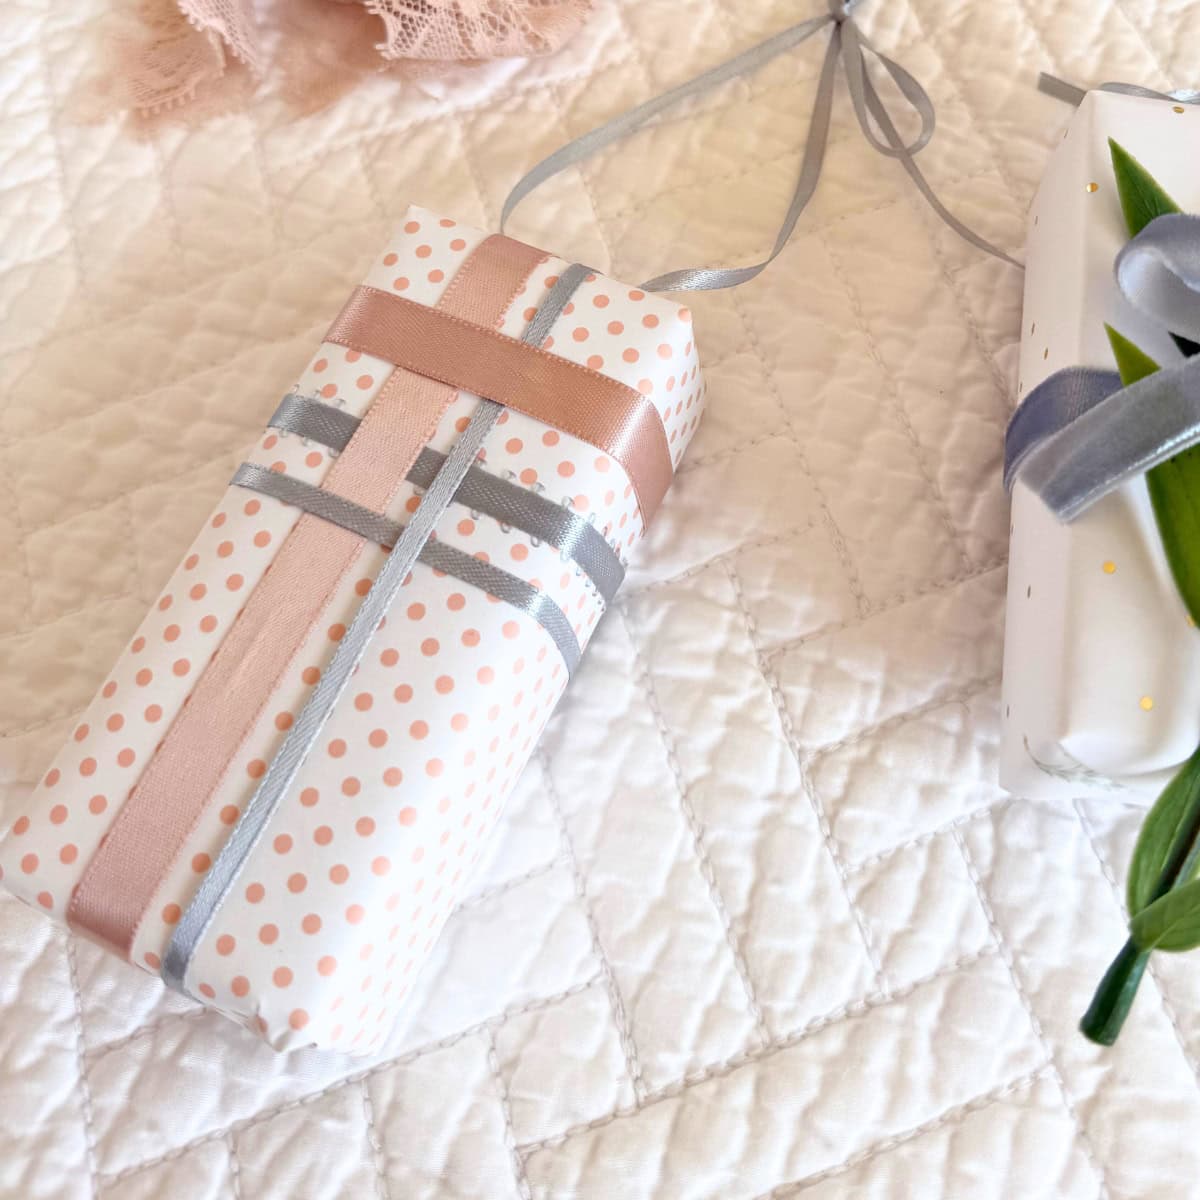
It may be slightly difficult to distinguish, but I actually used three different satin ribbons to achieve the look. I love how it turned out!
Embellishiments
To make your tiny DIY gift box Christmas ornaments all your own, add embellishments, including
- Tiny berries
- Sprigs of greenery
- Bells
- Glitter
- Bows
- Wood beads
- Tassels
- Faux snow
- Tiny wreaths
- Mini brass stars
- Yarn
- Mini snowflakes
Hanging Hardware
To hang the ornaments on the tree, use ribbon, twine, yarn, or a traditional hook. I always only use some style of ribbon to hang ornaments on our tree. In this case, I used a 3/16 inch light blue satin ribbon for all of the mini presents.

How To DIY Mini Christmas Present Ornaments
This DIY focuses on reusing mini boxes that you already have like I mentioned earlier in the post from skincare products to a bar of soap.
Step 1:
Gather your supplies in one place, including the small boxes. I recommend stuffing the mini boxes with scrap paper to provide structure, which will make it easier to wrap the tiny presents as well as store them for seasons to come.

Step 2:
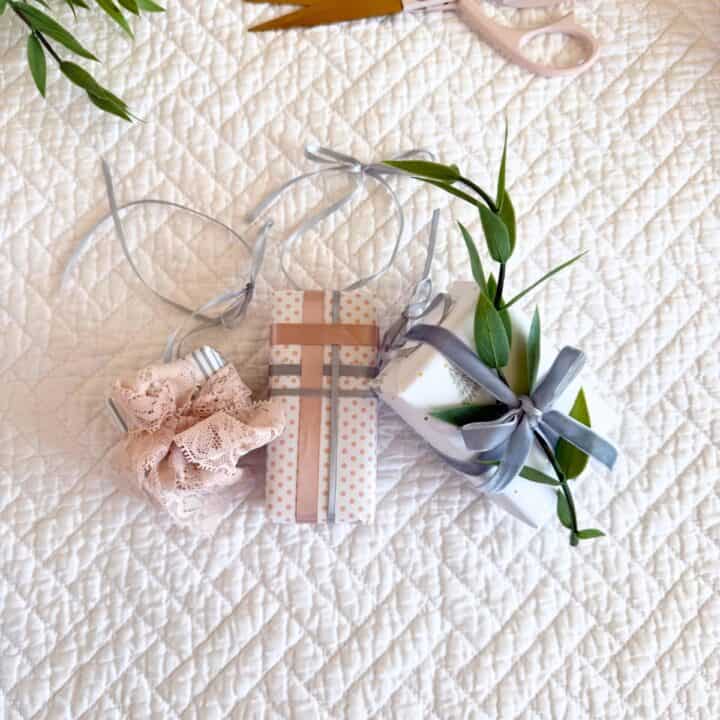
Wrap the mini presents in pretty wrapping paper, fabric, wallpaper, or craft paper. Add ribbon, yarn, or twine to each mini present. Be creative! I made a plaid pattern on one mini present, tied an oversized blush pink bow on another, and made a traditional bow on the third with a dusty blue velvet ribbon. Use ribbon, twine or yarn to create the hanging hardware.
Step 3:
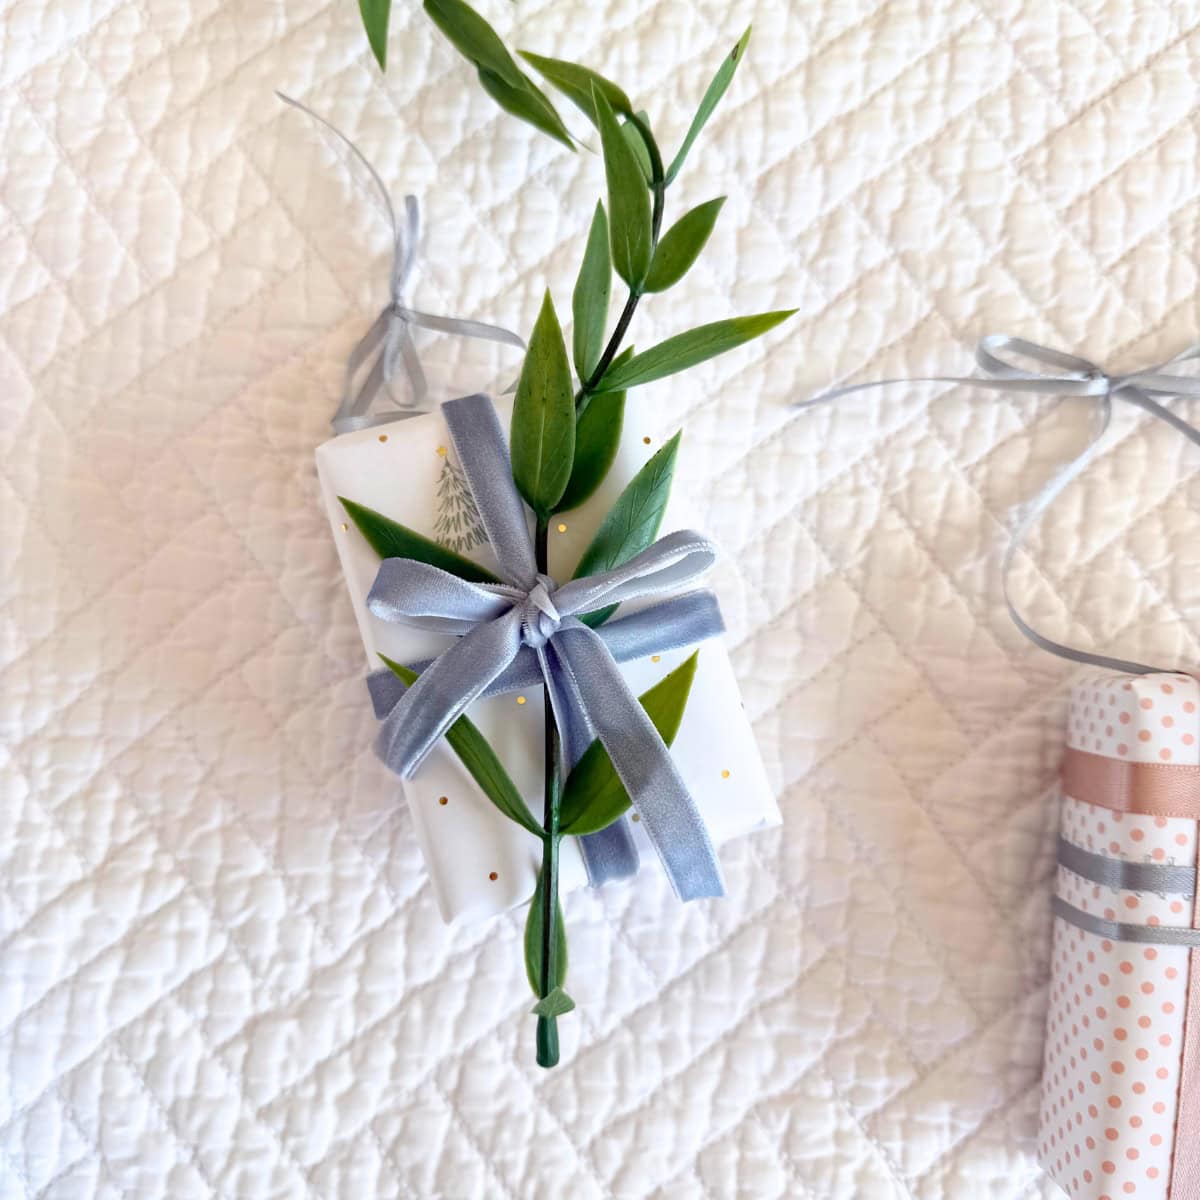
Finally, add embellishments, such as sprigs of greenery, bells, faux snow, and more. Be creative, anything you like goes! For instance, I added a sprig of greenery to one of the mini presents. I love how the oversized greenery calls attention to how tiny the present is. It's so charming.
That's it! Now let's decorate the tree… or mantel, console table, or anywhere else you want!
Decorating With DIY Mini Present Ornaments
The best part is decorating the tree. Hang your DIY mini Christmas present ornaments on the tree and enjoy them! You can re-use these ornaments or create new mini presents if you change the color palette or theme from year to year.

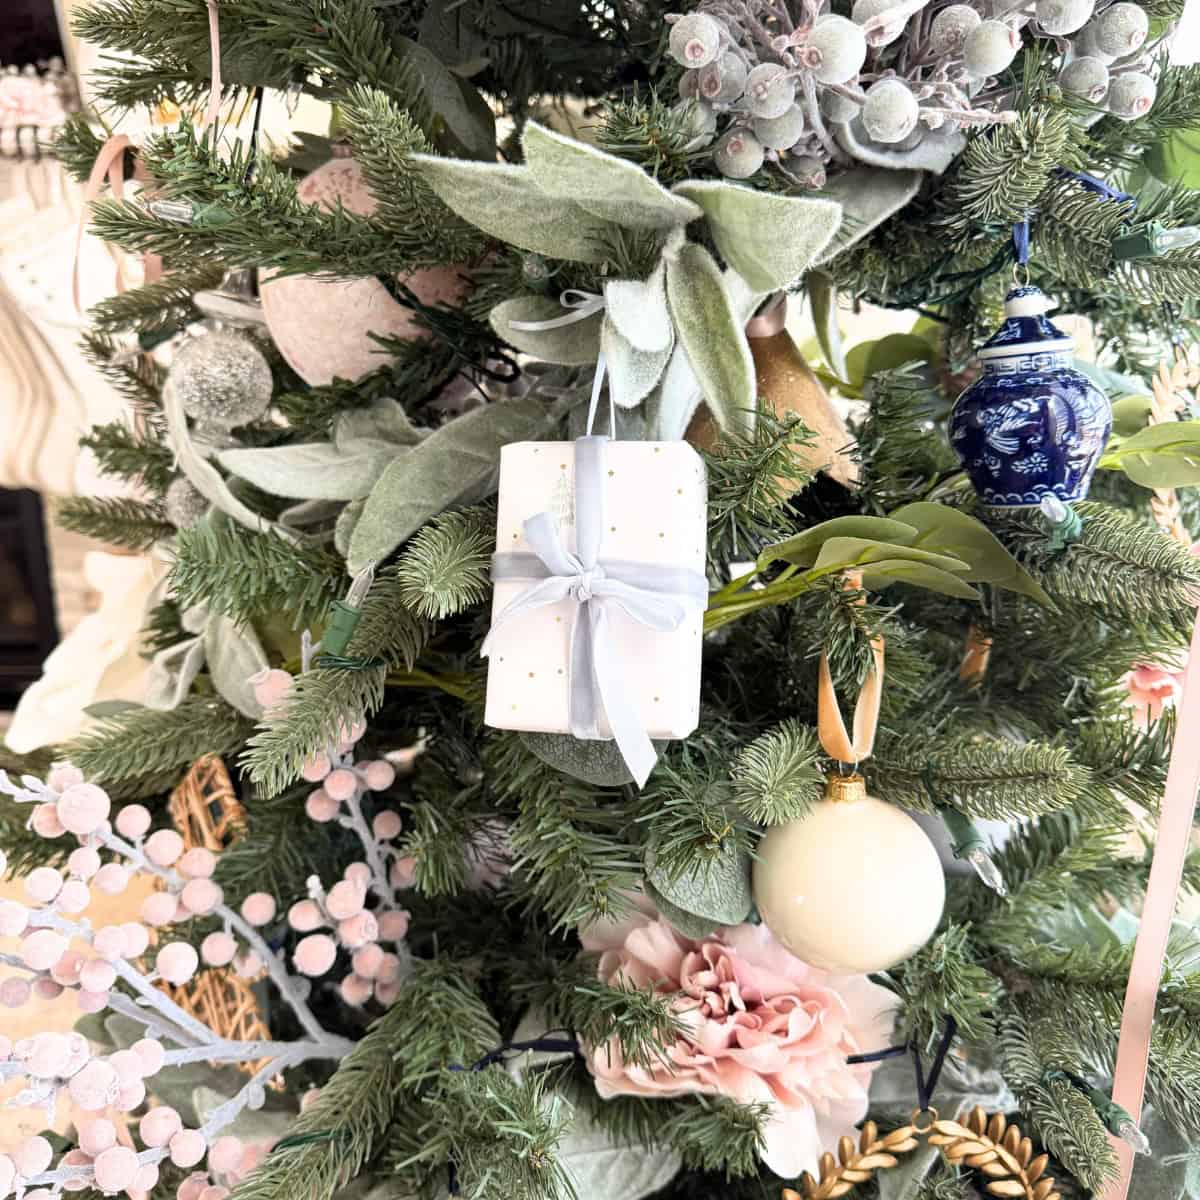
As with the past few years, I stayed true to my love of soft colors of blush pink, dusty blue, and white this Christmas. You can see how the mini present ornaments hanging on our tree add a little something unexpected.


In the picture below, around the middle of the tree you can see one of the mini ornaments. Doesn't it look so charming? I also made the cheery DIY Orange Garland for our mantel this year and I love it! I say this every year, but, truly, this year is my favorite Christmas tree! Of course, these mini ginger jar ornaments set I found this year has quickly become a new favorite. Our living room is perfectly cozy and calm and I am so in love with how it turned out. Did you make your own DIY min present ornaments? Share details in a comment below!

Leave a Reply