
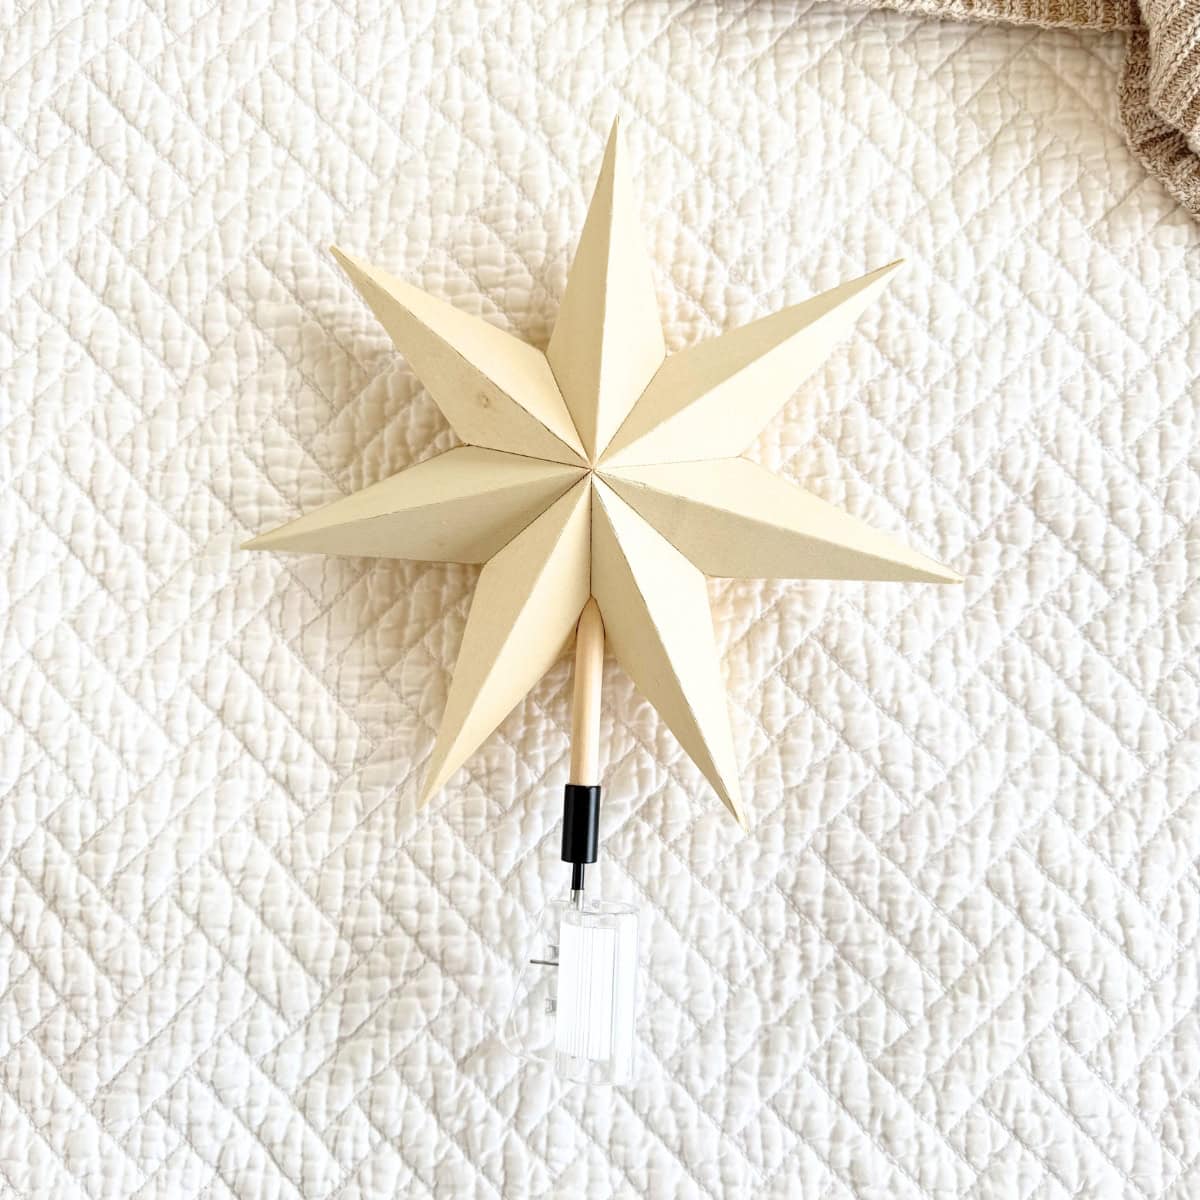
Several years ago, I bought a classic star tree topper for our Christmas tree. It was made of raw beechwood that was quite rough in spots. It actually looked like an unfinished craft wood tree star.
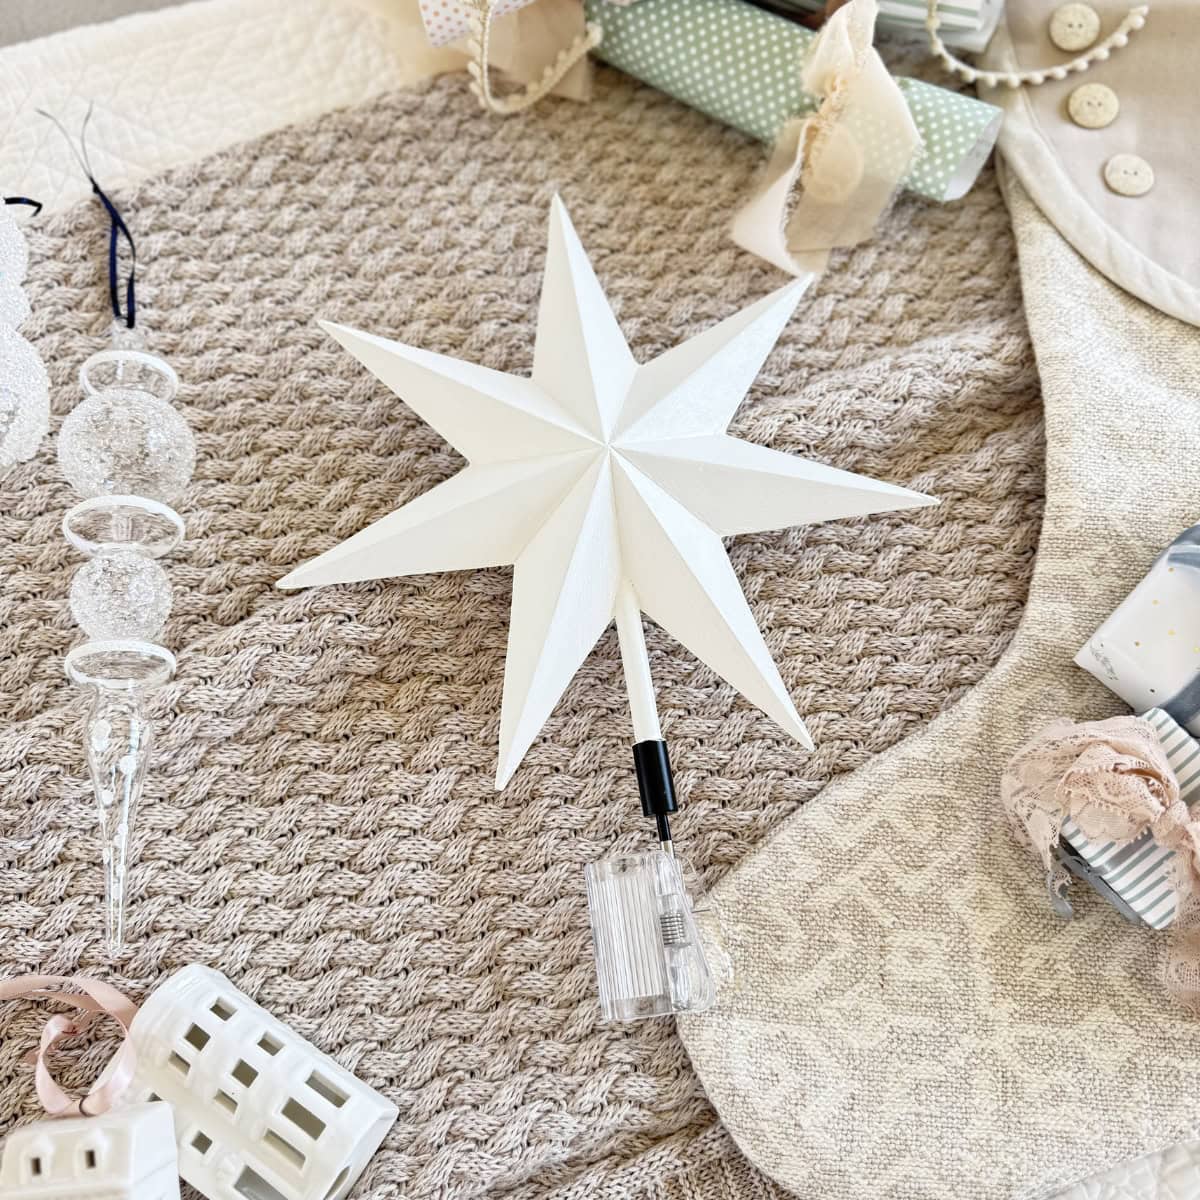
After seeing a beautiful bright white painted star tree topper from one of my favorite designer's home decor stores, I decided to give our tree topper a DIY makeover.
With a little white paint (and patience between coats), I made over our tree topper in no time and it looks stunning! Read all the details to get ideas to DIY a wood tree topper.

This post may contain affiliate links which we may receive a small commission when some items are purchased at no additional cost to you. Read the full disclosure.
Who doesn't love a classic star atop a Christmas tree? Whether adorned with glitter, bells, or simply painted a festive color, you really can't go wrong.
These days, I love a simple tree topper. That's why I bought a timeless star for our tree several years ago for under $20. It was part of the 2022 Target Threshold x Studio McGee Holiday Collection. I figured I could easily paint it one day if I wanted to.
The Designer-Inspired White Tree Topper
Our home used to be filled with traditional colors at Christmas - reds, greens, silver, and gold. But that has shifted over the past few years.
Now during the Christmas holiday season our home is filled with soothing, muted dusty blues, blush pinks, whites and creams, light sage greens, and brassy gold with traditional silver. For instance, this past year I created a Captivating Christmas Tree Decorated with Flowers, while the year prior it was a Cozy Coastal Inspired Christmas and the year before a Dreamy Pastel Christmas Tree.
All three trees were adorned with the simple wood star tree topper.


So a few years back when I saw one of my favorite designers carrying a painted white star tree topper, I was immediately in love! Simple, understated, elegant - it was perfect for our tree!
I decided to do a designer inspired star tree topper makeover, because I could easily paint ours.
Shop the photo: Glass finial ornaments (similar) or Hand-blown glass finial ornaments (similar)
Why a Hand Painted Tree Topper
For all of the store-bought holiday decorations you can find, there are usually a few you can DIY craft to make your own. A hand painted tree topper is an easy way to create something unique to your design style and family holiday traditions.

A wood tree topper can be sanded and painted again and again to match any holiday theme. You could take it a step further by embellishing your tree topper, including
- Sprinkle generously with glitter for a shimmery effect
- Add a bell or multiple tiny bells for the sound of the season
- Paint snowflakes in creams, silver, and light blue (or whatever color you want)
Creating a one-of-a-kind topper that can become a family heirloom makes a great story to pass along to future generations. Who doesn't love seeing a charming topper adorning their tree around the Christmas holiday season?

Supplies
Traditionally, if you are painting raw wood or painting over paint, there are a few key supplies you will need. This is not an exhaustive list, as there are just too many possible starting points for me to list them all.
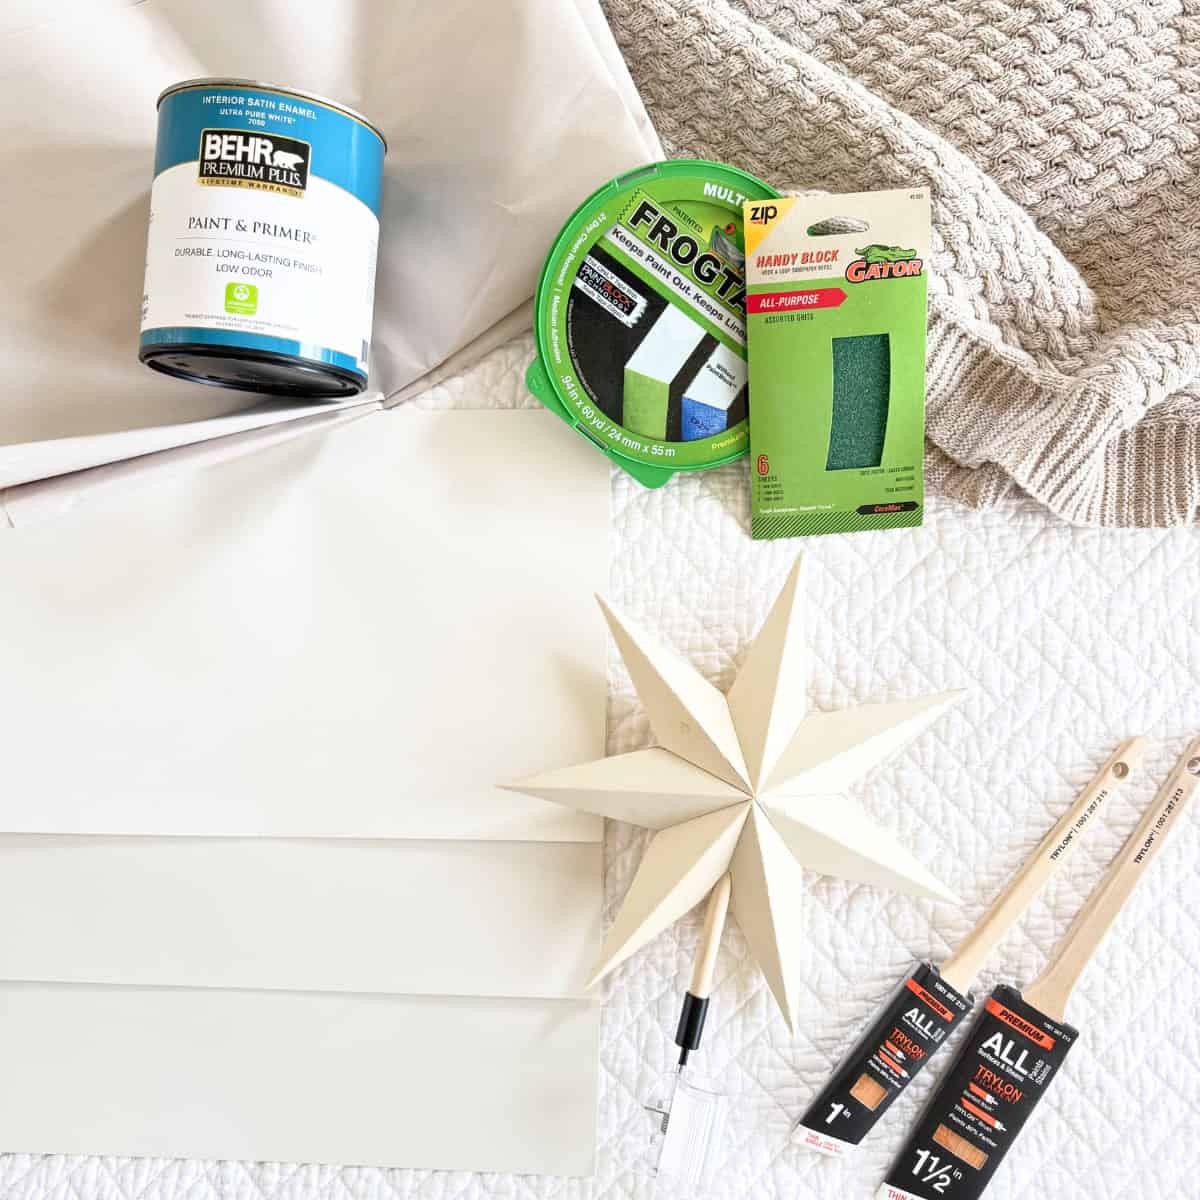
Below is a list of supplies to consider if you are taking on a similar project.

Wood Tree Topper
Target no longer carries the star tree topper I bought, but I did find this rustic wood tree topper or this pine wood tree topper that may work as a DIY.
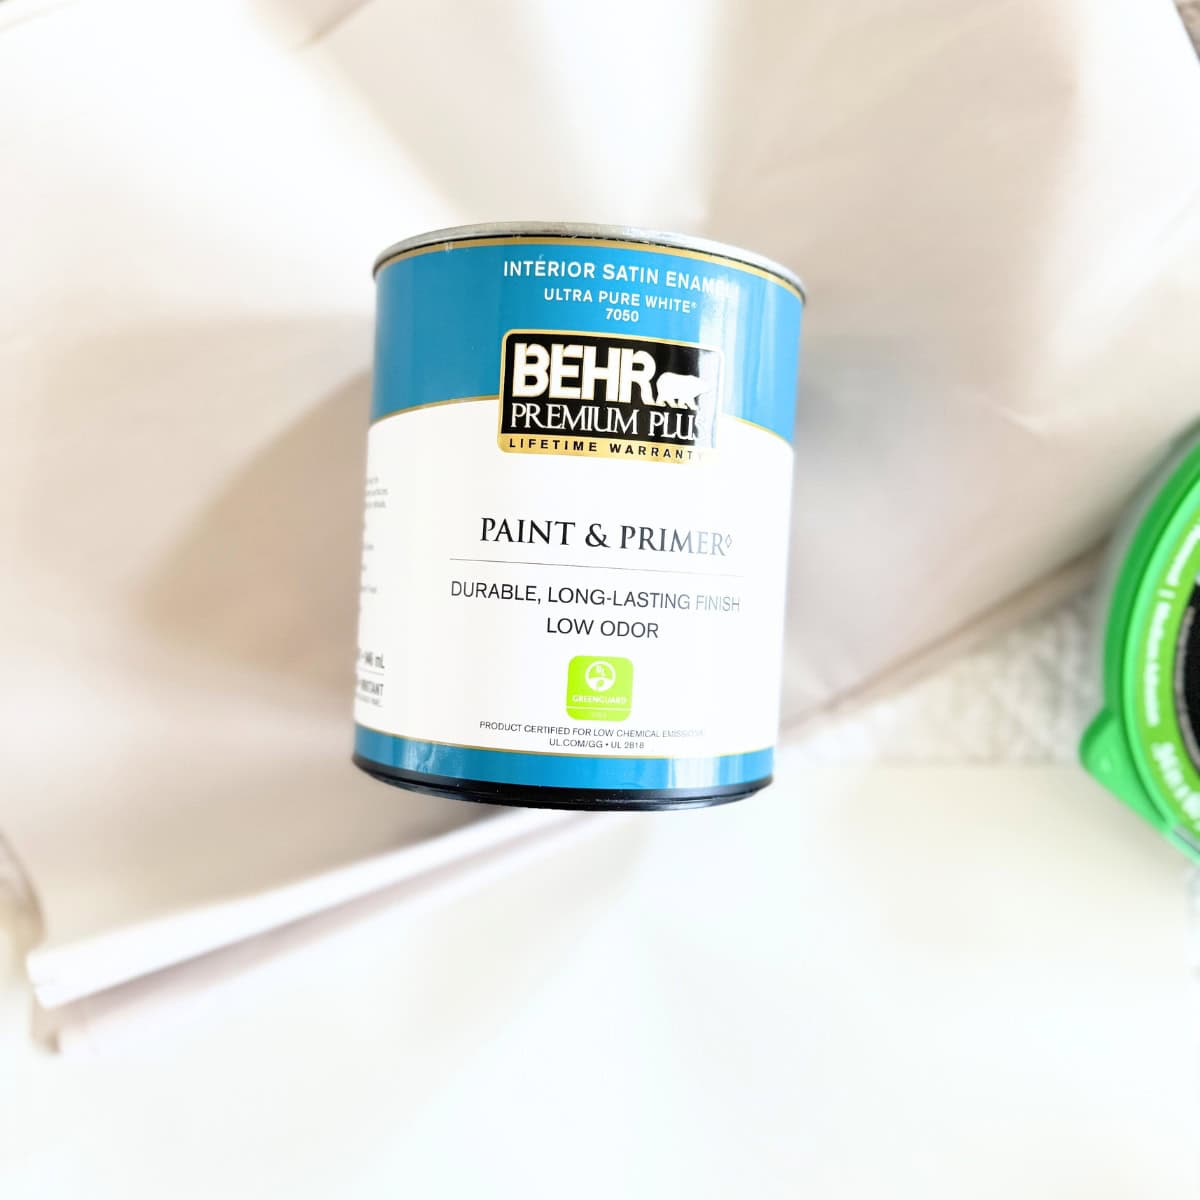
Paint
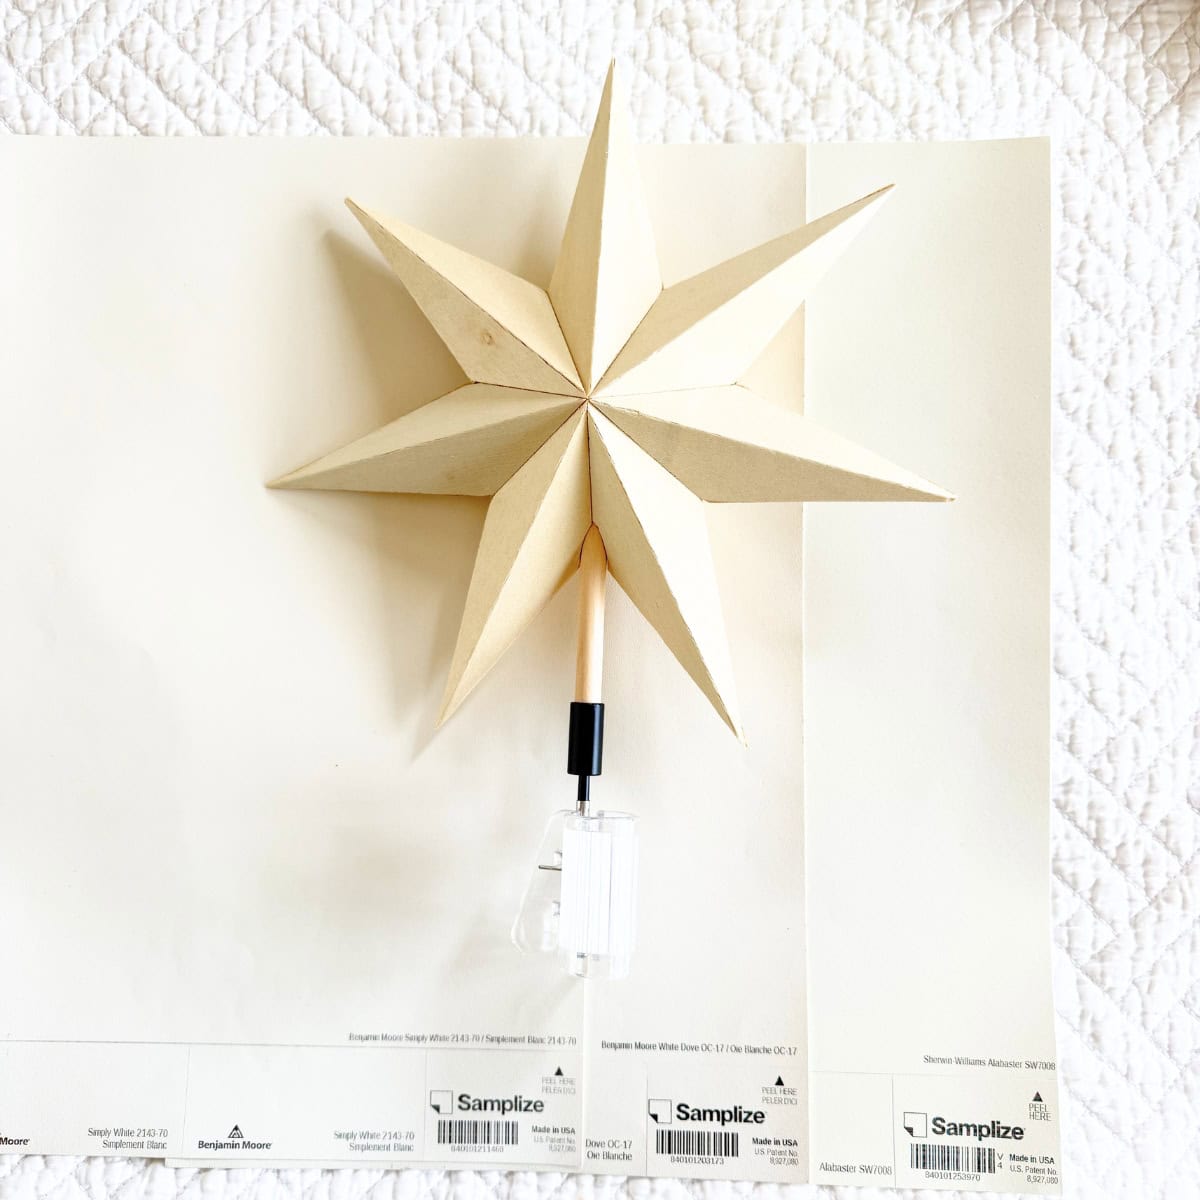
I used Behr Premium Plus paint in a satin finish color matched to Benjamin Moore Simply White. It's a warm, bright white that has a slight undertone of yellow in the right lighting. I considered BM White Dove, which I used for a Stunning Nightstand Makeover, but I wanted a warmer white. I also thought Simply White was a closer color-match to the original designer tree star that inspired this project to begin with.


Paint Brush
I used a 1 inch paint brush. You may be able to use a larger paint brush, depending on the size of the tree topper. This looks like a nice paint brush set from Wooster. Use a drop cloth or scrap paper on top of the painting surface.
Painter's Tape
Use painter's tape to cover any parts you do not want painted. For instance, many tree toppers have some sort of clip to attach the star to the tree. Our tree topper had a black plastic piece just before a clear plastic clip at the bottom that I covered with painter's tape.

Sandpaper
Whether your topper is raw or painted wood, you will need various grit sandpaper (similar). Ours was pretty much raw wood, but I lightly sanded it with 220-grit sandpaper to rough up the surface to help the paint adhere better. Be sure to use a lint-free cloth to wipe excess saw dust from the surface after sanding, including in between coats.
Hand and Face Protection
Make sure you check that the type of protection you buy is rated for the material you are making over (i.e., wood, metal). Wear work gloves to protect your hands when sanding if you need to. I do not like the feeling of sand paper, so I always wear gloves. Wear safety goggles or glasses to protect your eyes and/or a mask to cover your mouth and nose if you need it.

How to Paint a Wood Tree Topper
Depending on the wood star topper you buy, these steps may or may not work for you. If you have a raw wood tree topper or a painted topper, you should be able to get a general sense of the steps to take in your case.
- Start by sanding the entire surface of the wood tree topper with the appropriate grit sandpaper(s). My topper was pretty much raw wood (I believe it is beechwood), so I used 220-grit sandpaper to lightly sand all over. Use a lightly damp lint-free towel to wipe away excess saw dust from after sanding.
- Use painters tape to cover any parts you do not want painted. I covered a black piece of plastic just above the clear plastic clip that attaches our topper to the tree.
- Paint the topper with one coat of paint per the paint manufacturer's instructions.
- Lightly sand between coats after sufficient dry time indicated on the paint can.
- Paint a second coat per the paint manufacturer's instructions. I ended up painting three coats. If you are happy with two coats of paint, you are done. If not, you may need additional coats, so read the instructions on the paint can and lightly sand before painting a third coat.
Once the paint is fully dry, decorate your Christmas tree with your charming tree topper!
I can't wait to adorn our tree with my designer inspired white star tree topper! (It will be a little while before Christmas, so I will add pictures of the tree topper then.)
Did you simply paint a wood tree topper or did you go all out with glitter and other embellishments? Leave a comment below!


Leave a Reply