
With this easy step-by-step guide, you can learn how to hem (shorten) curtains without sewing. This no-sew way to shorten curtains can even be done while the curtains are hanging, saving time and energy in the process.
If you need a quick and easy way to get the custom curtain look for less, this DIY method to quickly hem curtains by hand is for you.
Grab a pair of scissors, a measuring tape, iron-on hem tape, some sewing pins, and you're ready for the best no-sew way to shorten curtains.
Look for Less Custom Curtains
When we bought our house I knew I wanted to hang curtains on practically all of the windows. The house came with lovely shutters, roman shades, and blinds on most of the windows, but I absolutely adore a layered window treatment. Curtains soften a room and make it feel complete.
Seeing as how we live in a townhome, I am conscious of not overspending for our type of house. When it comes to resale and getting money back out of a house, single family homes can bear more money spent on upgrades than single family attached dwellings, generally speaking.
Since custom curtains were not something I was willing to consider, I turned to off-the-shelf curtains look custom for significantly less.
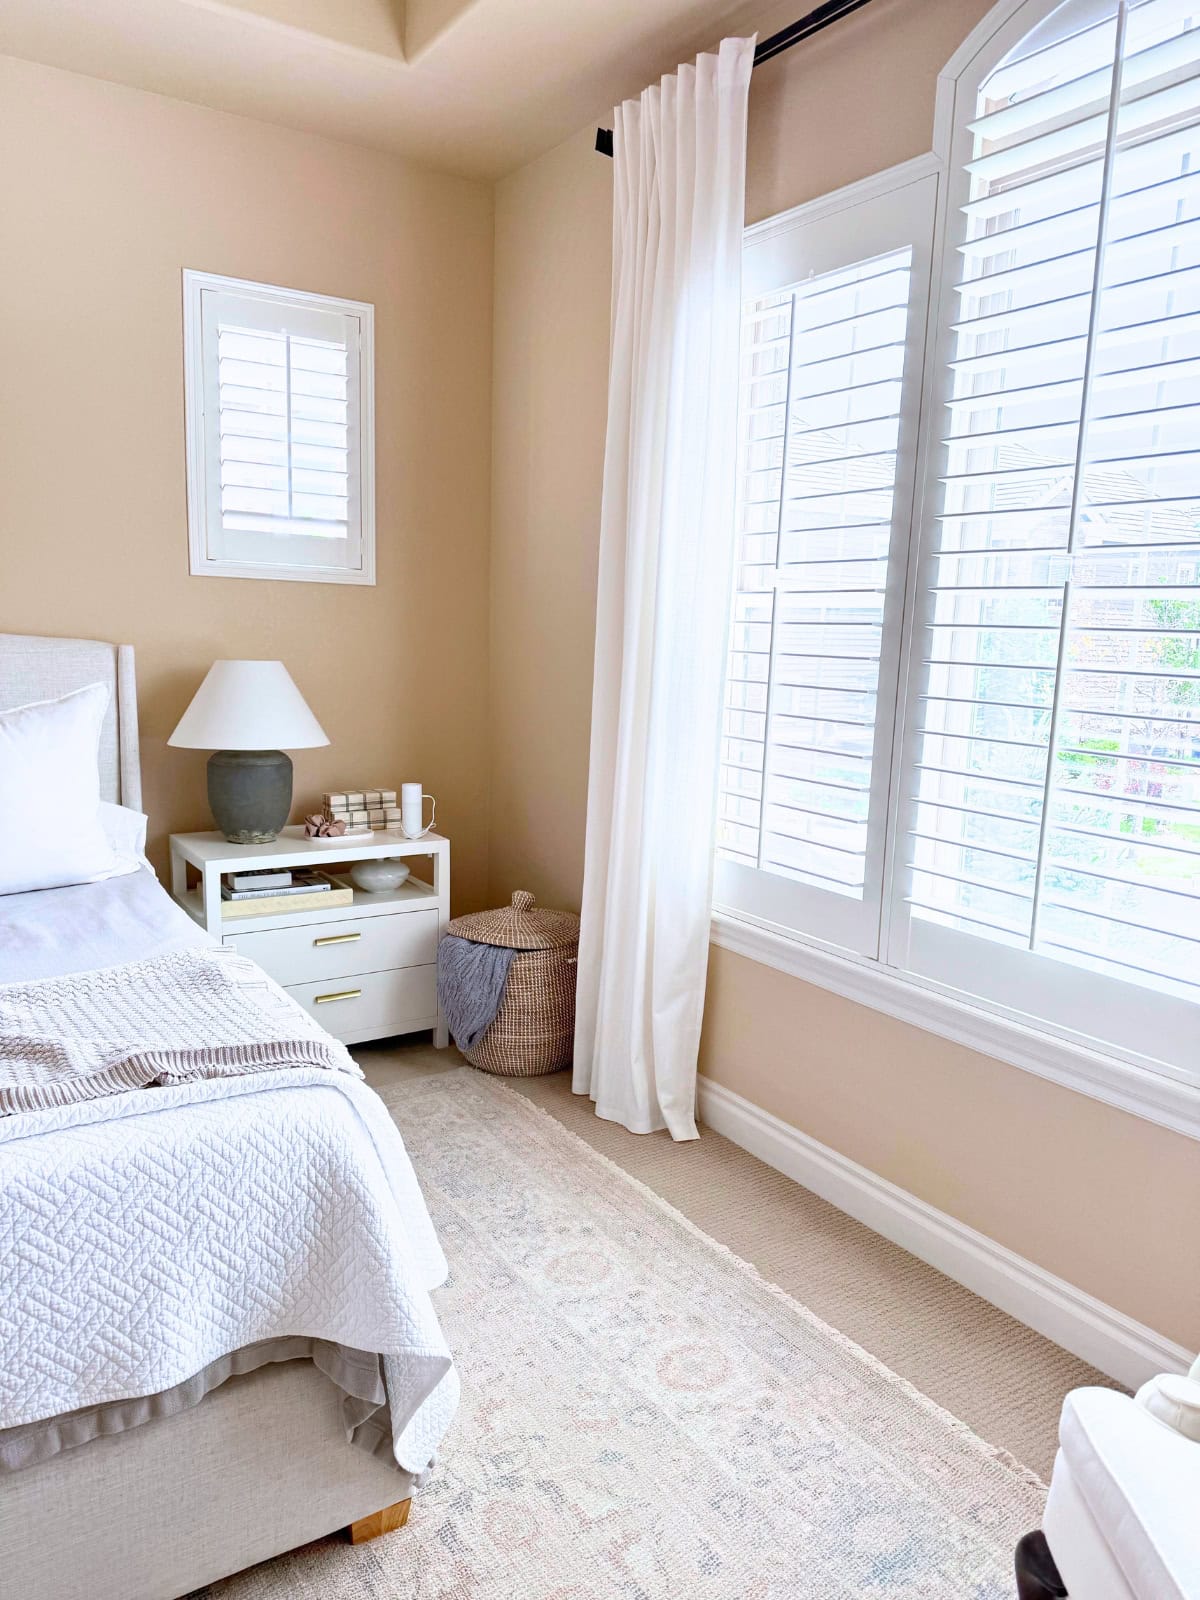
I found these beautiful 100% cotton curtains from Ikea that allowed me to add curtains to our whole house. They are a soft, ever so slightly off-white color with a faint linen-like texture. They come as a pair in varying lengths, allowing you to modify the length for your particular ceiling height. They look great with many different interior design styles, as they are a neutral color.
We have 10 foot ceilings on the first floor and 9 foot ceilings on the second, so I needed the longest length at 118 inches.
Hang Curtains Like A Pro
This is a quick primer on how to properly hang curtains like a professional interior designer.
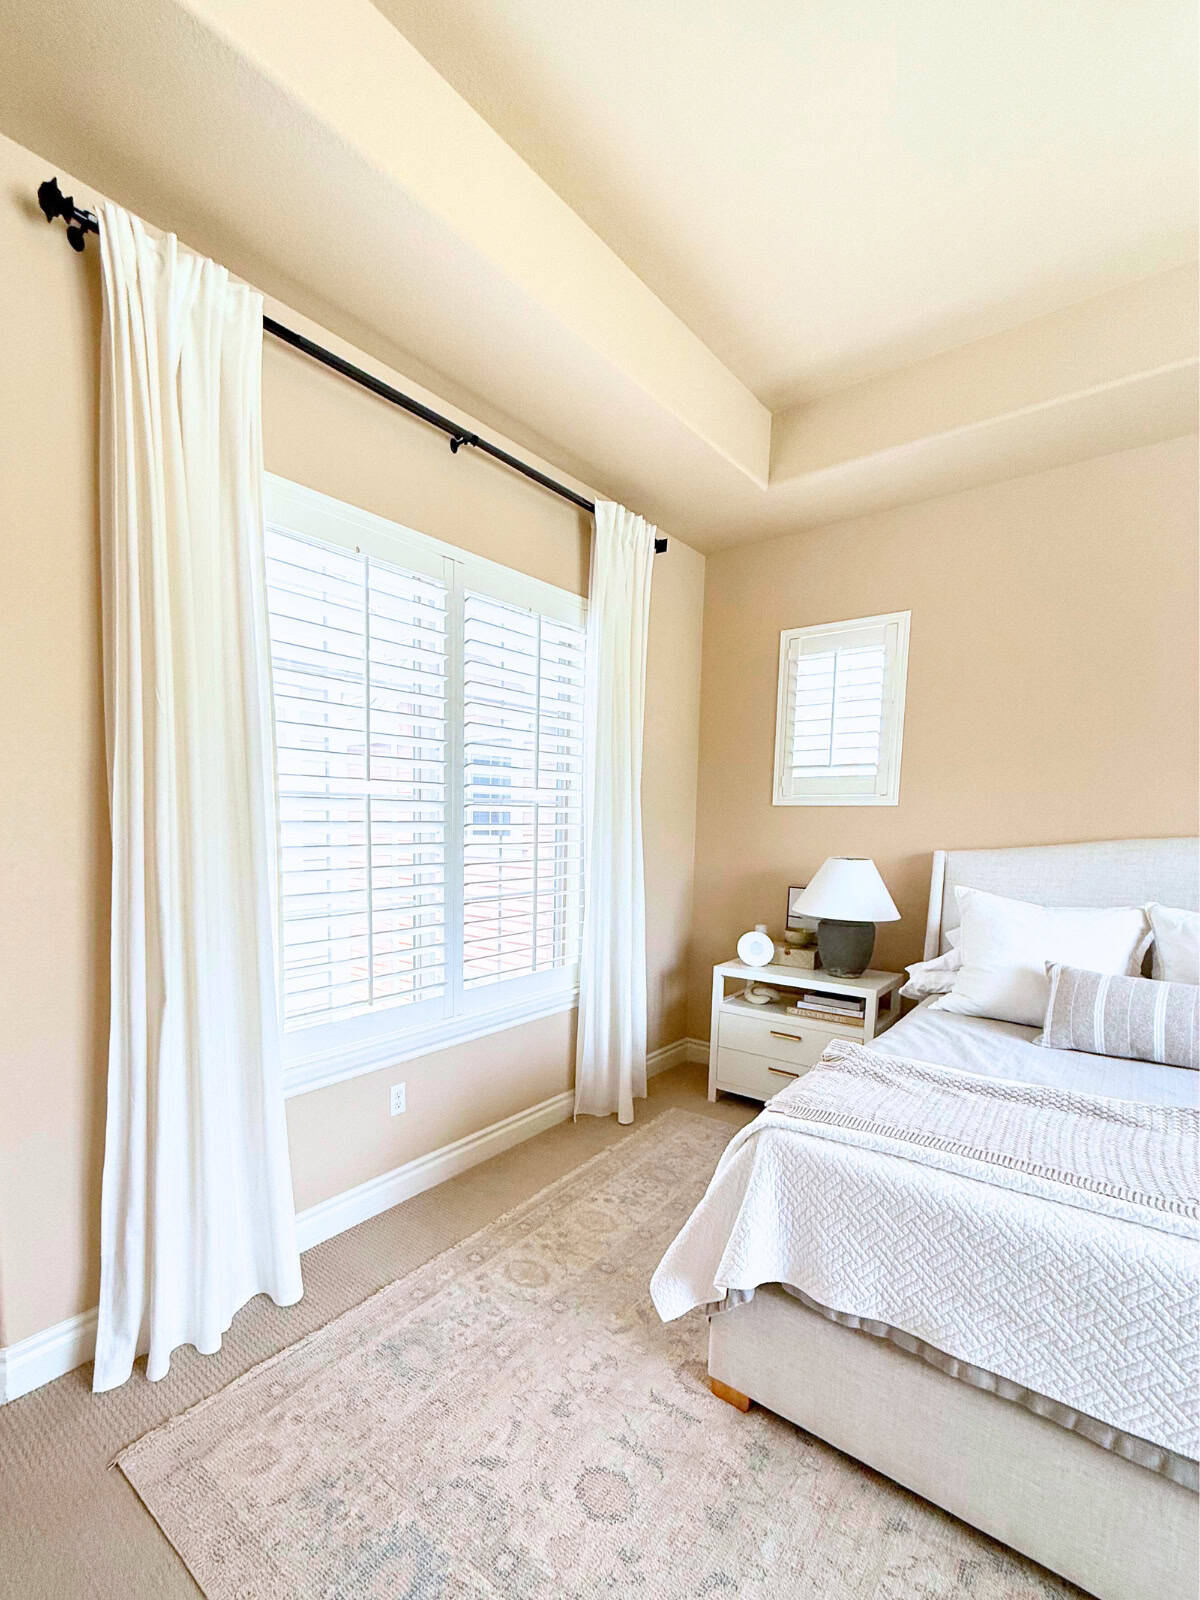
- Height - The curtain rod should be 2 to 6 inches below the bottom of the ceiling or crown molding. Do not hang curtains just above the window frame. Hanging curtains higher draws the eye up to the full height of the room, as opposed to cutting it off at a shorter height.
- Width - The curtain rod should extend at least 12 inches beyond the window frame. This ensures the curtains can fully open without intruding on the window or blocking the light. Note: This rule depends on the width of the window, as you could extend out two feet or more beyond the window frame for very large windows.
- Length - The length of the curtains should just graze the floor. They should NOT be an inch or two (or twelve) above the floor or have 6 inches of fabric pooling on the floor. I'm sure you, too, have seen curtains hung in such a way, which is incorrect.
- Panels - The curtain panels should be at least 2.5 times the width of the window. Why? Because when closed, the curtains need to cover the full span of the window. Otherwise, you will end up with a gap at the middle or at the sides. Moreover, and especially with very large windows, if you do not have ample fabric when the curtains are open, too little fabric will look very unbalanced (read: skinny curtain) in comparison to the size of the window. For very large windows, consider hanging two curtain panels on each side. You can even use the same iron-on hem tape to fuse the panels together at the center for a seamless look.
Supplies To Shorten Curtains
Aside from the curtains for this do-it-yourself project, you only need four other supplies to shorten your extra long curtains.
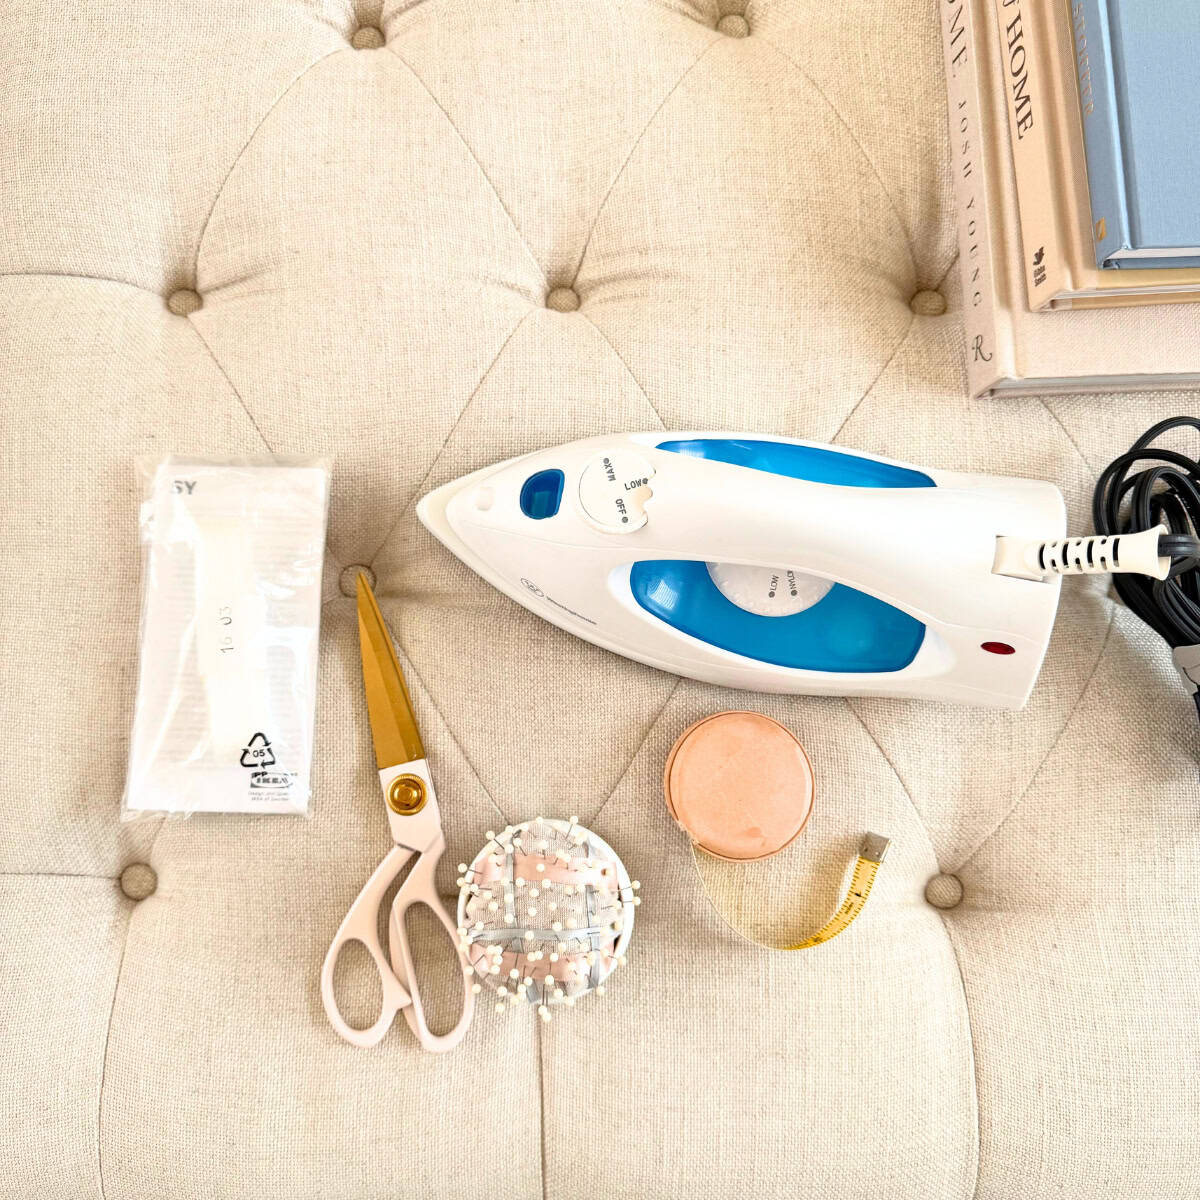
- Curtains - Whether cotton, linen, a blend, or some other fabric, be sure the iron-on hem tape works with your particular curtain fabric composition.
- Iron-on Hem Tape - You can find iron-on hem tape, also known as fusing tape, at craft stores as well as Ikea and Amazon. Be sure to get the appropriate hem tape for the fabric type and weight of your curtains.
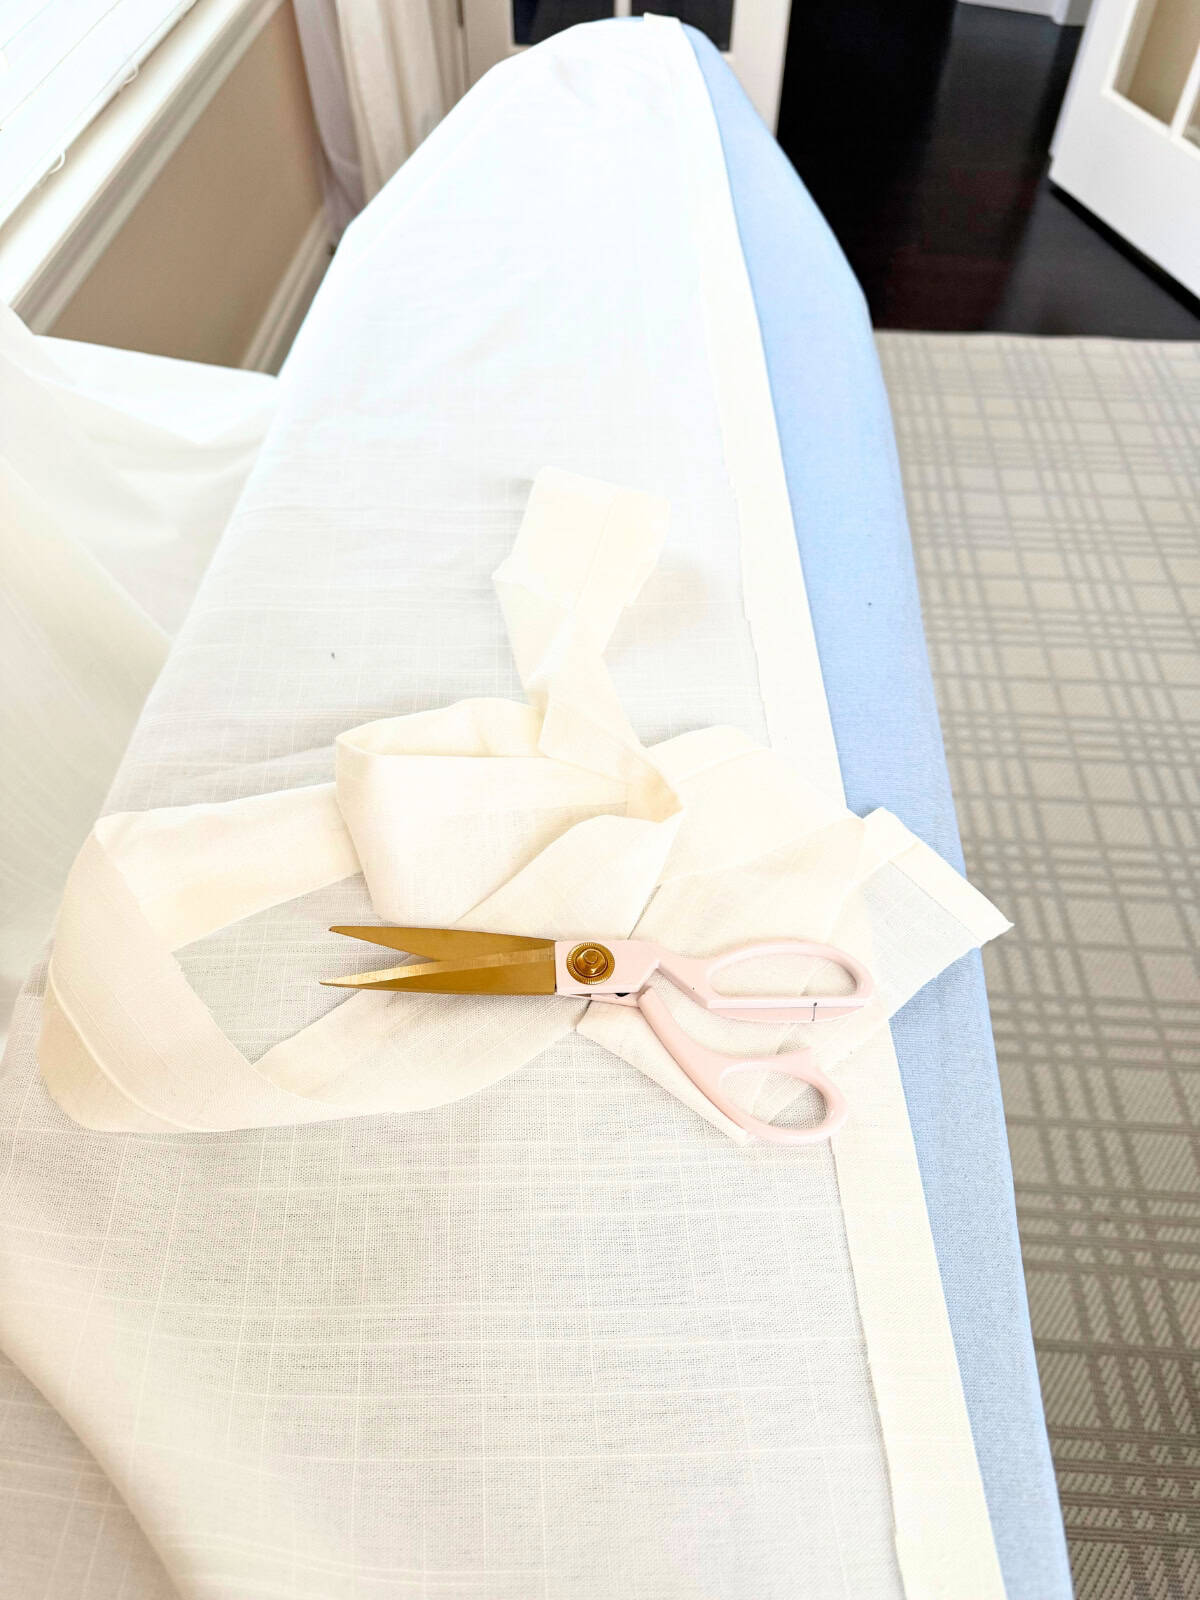
- Scissors - Sharp scissors that can easily cut through fabric are required for this DIY project. I own these gorgeous stainless steel scissors in a blush pink color that are just as sharp as they are beautiful. These pretty black scissors, gold dressmaker shears, or Russell+Hazel's beautiful golden acrylic scissors may also work, but make sure to check that they can cut through fabric.
- Ironing Board With Iron - Break out your ironing board, because you will need it for this project. This will be the tool used to create a crease where the hem tape will be applied.
- Measuring Tape (fabric preferred) - For this particular project, a fabric tape measure is much easier to work with. Any fabric tape measure will work, but if you've read any other posts here on Mornington Lane, you know that I try to buy aesthetically pleasing everyday items. When I came across a pretty neutral colored leather tape measure, I knew it had to become part of my life.
Unfortunately, the one I have is difficult to find, but I found a few other options. This Graphic Image tape measure comes in many different colors. This slightly small tape measure (5' instead of 10') is a nice Amazon find, or this portable tape measure from Etsy may also work for you.
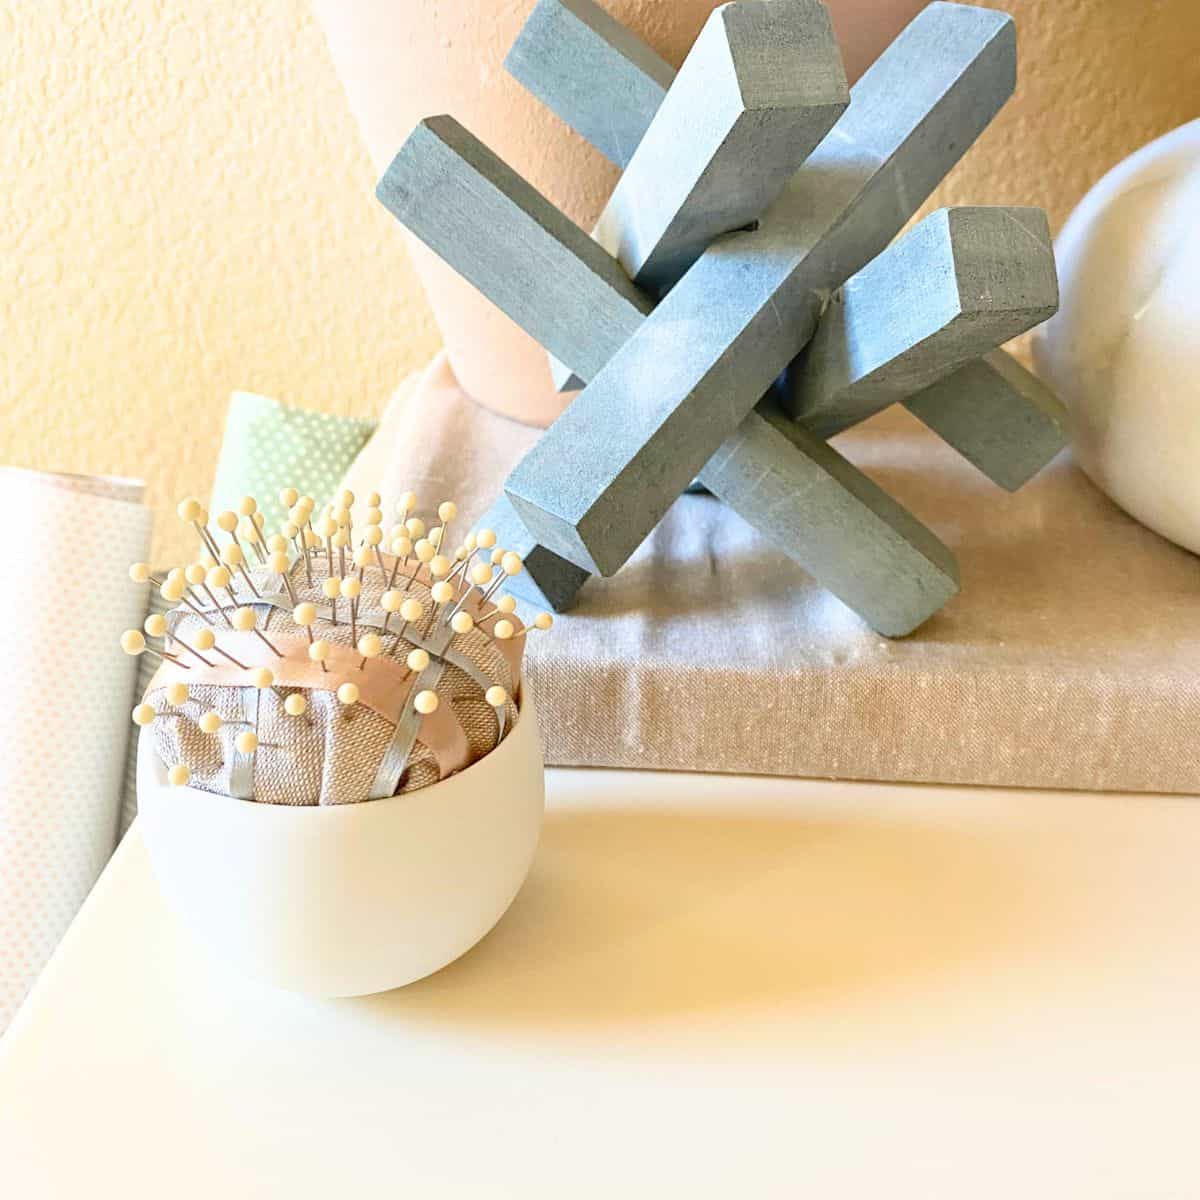
- Pins - You will need pins to keep the fabric in place at various stages during the hem process. I bought beautiful, high-quality Bohin glass head pins from Etsy and I store them in my pretty DIY pincushion. You may be able to find pins at a smaller local craft store in your area if you don't have any on hand.
How to Shorten Curtains Without Sewing
Many no-sew curtain tutorials involve taking the curtains down to measure, measure again, add some inches on to the measurement and so on.
As long as you are gentle while you complete this project, this no-sew curtain hem DIY can be completed while the curtains are hanging. Not only does it save a few steps, it also reduces the likelihood of making a mistake during the measuring process.
Tip:
If you ever plan to wash your curtains, do not hem them until after you have done so. Depending on the type of fabric your curtains are, they may shrink which means they will no longer be the correct length. When in doubt, wash your curtains first.
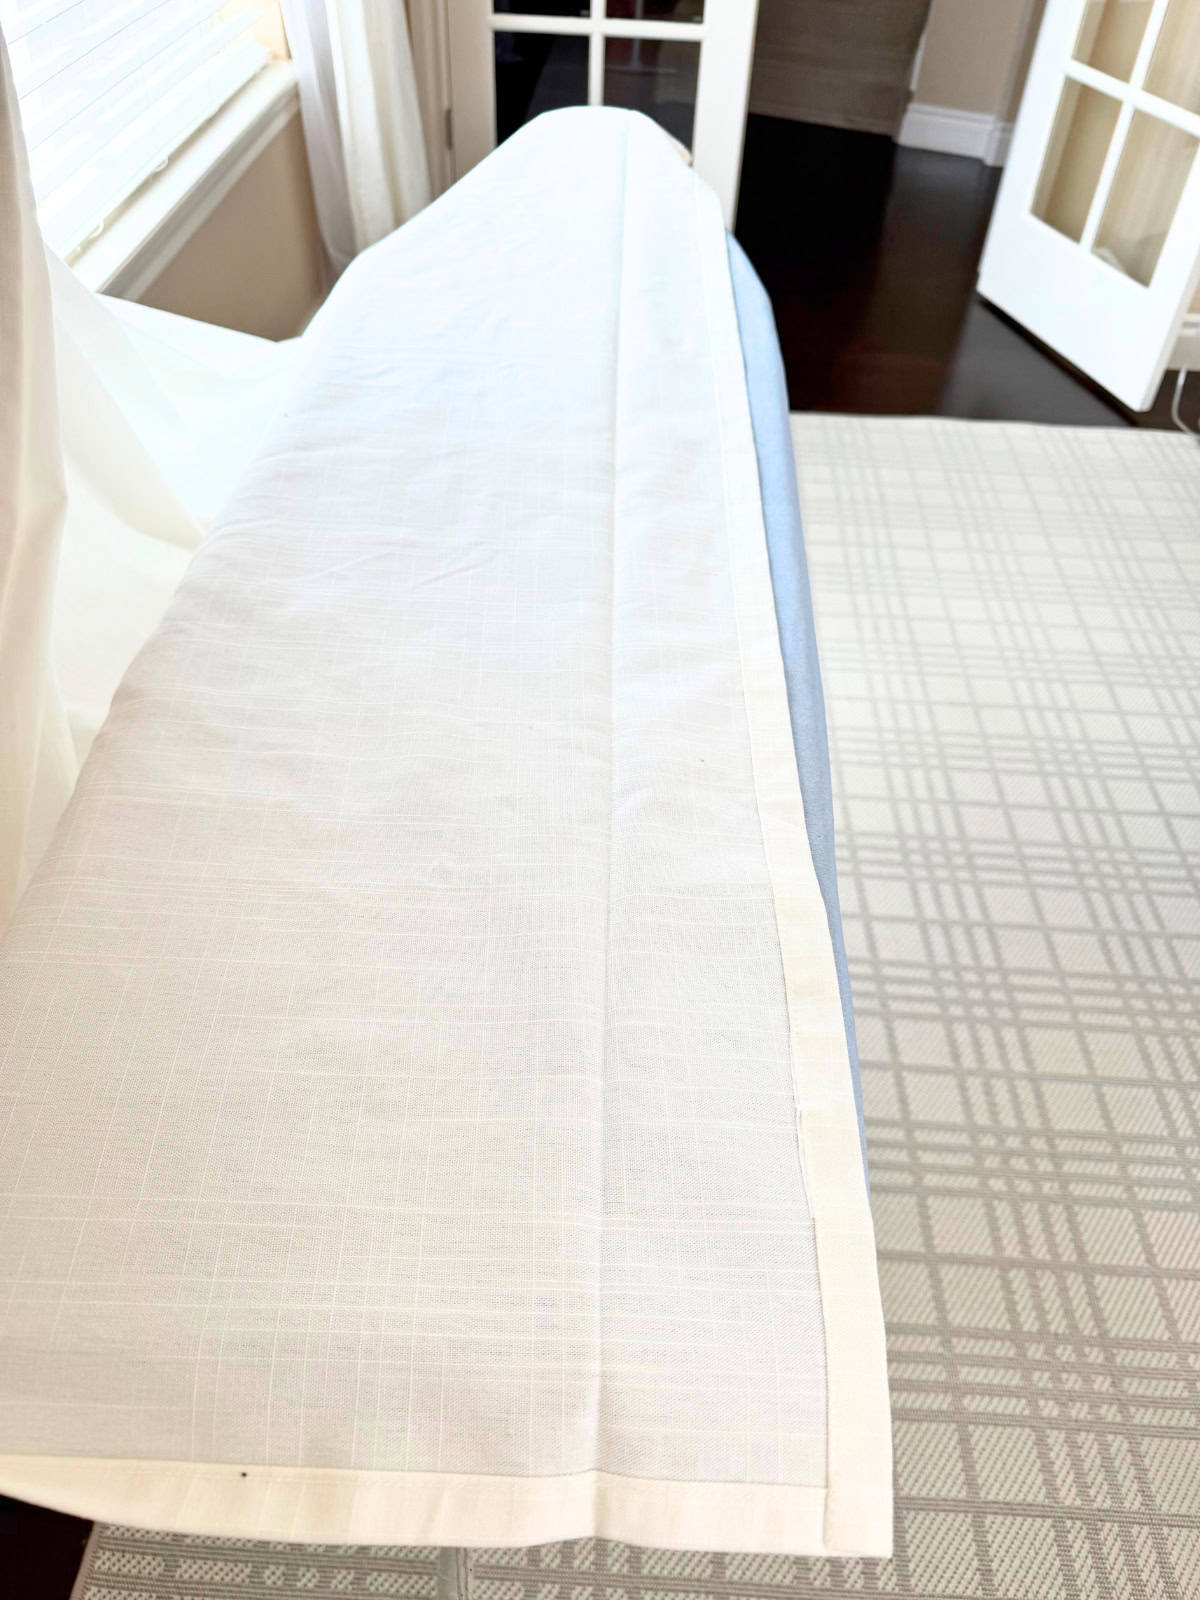
- With the curtains hanging, at one end of the curtains, fold back the excess fabric until the curtain just grazes the floor. Pin it in place with a pin at the point nearest the floor as well as at the top to hold up the excess fabric. Gently place the curtain onto the ironing board with the back facing up.
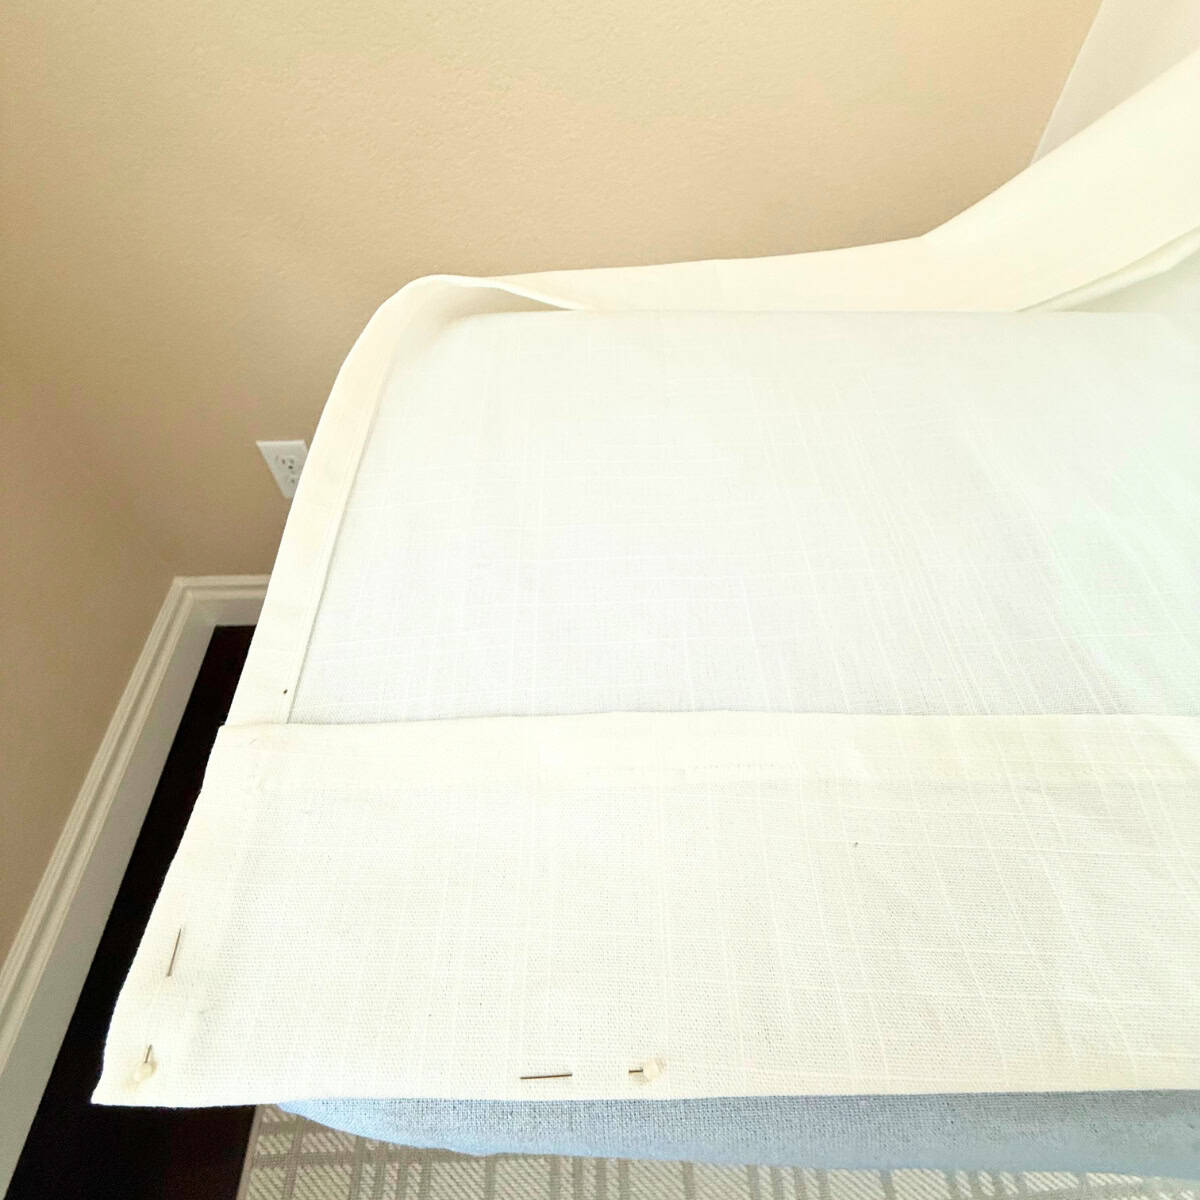
- Measure from the top of the excess fabric to the bottom where the curtain will graze the floor. Use this measurement to pin along the length of the curtain, both at the top and bottom. Pinning at both places will allow you to put the curtain in place to check your work before making any cuts.
- Once you have pinned along the entire length of the curtain, gently flip the curtain back around and put it in place so it's once again hanging. Where the curtain meets the floor, check that it is straight and just grazes the floor. Fix any low or high points by moving the pins around before proceeding to the next step.
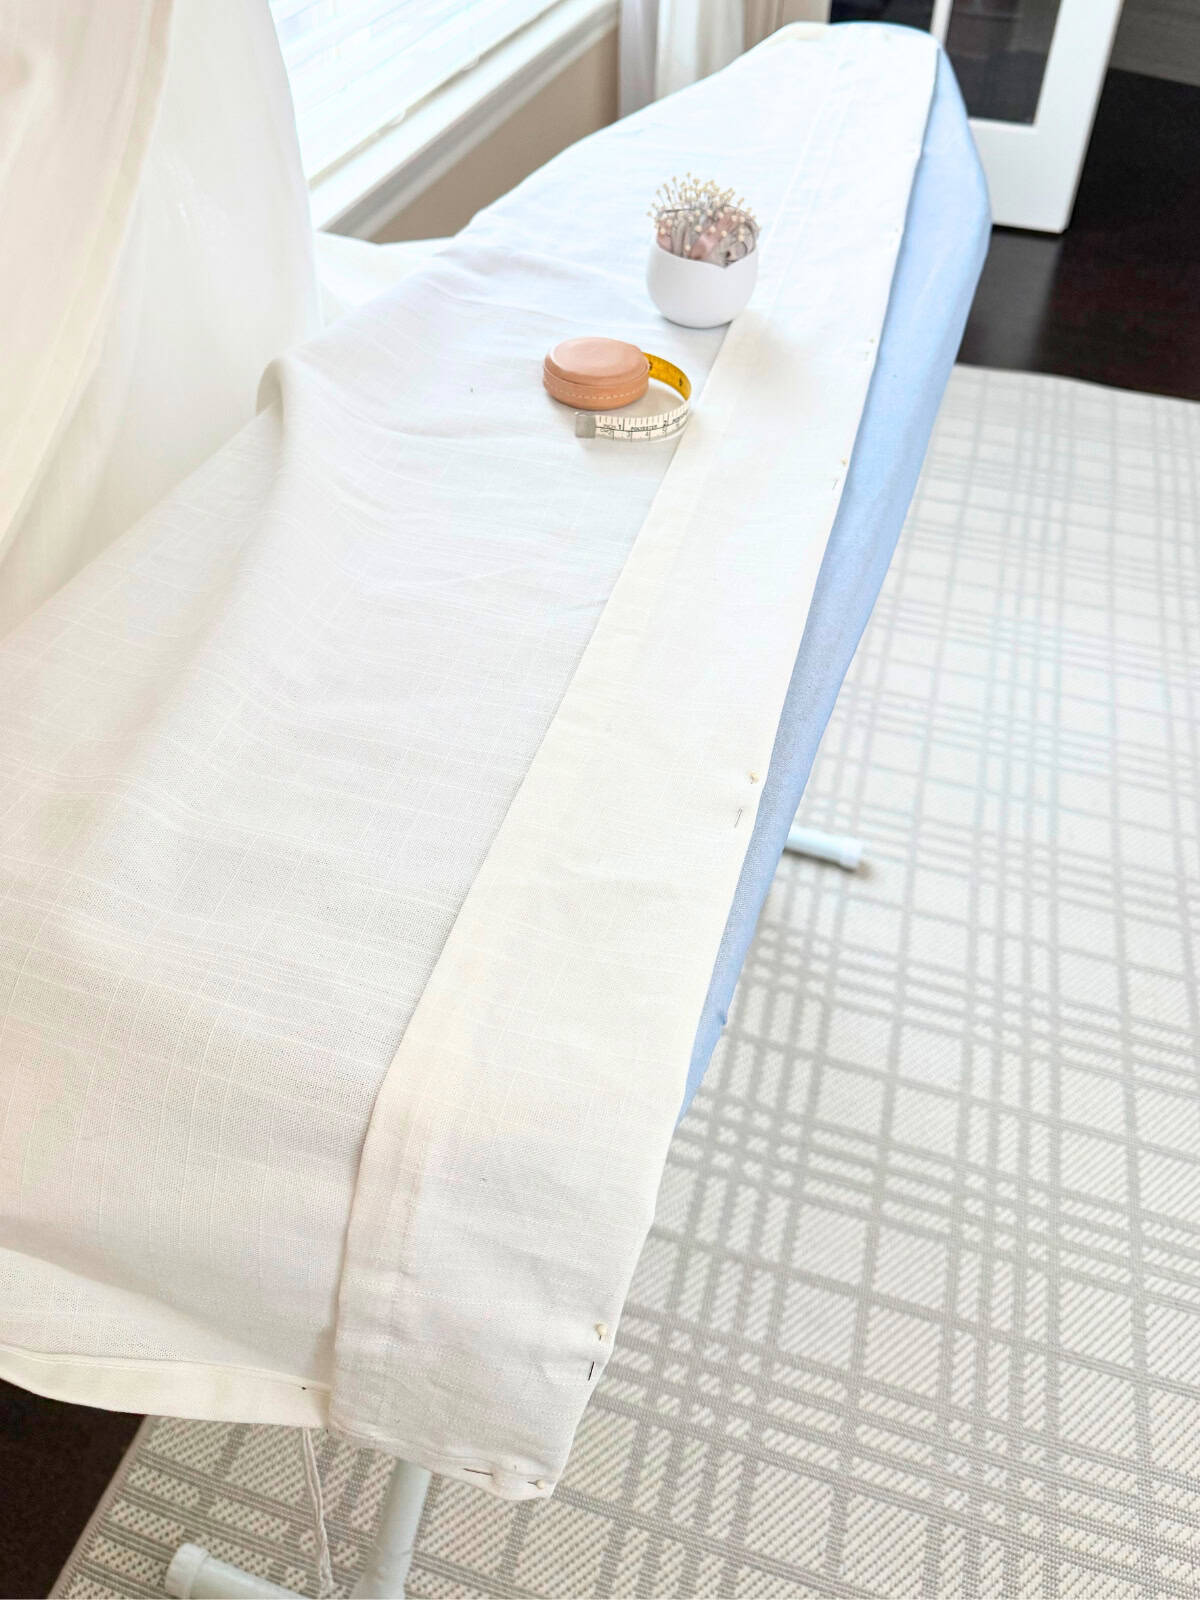
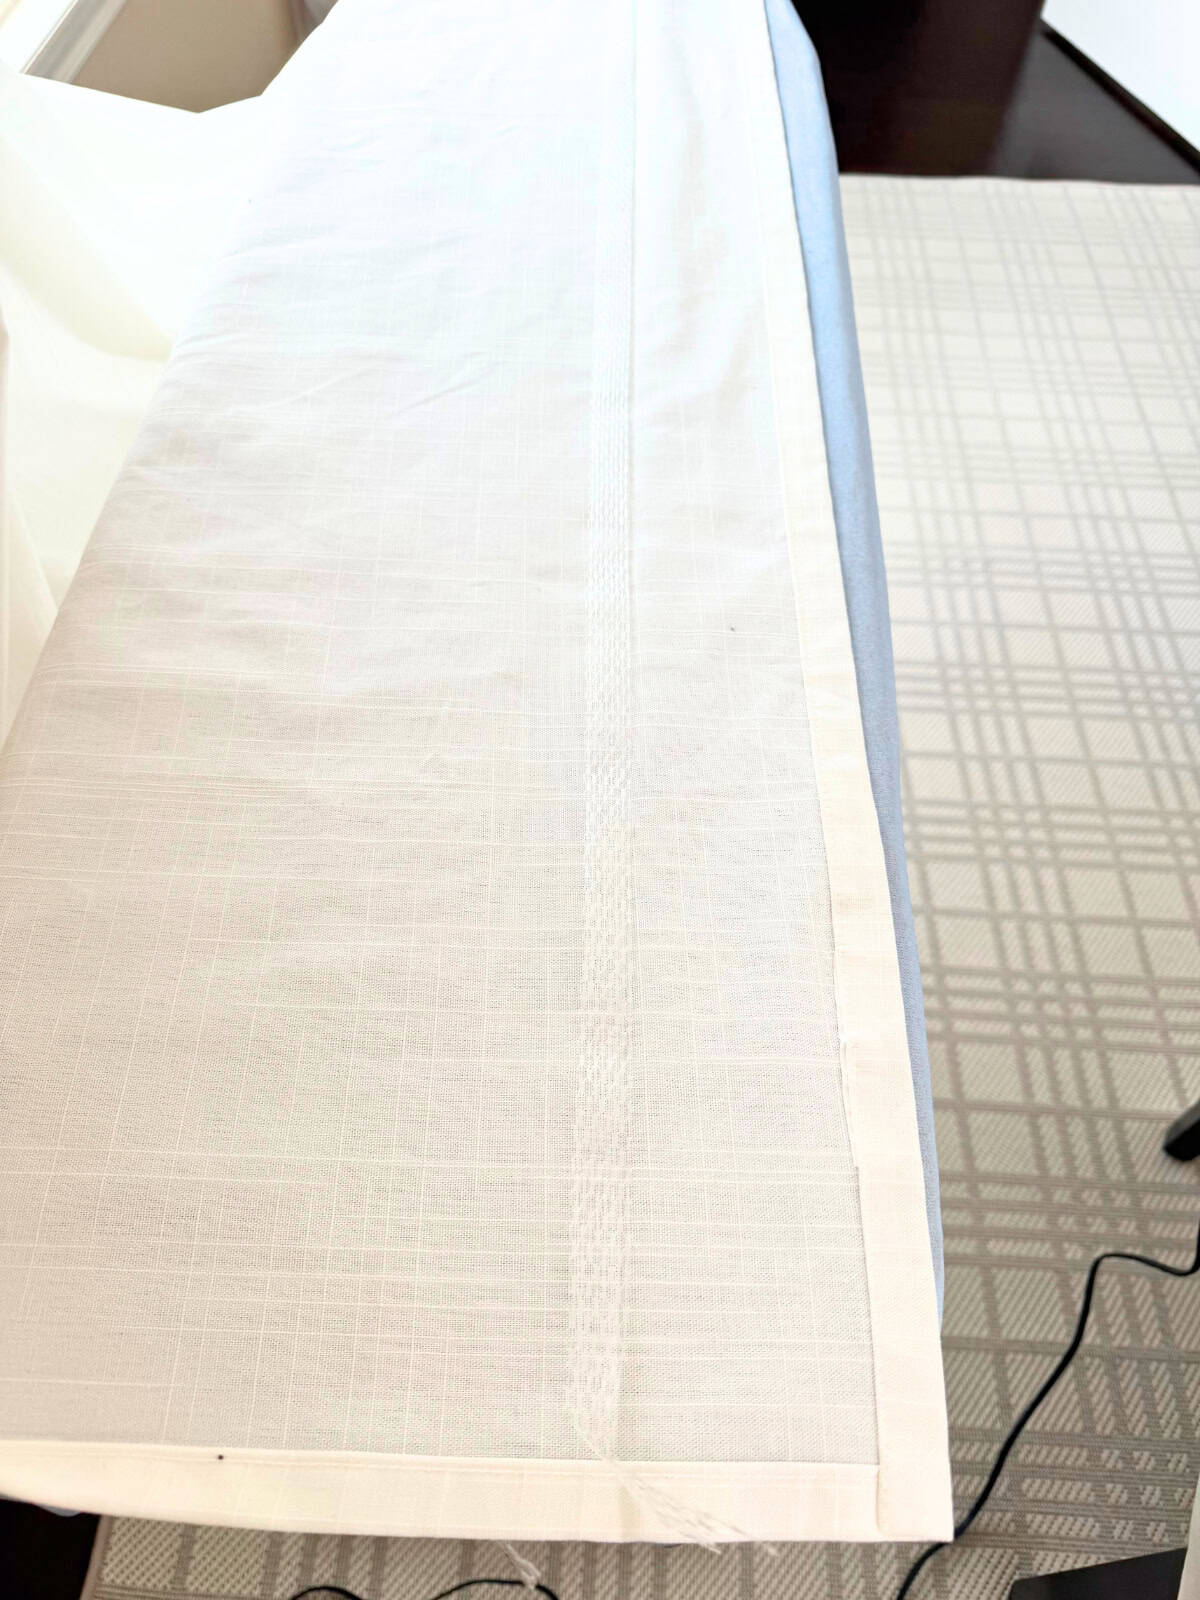
- Once again, place the curtain on the ironing board with the back facing up. Iron along the length of the curtain to create a crease, removing the pins as you go. Caution: Do not iron over the pins.

- After creating the crease, put the pins back in. Put the curtain back in place to check that the curtain is still straight and just grazes the floor. Fix any low or high points by moving the pins before proceeding to the next step.
Important:
Read the instructions for the iron-on hem tape you purchased before using it, as the instructions may differ from the hem tape used here.
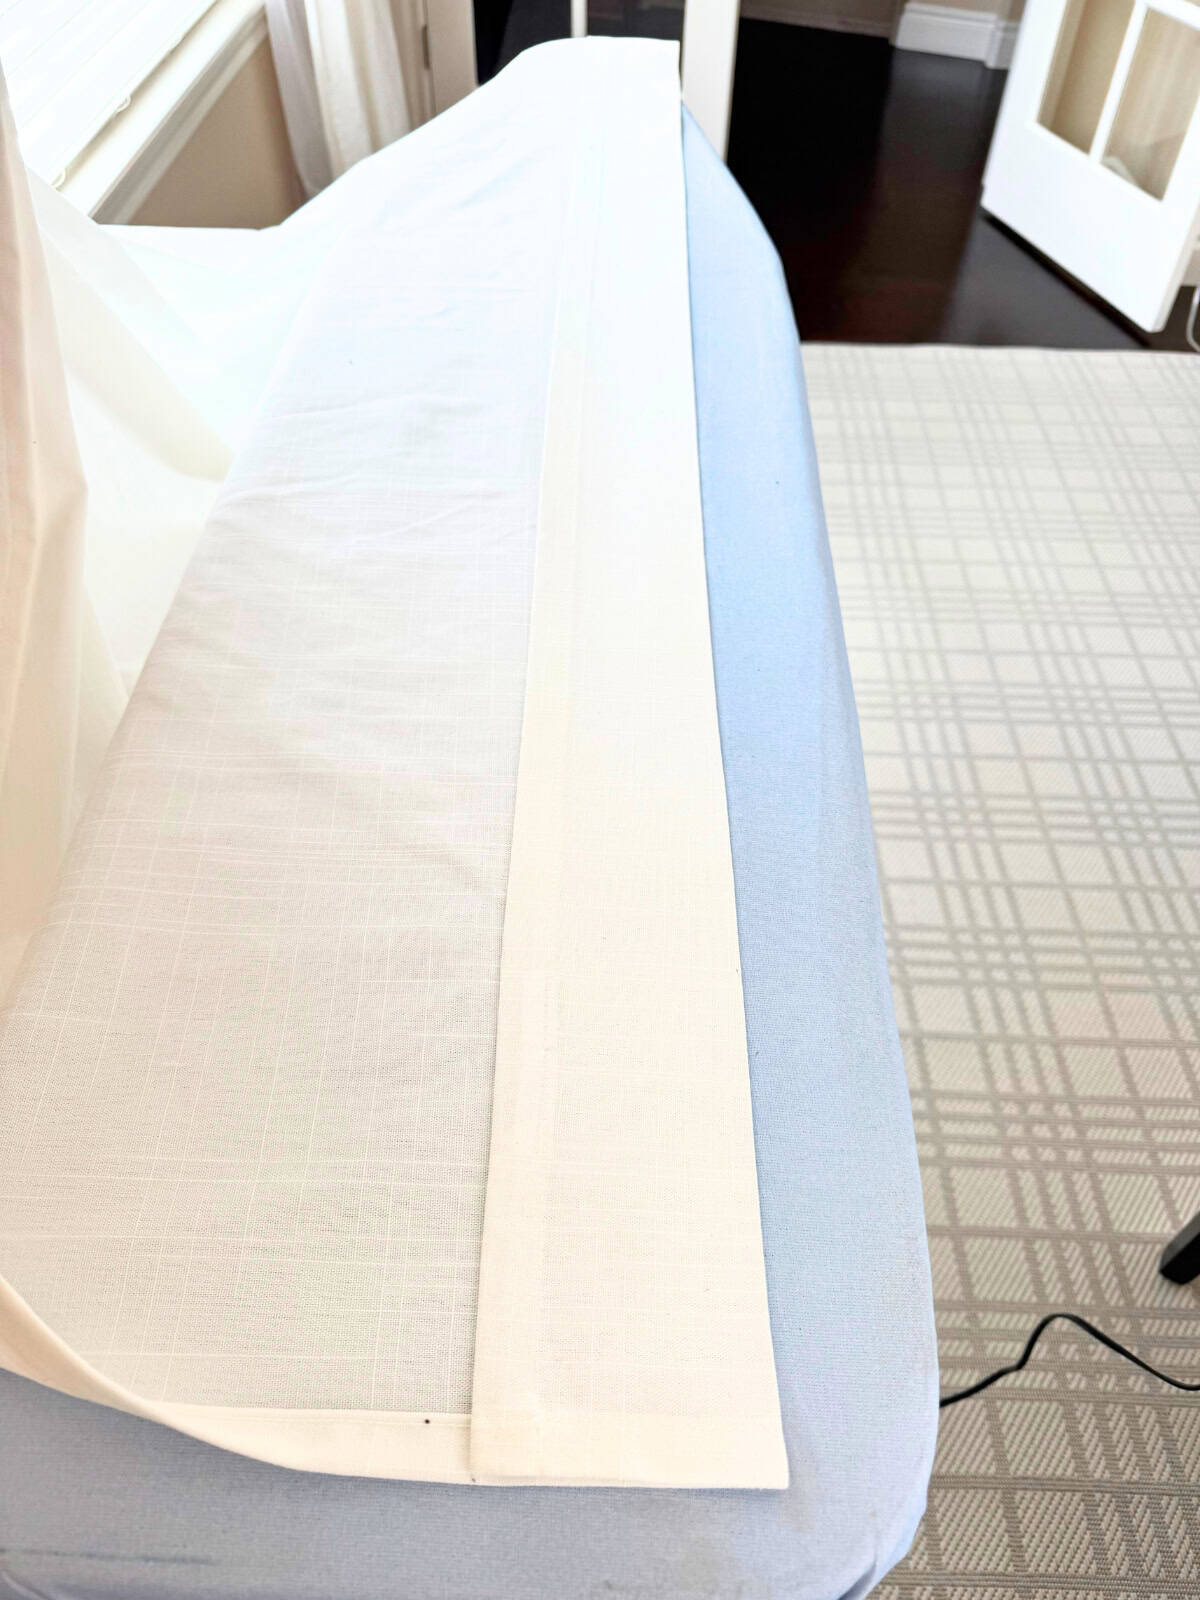
- Place the curtain on the ironing board with the back facing up. Remove all pins and unfold the curtain to reveal the crease.
- Place the iron-on hem tape on the crease above the fold. This will be the new hemline.
- Carefully fold the excess fabric over the hem tape, making sure it doesn't move. Cut the excess hem tape off the end. Iron along the length of the curtain using a pressing motion. Note: The iron-on hem tape I used required water, so I used the steaming function on my iron to apply water before pressing the hem tape in place. Allow the area to fully cool before checking your work.
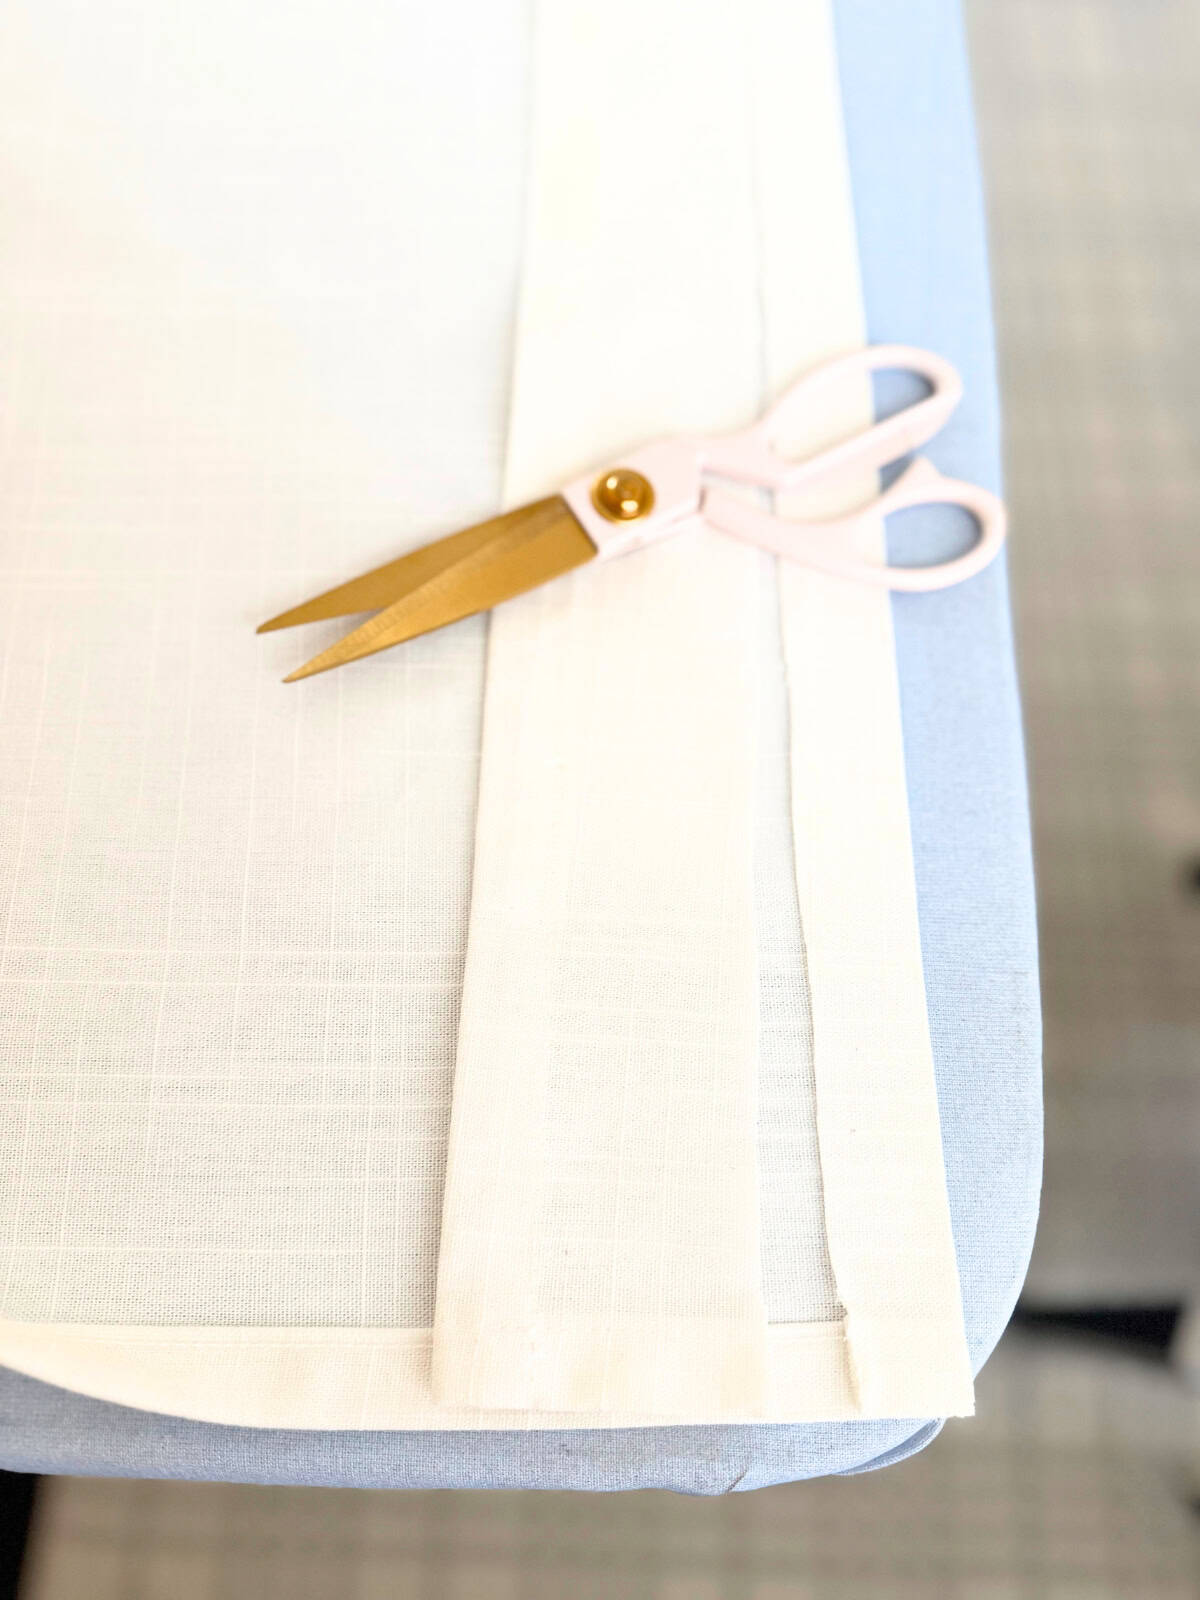
- Once you have confirmed the tape is securely in place, cut off the excess fabric. Note: It does not have to be a perfect cut since this is the back of the curtain, but try to keep it somewhat consistent.
- Put the curtain in place and you're done! Stand back and admire your work!
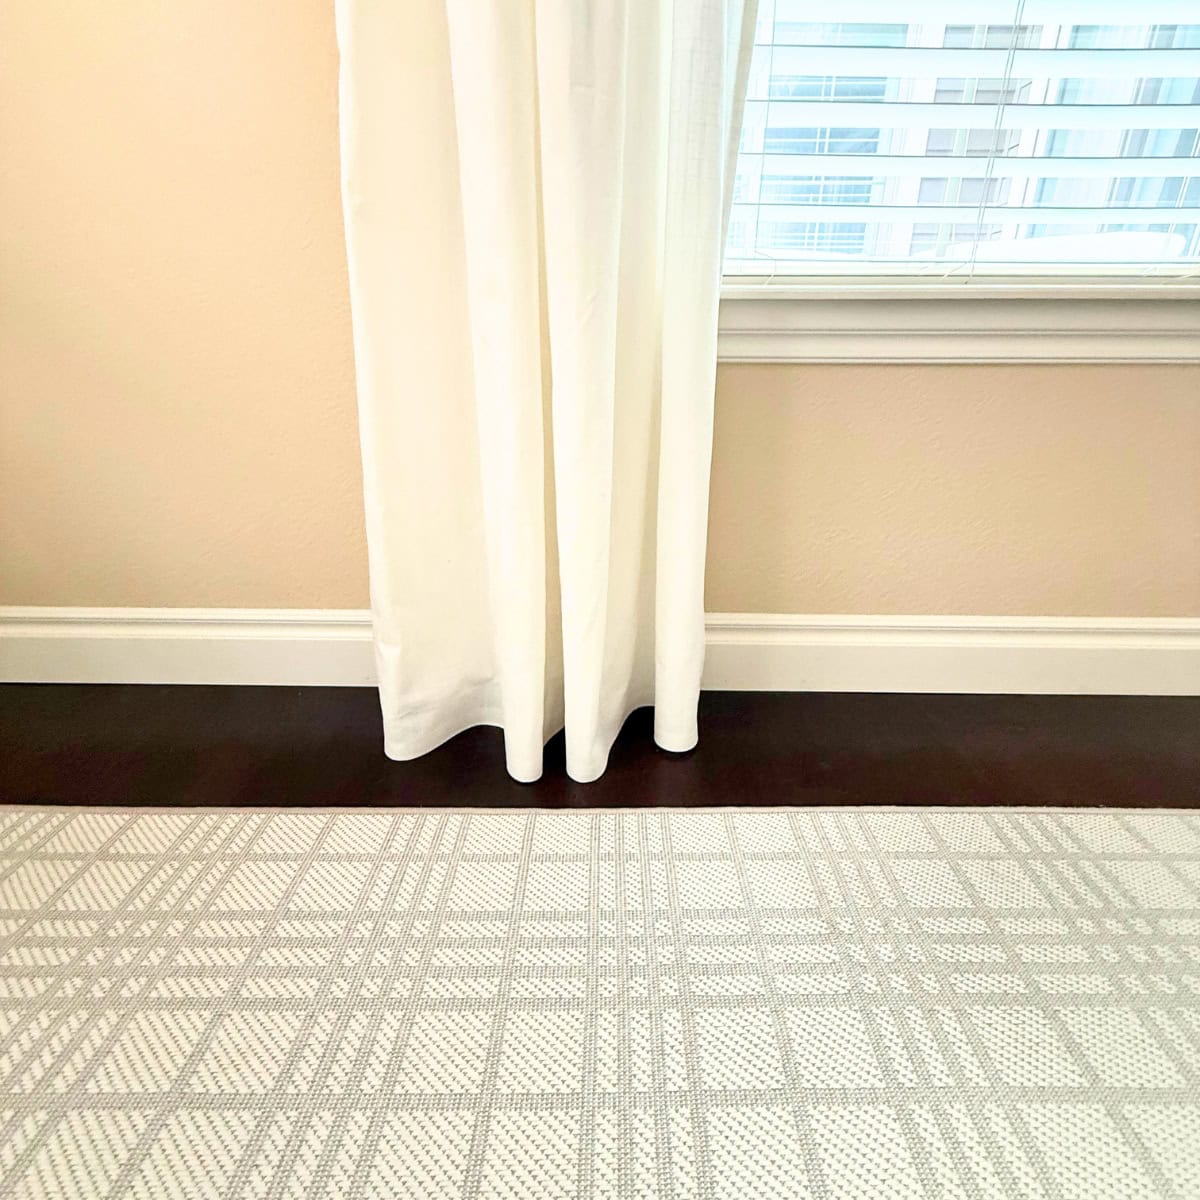
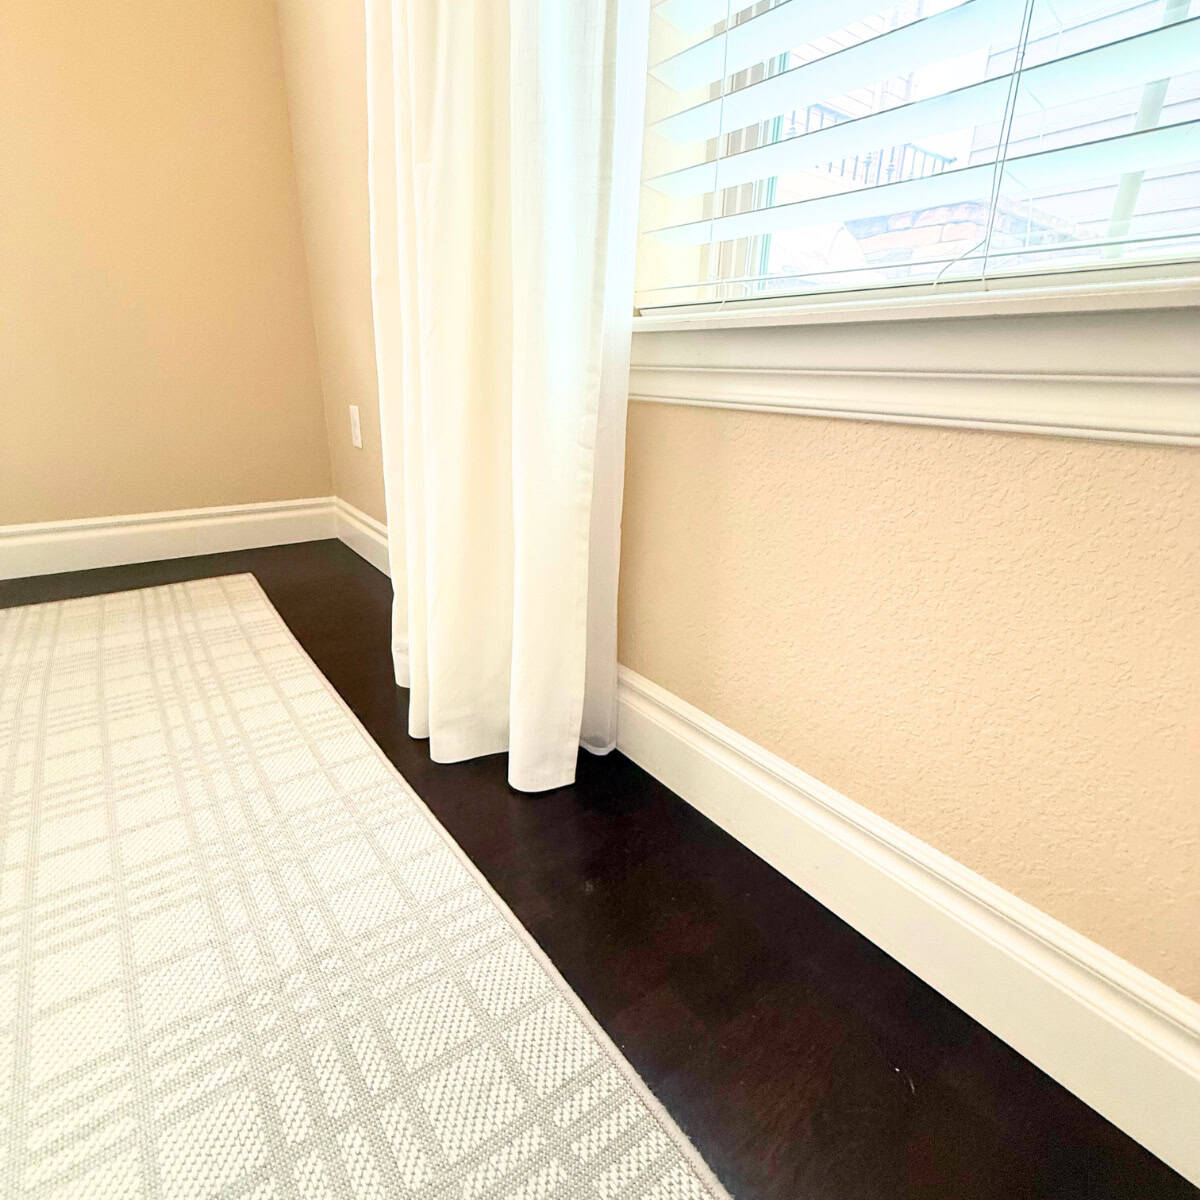
Before, you can see how much extra curtain fabric pooled on the floor. After using iron-on hem tape to DIY no-sew shortened curtains, the curtains just graze the floor. Now they look like custom curtains!
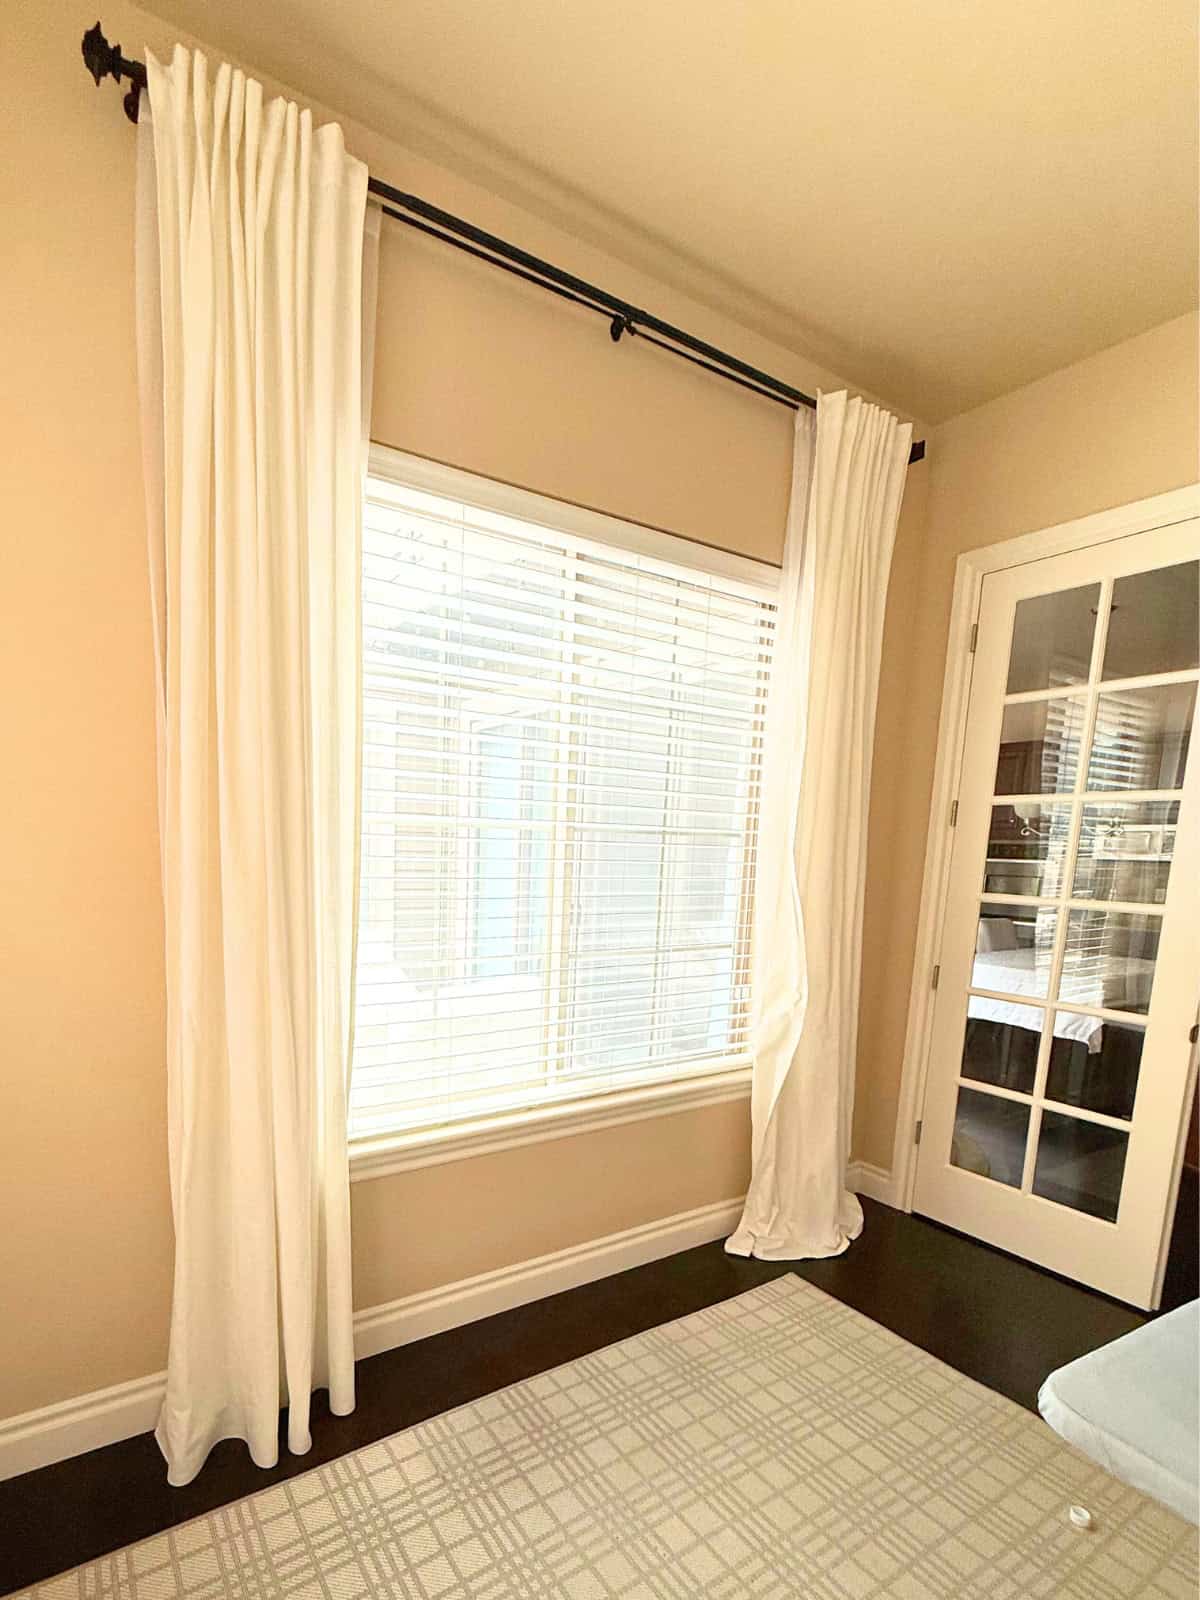
I shortened all of the curtains in our home using this no-sew hem method, like our bedroom shown in the photo below, and I am so happy with how they turned out! I hope you found this post helpful as you beautify your own home!


Leave a Reply